Important
You are browsing the documentation for version 4.1 of OroCommerce, OroCRM and OroPlatform, which is no longer maintained. Read version 5.1 (the latest LTS version) of the Oro documentation to get up-to-date information.
See our Release Process documentation for more information on the currently supported and upcoming releases.
Configure Microsoft Office365 oAuth Settings (Azure Active Directory Application)
Note
This article is part of the Microsoft Office365 OAuth Integration topic.
Hint
Microsoft Office365 oAuth is available since OroCommerce v4.1.9. To check which application version you are running, see the system information.
To integrate a configured Azure Active Directory Application:
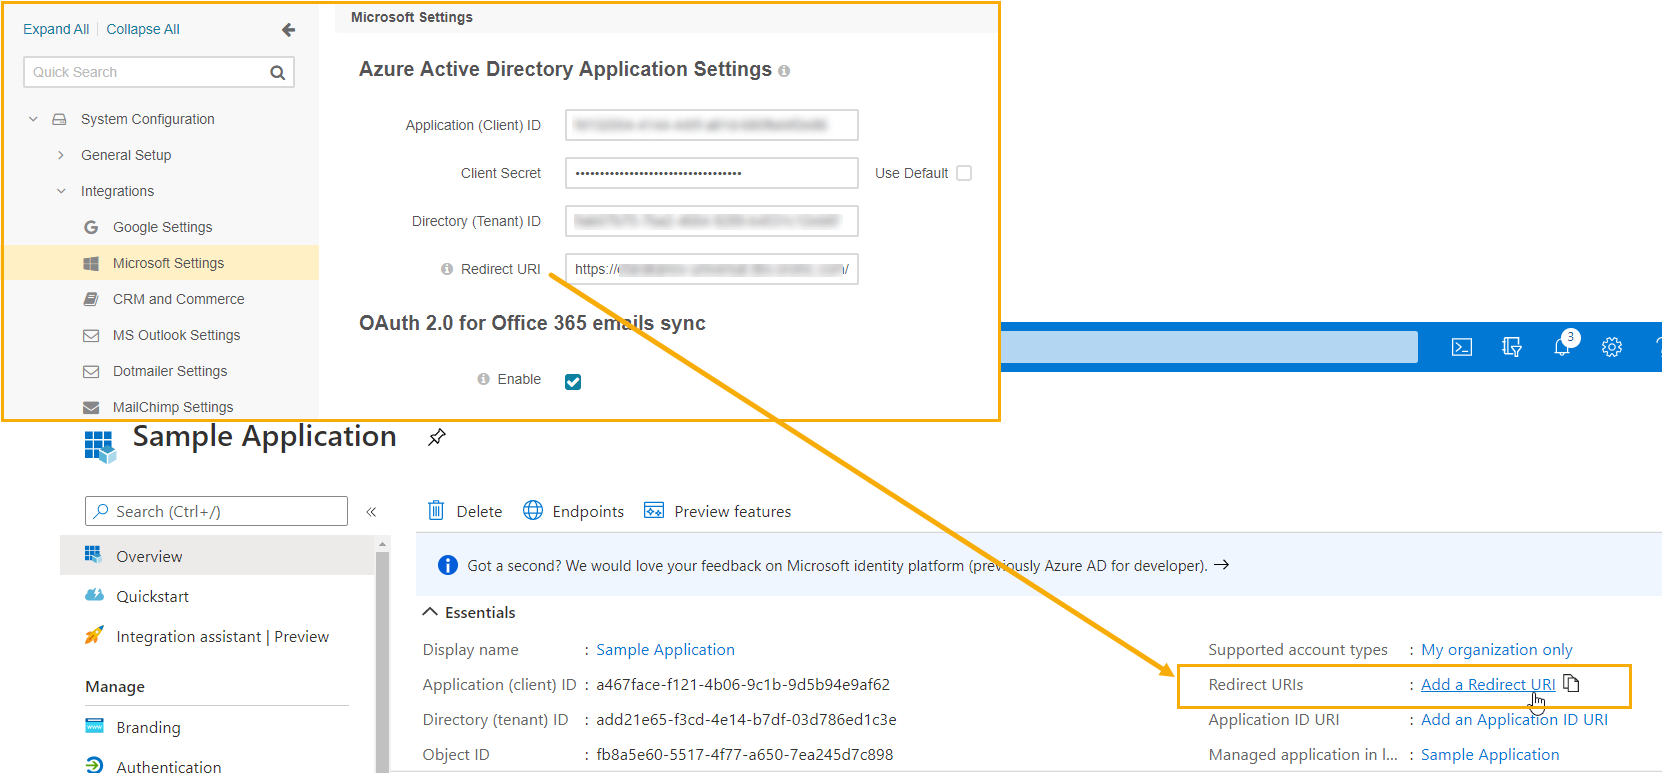
Navigate to System > Configuration > Integrations > Microsoft Settings.
Provide the following details under Microsoft Settings:
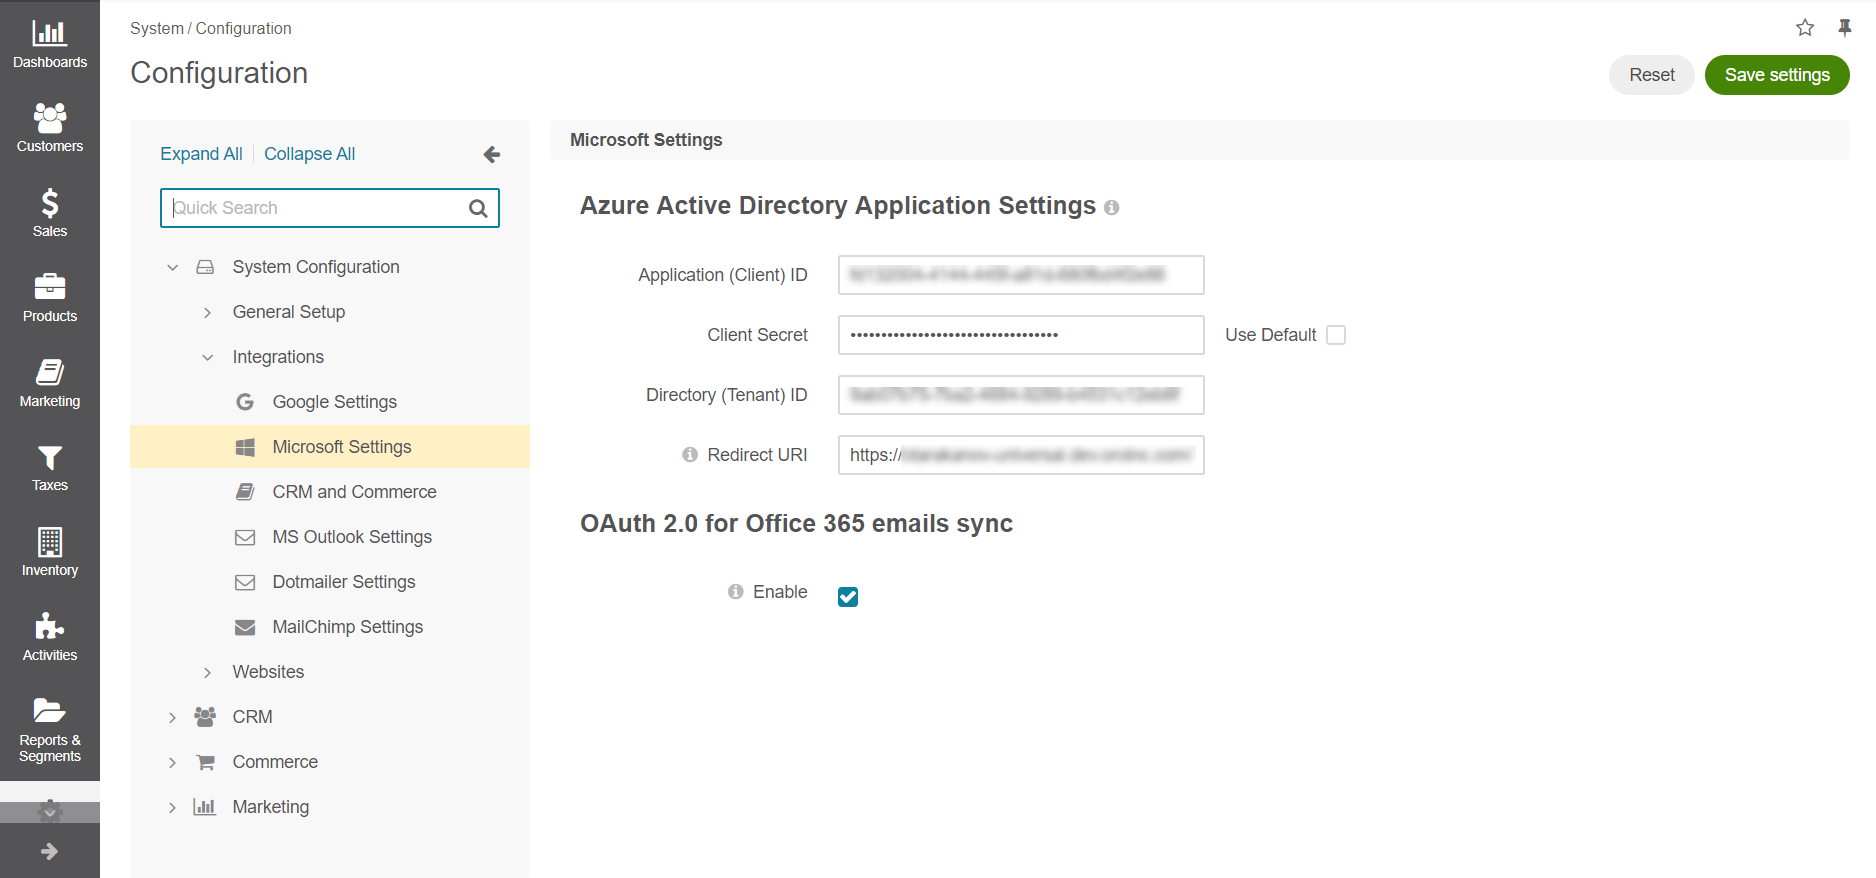
Application (Client) ID - The client id generated on the Azure side when creating an active directory application. It is located on the main application page under Essentials. Selecting the Use Default checkbox resets the value.
Directory (tenant) ID - The directory id generated on the Azure side when creating an active directory application. It is located on the main application page under Essentials.
Redirect URI - Copy this value and add it to your Azure Application trusted redirect URIs in order to complete the connection.
oAuth 2.0 for Office 365 emails sync - Click Enable to connect to the Azure active directory application. Wait for the green success message to confirm authorization.
Click Save Settings.
Note
Once the connection between Azure and Oro has been established, you can connect Office365 account as your personal mailbox or a system mailbox in the Oro application. For instructions, please see the User Email Synchronization Settings and System Mailbox Synchronization Settings documentation.