
Important
You are browsing the documentation for version 1.6 of OroCommerce, OroCRM and OroPlatform, which is no longer maintained. Read the latest LTS version of the Oro documentation to get up-to-date information.
See our Release Process documentation for more information on the currently supported and upcoming releases.
Guest Checkout per Website
- Navigate to System > Websites in the main menu.
- For the necessary website, hover over the More Options menu to the right of the necessary website and click to start editing the configuration.
- Select Commerce > Sales > Checkout in the menu to the left.
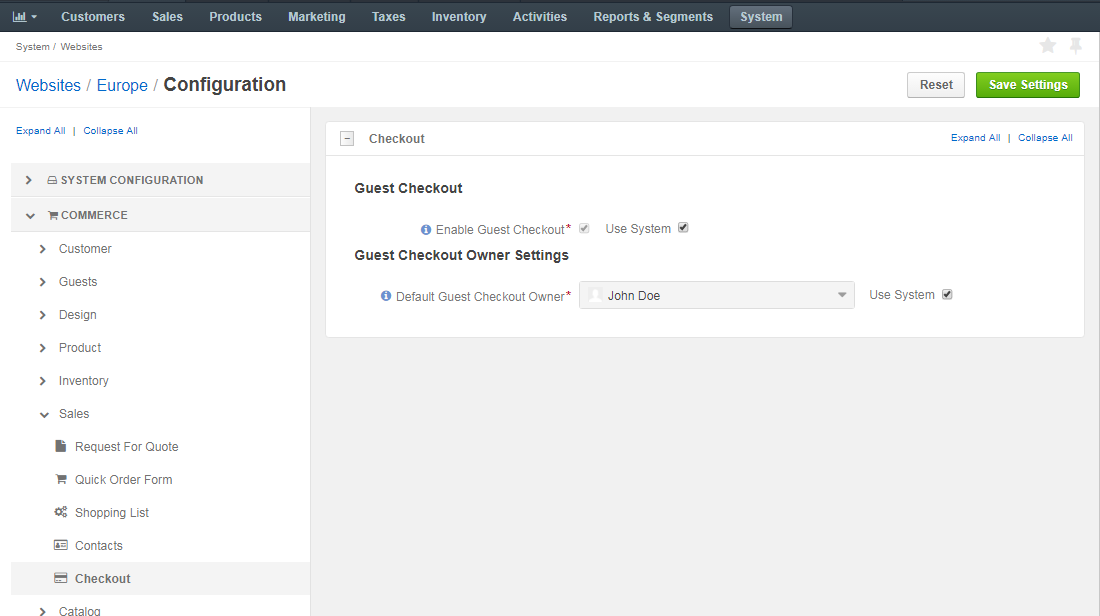
In the Guest Checkout section, set whether guest checkout should be enabled or disabled.
By default, guest checkout is disabled.
To enable it, clear Use System and select the Enable Guest Checkout check box.
When the guest checkout is enabled, click Save Settings to display the additional Guest Checkout Owner Settings section.
In the Guest Checkout Owner Settings section, select the default owner of the guest checkout. Depending on the roles and permissions of the owner, guest data (e.g. shopping lists) may or may not be viewed and managed by the users who are subordinated to the owner.
Note
To enable users from the same business unit or organization (that the owner belongs to) to view and manage guest checkout data, adjust permissions for the checkout entity in their roles accordingly.
Click Save Settings.