Important
You are browsing the documentation for version 3.1 of OroCommerce, OroCRM and OroPlatform, which is no longer maintained. Read the latest LTS version of the Oro documentation to get up-to-date information.
See our Release Process documentation for more information on the currently supported and upcoming releases.
Manage Email Campaigns in the Back-Office
With Email Campaigns in Oro application, you can send an email with birthday wishes and a special offer to all of your loyal customers who were born in June or deliver a compliment to every customer who has purchased from you since April.
Before you start using Email campaigns, prepare your contact sources (e.g. a marketing list) and create an Email Template.
After that, you can easily set-up an Email Campaign, within which all the contacts on the list will receive personalized emails.
This article describes how to set up an Email Campaign in Oro application and manage it.
Create an Email Campaign
To create a new email campaign:
Navigate to Marketing > Email Campaigns in the main menu.
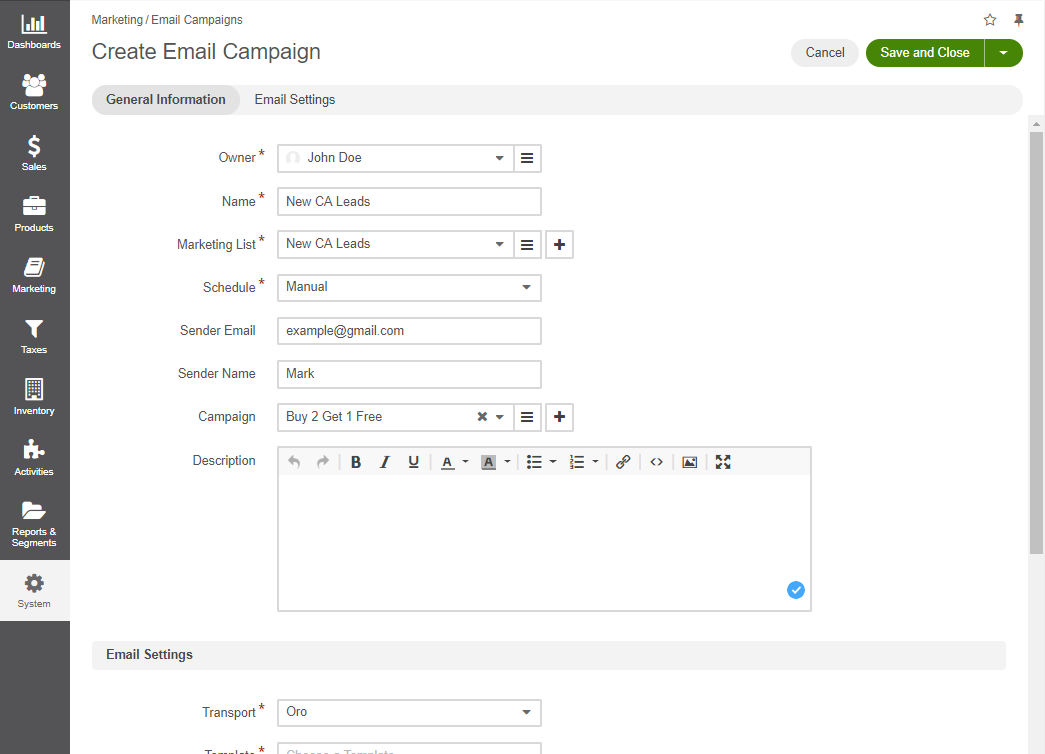
Click Create Email Campaign in the top right corner to get to the Create Email Campaign page.
In the General section, provide the following information:
Name
Description
Name*
Name used to refer to the campaign in the system.
Marketing List*
Choose one of available marketing lists. The letter will be sent to email addresses defined by the list. More details about the marketing lists are available in the Marketing Lists guide.
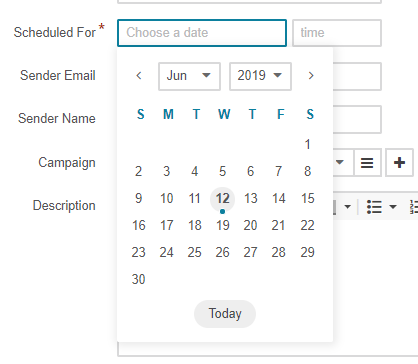
Schedule*
Defines whether the mailing shall be activated manually (Manual) or scheduled for a specific date (Deferred).
If Deferred is chosen, the Scheduled For field will appear. Choose the date and time of the mailing in the calendar.
Owner*
Limits the list of users that can manage the campaign to those, whose roles allow managing email campaigns of the owner (e.g. the owner, members of the same business unit, system administrator, etc.).
Sender Email
Optional.
Sender Name
Optional.
Campaign
Optional. A Marketing Campaign this email campaign is a part of.
Description
Optional.
Note
Custom fields may be added, subject to specific business needs.
In the Mailing Settings section, select the transport and the email template to use for the email campaign.
Name
Description
Transport
The field defines the service to be used for the mailing. Out of the box, the only option is Oro application. Other services can be added in the course of customization.
Template
Choose the email template to be used from the drop-down.
Note
You can only see the templates assigned to no entity or the same entity as the marketing list.
Important
Keep in mind that the ability to view and add email templates from the dropdown list depends on specific roles and permissions defined in the system configuration. For example, with the User permissions, you can view and add the templates created by you exclusively. The Business Unit permissions give the access to the email templates created by any user who belongs to the same business unit as you. For more information about available access levels and permissions, see the Understand Roles and Permissions guide.
Once you finish configuring the marketing campaign, click Save and Close in the top right corner of the page.
Assign an Email Campaign to a Marketing Campaign
If you want to include one or several email campaign(s) to an Oro Application Marketing Campaign, choose the Marketing Campaign name in the Campaign list.
Multiple email campaigns may be assigned to a marketing campaign.
Manage Email Campaign Records
The following actions are available for an email campaign from the grid:
Delete the campaign from the system:
Edit the campaign:
View the details of the campaign:
Send an Email Campaign Manually
To launch an email campaign:
Navigate to Marketing > Email Campaigns in the main menu.
Click on the Email Campaign to preview its contents.
Review the recipients list to ensure it covers only the planned target contacts.
Click the Send.
This generates an email based on the template you’ve selected, populates it with the contact’s details and sends it to the email from the contact information.
Note
If an Email Campaign has been created as a result of integration with MailChimp or dotmailer, its record will be automatically created in Oro application, and related statistics will be uploaded and synchronized.