Important
You are browsing the documentation for version 3.1 of OroCommerce, OroCRM and OroPlatform, which is no longer maintained. Read the latest LTS version of the Oro documentation to get up-to-date information.
See our Release Process documentation for more information on the currently supported and upcoming releases.
Data Import Concept Guide
One of the most time-consuming aspects of setting up a new store is getting all your data into the system. Whether OroCommerce is the first e-commerce application for you as a new store owner or you are an existing store owner who is transitioning from a different application, working with a freshly installed clean application can seem daunting, and you may not know where to start. One of the first things you will need to do is move all your data into the Oro application. Manual import can be tedious when dealing with large amounts of data, that is why Oro applications are equipped with a powerful import engine that makes sure that all of your data is uploaded correctly and swiftly in a .csv format.
Pre-Import Guidelines
Data import is available for a number of different entities, including, but not limited to, products, master catalog categories, customers, accounts, and many more. You may be tempted to migrate your data in random order, but there are a few rules of thumb to follow before you start any import operation.
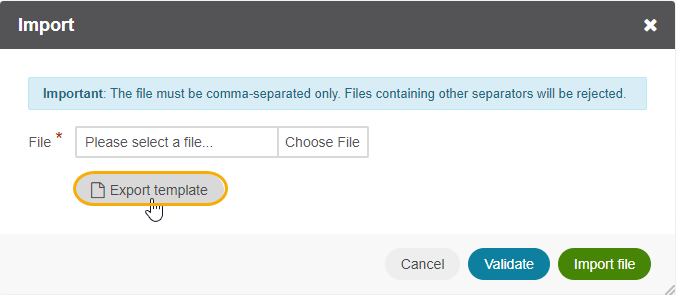
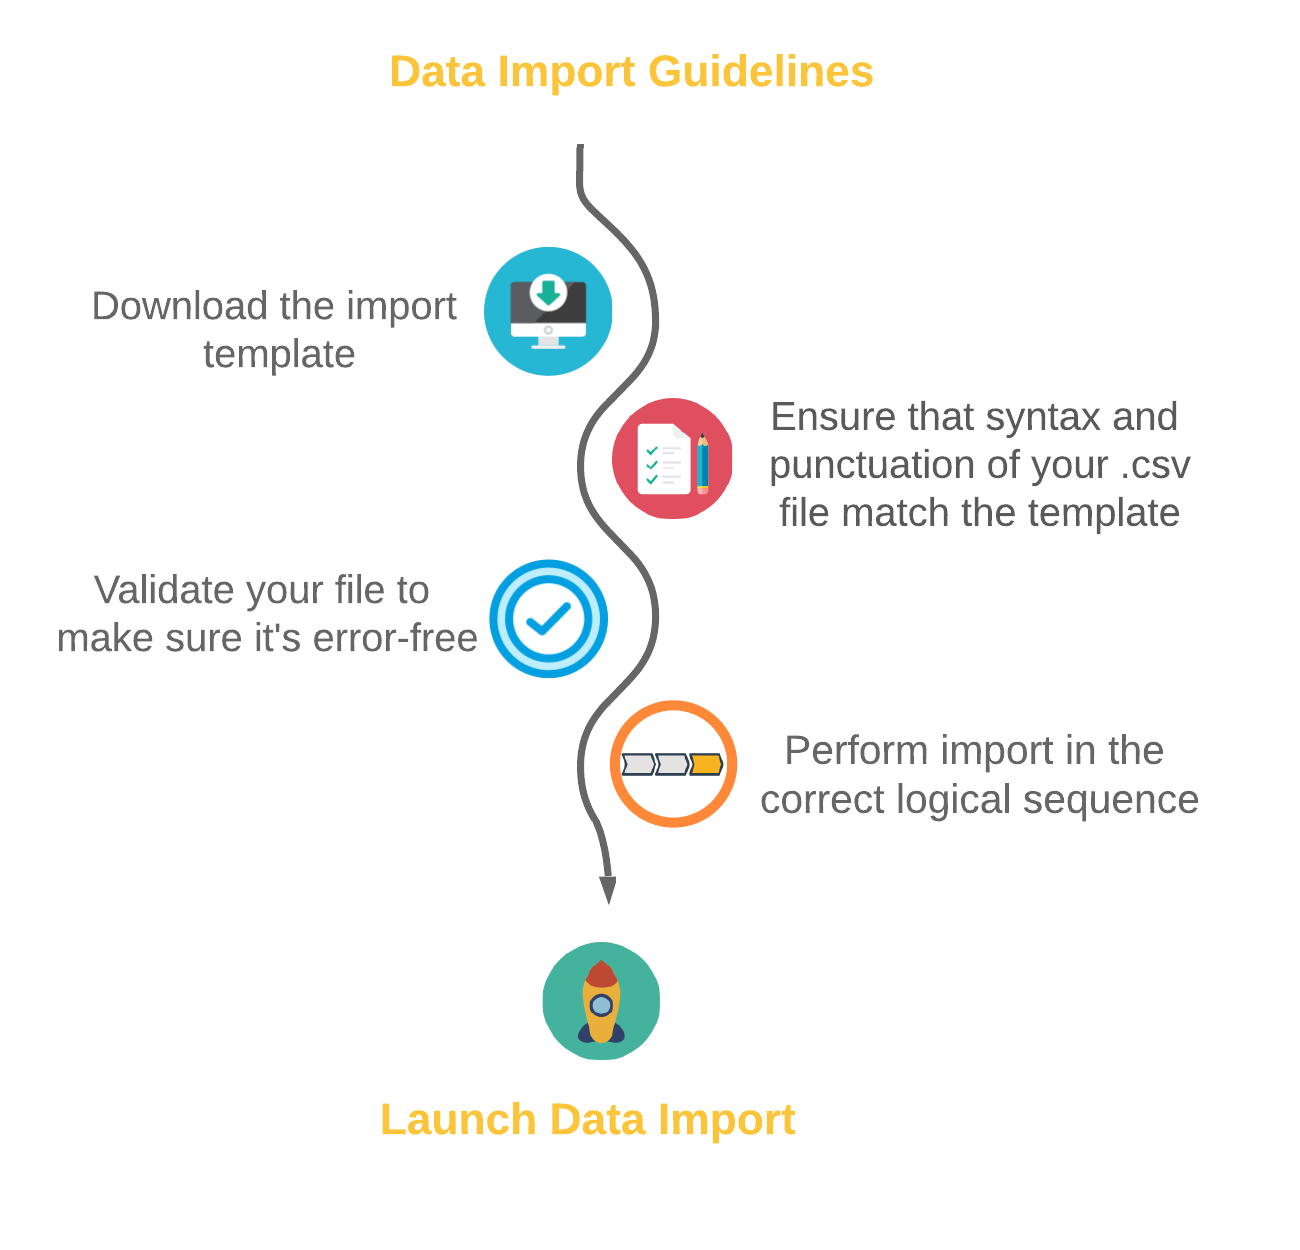
Oro applications have built-in import templates available for every importable entity. You need to download them before you initiate any import operation and make sure your data fits the template format. The templates are ready for you to export from the import dialogs of every importable entity; this way, they are never lost and are always on hand and ready for you. Each of these templates is different, depending on what entity you need to import.
That is why it is essential to:
Ensure that your .csv file is saved in the Unicode (UTF-8) encoding. Otherwise, the content of the file can be rendered improperly
Ensure that the syntax and punctuation of your .csv file is the same as in the Oro template
Examine all the fields required for the import from left to right, and make sure that the .csv file you will be importing has all the required information for the entity you are importing
Validate your file to make sure it is error-free. You are emailed validation results. If there are any entries with errors, fix them in your .csv file before initiating import
Perform import in the correct logical sequence, otherwise you will experience content management issues. For example, if you try to import products before product attributes, or customer users before customers, your import will fail. Start import only after you have double-checked that the import sequence makes sense
Ensure that all the necessary features are configured in the application, such as a suitable default currency or product unit
Logical Import Sequence
Out-of-the-box, the import is enabled for the following types of data:
|
Products, Product Attributes, Product Images, Price Attributes Data, Price Lists, Inventory Levels, Customers, Customer Users, Master Catalog, Tax Rules, Tax Rates. |
|
Leads, Opportunities, Accounts, Contacts, Business Customers |
You should not experience any import issues if you follow the steps outlined in the section above and make sure that the content you are uploading follows the import guidelines. We are going to provide several examples of logical data import sequence that you can follow when working with your Oro application.
Product Data Import
Whether you are creating a product manually from scratch or uploading a large .csv file with hundreds or thousands of products, you need to make sure that the order in which you are adding product-related entities into the application makes sense.
There are seven mandatory steps in the product data upload sequence and some optional steps (marked below) that do not compromise the success of the import operation.
Create and define Product Families with product attributes
Import Tax Rules and Tax Rates (optional)
Import Price Attribute Data (optional)

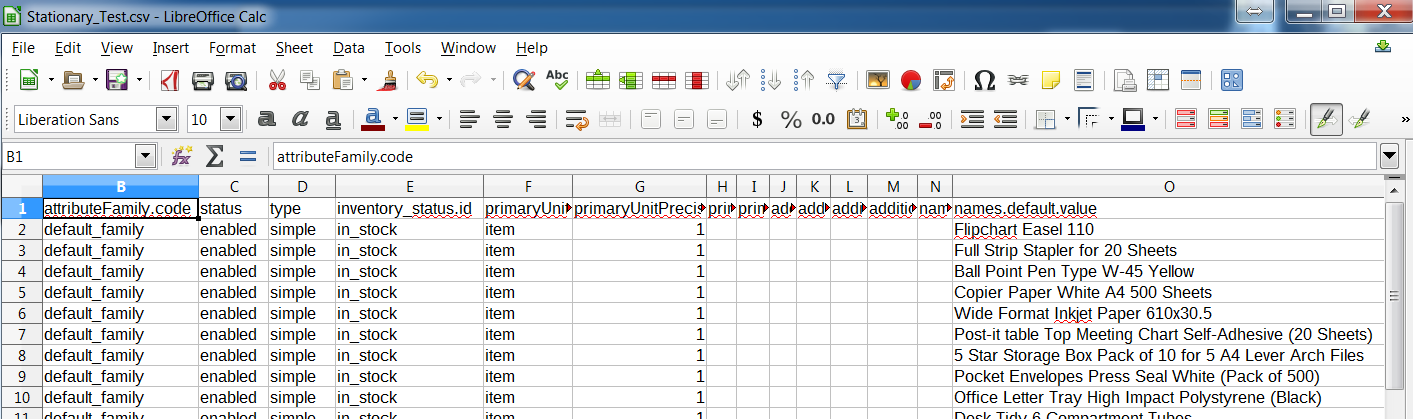
The following screenshot illustrates a .csv file filled in according to the downloaded product import template:
Hint
Check out Products user documentation on creating different types of products manually.
Customer Data Import
Customer users are linked to their customers, which is why importing customers and their roles into the application should go before importing customer users:
Create and define Customer User Roles

Hint
For more information on customers, see Customer Permissions and Customer Management concept guides, and Managing Customer Entities in the Back-Office user guide.
Inventory Levels and Statuses Import
You can import inventory information once the application has all the products to link inventory levels and statuses to:
Create a warehouse
Import Products (see the Product Data Import section above).

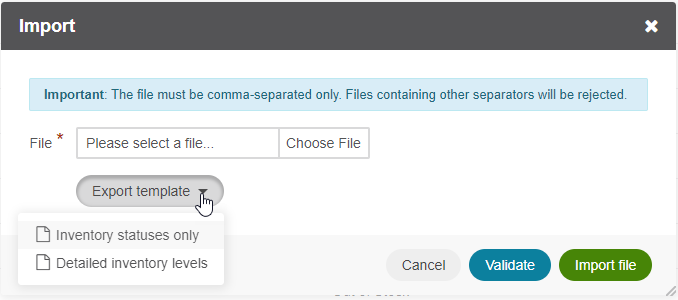
You can either upload inventory statuses only or detailed inventory levels based on the inventory templates that you can download from the import dialog.
Hint
Check out more information on inventory and warehouses in the Inventory Management concept guide and Manage Inventory in the Back-Office user guide.
As you can see, the data that needs to be prepared before every import is available in every import template. Once the data is ready and validated, you can launch import and select the import strategy (if strategy selection is available for your entity). Interactive status messages display the import progress, and once the import is complete, the changes are reflected in the list after a refresh. You will also get an email with the import status.
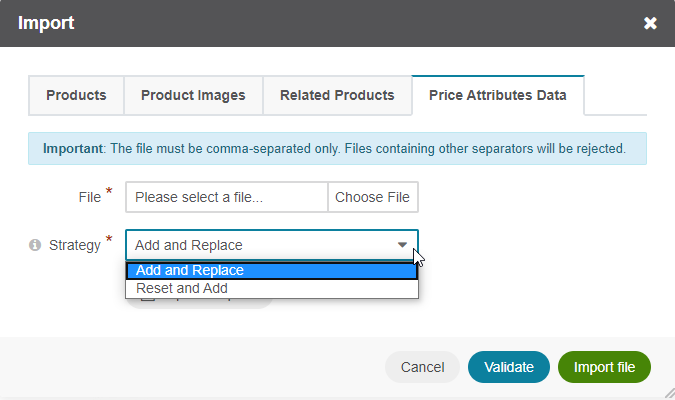
Import Strategies
When importing some particular entities, such as business customers, price attributes, contacts, price lists, and languages, you have three import strategies to select from:
|
Add and Replace strategy overrides the existing values with the ones mentioned in the file for the corresponding importable entity. Also, it adds new values to items with empty fields. |
|
Reset and Add strategy removes all the current values from the entity and adds only the ones listed in the .csv file. |
|
Add strategy adds new values listed in the .csv file to the ones that already exist for a particular importable entity |
Related Topics