Important
You are browsing the documentation for version 3.1 of OroCommerce, OroCRM and OroPlatform, which is no longer maintained. Read the latest LTS version of the Oro documentation to get up-to-date information.
See our Release Process documentation for more information on the currently supported and upcoming releases.
Configure Zendesk Integration in the Back-Office
Oro applications support out of the box integration with Zendesk, enabling you to load data from your Zendesk account and process it in the Oro application. This article describes how to define and edit the integration and synchronization settings.
Hint
While Zendesk integration capabilities are pre-implemented, OroCRM and OroCommerce can be integrated with different third-party systems.
Generate API token in Zendesk
To retrieve your API token on the Zendesk side:
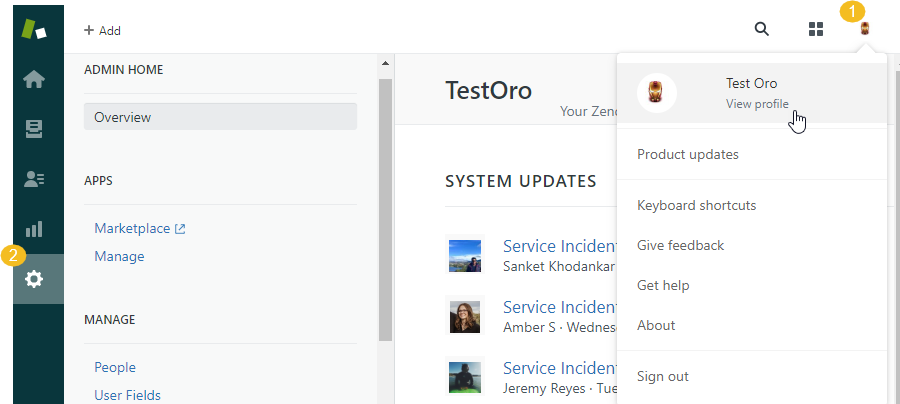
Open your account profile and go to the Admin page.
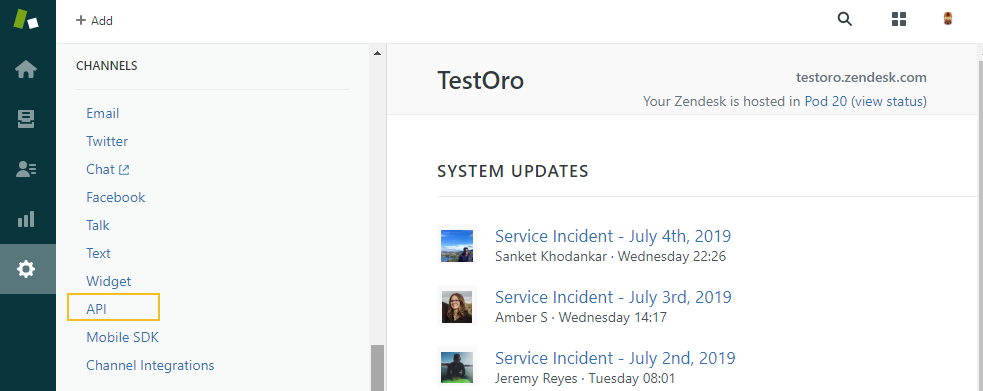
Navigate to the CHANNELS > API.
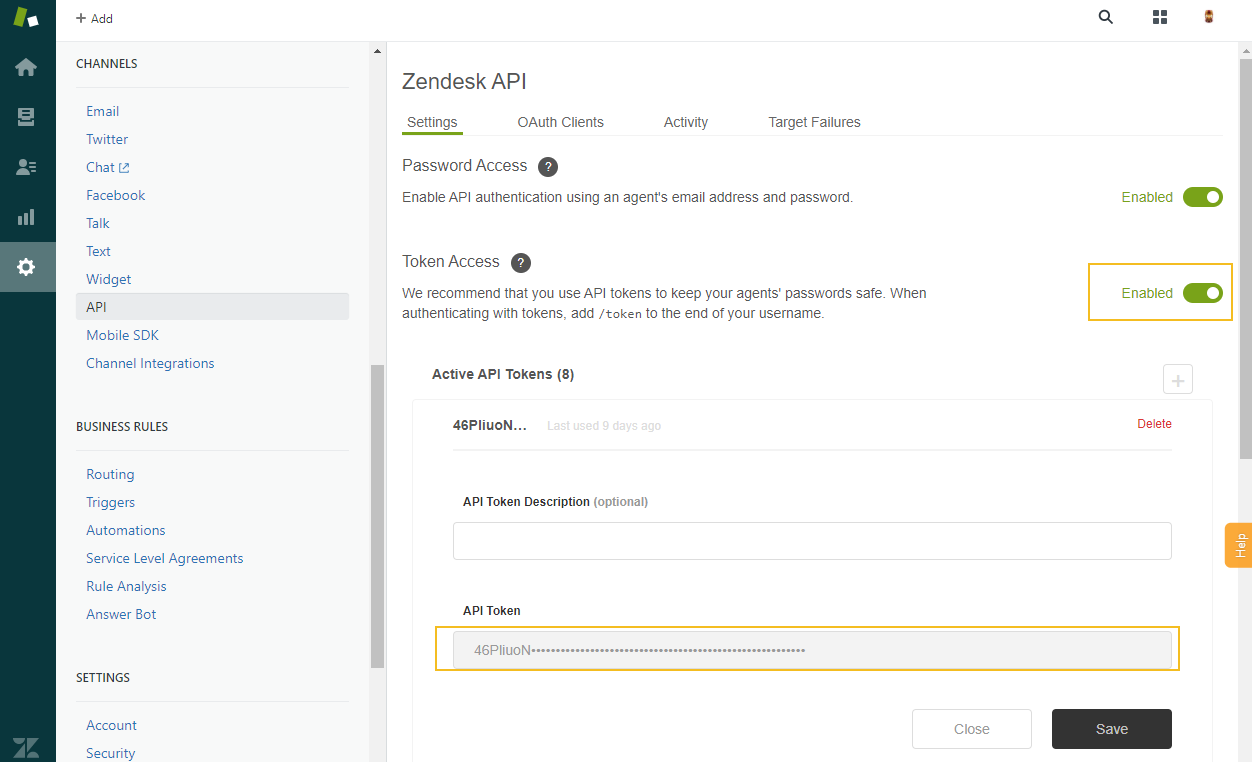
Make sure the Token Access is enabled.
Copy an active API token.
Create the Integration
To create an integration with Zendesk:
Navigate to System > Integrations > Manage Integrations in the main menu:
Click Create Integration on the top right.
On the Create Integration page, set the integration type to Zendesk
In the General section, define the following mandatory details:
Field
Description
Type*
The integration type. Must be set to Zendesk
Name*
The integration name used to refer to the integration within the system.
URL*
A URL of your Zendesk account (e.g.,
https://username.zendesk.com).API Email*
The email used to register your Zendesk account.
API Token*
The API token generated and/or copied in the Zendesk (as described above).
Default Zendesk User Email
User with this email will be assigned tickets that come from the Oro application and for which there are no Zendesk users with a matching email address.
Owner
Limits the list of users that can manage the integration, subject to the access and permission settings etc.) Used as an Oro application user for Zendesk tickets if there are no users with a matching email address.
In the Synchronization Settings section, enable/disable the two-way synchronization.
Select the Enable Two Way Sync check box, if you want to download data both from Zendesk to your Oro application and back.
If the box is left unselected, data from Zendesk is loaded into the Oro application, but changes performed within it are not loaded back into Zendesk.
If the two-way synchronization is enabled, define the priority used for the conflict resolution (e.g., if the same customer details were edited from both Oro application and Zendesk):
Remote wins — Zendesk data is applied to both Zendesk and the Oro application.
Local wins — Oro application data is applied to both Zendesk and Oro the application.
Manage the Integration
As an illustration, we have created a sample Zendesk integration with two-way synchronization enabled and sync priority set to Remote Wins. This means that if the same data is changed from both Zendesk and Oro application, Zendesk changes take precedence.
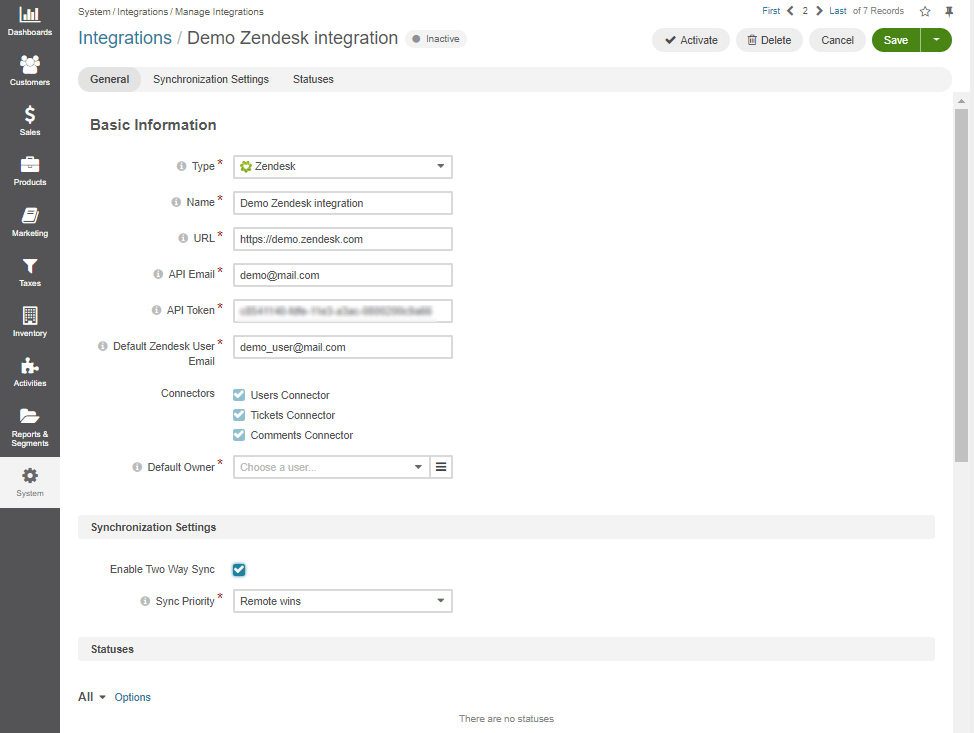
Initially the integration is inactive. In order to activate it, click Activate on the integration details page.
Note
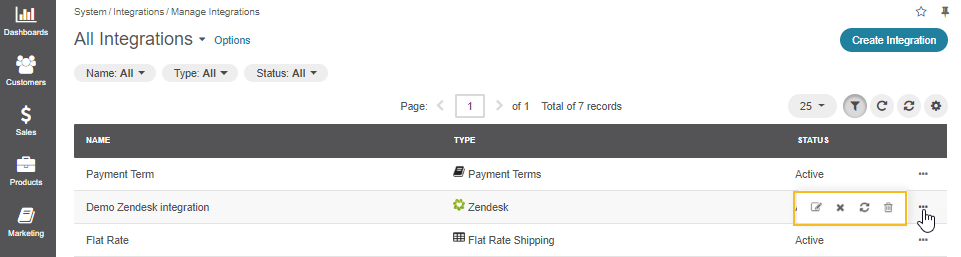
To edit, deactivate, schedule sync or delete the integration, navigate to the the page with all integrations System > Integrations > Manage Integrations.
Synchronize Data
Once integration has been created, the data is automatically synchronized.
To start the synchronization manually:
Navigate to System > Integrations > Manage Integrations in the main menu.
For the the integraion with Zendesk, hover over the More Options menu to the right and click to schedule sync.
Note
Alternatively, open the integration details page and click Schedule Sync on the top right.
Wait for data to synchronize. Click the Check progress link to see the synchronization status.
Sync from Zendesk to the Oro Application
A new case is created in the Oro application for every Zendesk ticket. The ticket fields are mapped in the Oro application case fields as follows:
Zendesk Field |
Oro application case field |
Comments |
||||||||||
|---|---|---|---|---|---|---|---|---|---|---|---|---|
Subject |
Subject |
Can be used to find the ticket/case in the grid |
||||||||||
Description |
Description |
Is also added as the first public comment for both the Oro case and the Zendesk ticket |
||||||||||
Assignee |
Assigned to |
The email address of the assignee is checked against primary emails of the Oro application User records:
|
||||||||||
Priority |
Priority |
The values are mapped as follows:
|
||||||||||
Status |
Status |
The values are mapped as follows:
|

For each case created as a result of synchronization with Zendesk, a ticket is created in the Oro application.
The following field values are defined as follows:
OroCRM/OroCommerce Ticket Field |
Description |
|---|---|
Ticket Number |
Zendesk ticket number. Used to determine if an existing case/ticket must be updated or if a new one must be created. |
Recipients Email |
Same as the Recipients Email field in the Zendesk ticket. |
Status |
Same as the Status field in the Zendesk ticket.(Does not map to the Oro application statuses). |
Type |
Same as the Type field in the Zendesk ticket. |
Submitter |
A contact or user. There are two possible cases:
|
Assignee |
The email address of the assignee is checked against primary emails of the Oro application User records:
|
Requester |
An OroCRM/OroCommerce Contact record is tied to it, as follows:
|
Priority |
Same as the Priority field of the Zendesk ticket (Does not map to the Oro priorities). |
Problem |
Same as the Problem field in the Zendesk ticket. |
Collaborators |
Same as the Collaborators field in the Zendesk ticket. |
Sync from the Oro Application to Zendesk
If two-way synchronization is enabled, the Publish to Zendesk button is available on the Case details page. Click the button to submit the case to Zendesk.
The case fields are mapped to the Zendesk ticket fields as follows:
Oro case field |
Zendesk field |
Comments |
||||||||||
|---|---|---|---|---|---|---|---|---|---|---|---|---|
Subject |
Subject |
Can be used to find the ticket/case in the grid |
||||||||||
Description |
Description |
Is also added as the first public comment for the both Oro case and Zendesk ticket |
||||||||||
Assigned to |
Assignee |
The email address of the Assigned to user is checked against the emails of Zendesk users:
|
||||||||||
Priority |
Priority |
The values are mapped as follows:
|
||||||||||
Status |
Status |
The values are mapped as follows:
|
After the ticket has been created in Zendesk, its details are saved in the Ticket related to the case in the Oro application.
Review Further Sync Rules
If some ticket details of a Zendesk ticket have been changed after the initial synchronization, the corresponding Oro application case details will also be updated in the course of the nearest synchronization.
If some ticket details of an Oro application case have been changed after the initial synchronization, the corresponding Zendesk ticket details will also be updated automatically (if the two-way synchronization is enabled).
If the same details have been updated in a related Zendesk ticket and Oro application case, and the two-way synchronization is enabled, the synchronization priority settings will be applied.