Important
You are browsing the documentation for version 3.1 of OroCommerce, OroCRM and OroPlatform, which is no longer maintained. Read the latest LTS version of the Oro documentation to get up-to-date information.
See our Release Process documentation for more information on the currently supported and upcoming releases.
Configure Channels in the Back-Office
Today, successful businesses usually have more than one sales site. These may be different online stores, business-to-business enterprises, or business-to-customer outlets. Moreover, different customers and sales-related data can be received from various survey-campaigns or memberships in clubs, funds, charity events, etc. Gaining a full understanding of all the information you receive from each of these sources, along with all the individual customer information you collect from various other sources, becomes crucial. With OroCRM’s channels, you can do both with minimum effort.
Each channel record represents one source of customer-related data.
Oro Community Edition has two types of channels: Web (built for online stores) and Sales (built for business-to-business activities). For enterprise clients, additional types of channels can be added during system integration.
There is no limit to the number of channel records that may be defined for one OroC application instance. Upon creation, you can choose what kind of customer-related information will be collected from each channel, as described below.
Create a Channel Record
To create a channel:
Navigate to System > Channels in the main menu.
Click Create Channel on the top right.
In the General section, specify the following channel details:
Name — The name used to refer to the channel in the system. It is recommended to keep the name meaningful.
Channel Type — Channel type defines a set of default rules and settings used for the channel.
Important
Extending OroCRM with new channel types is a proven practice, and it can be customized subject to your specific needs and goals.
The information collected from a channel is represented by the entities assigned to the channel and their related entities.
In the Entities section, add an entity to the channel to collect the necessary data by selecting the required entity from the list.
Click Add.
One of the entities defined for any channel must be a customer. It is added to the entity list automatically, subject to the chosen channel type:
Sales Channel—Business Customer
Custom Channel—Customer Identity
Some other entities are added to channels of a specific type by default. However, they are optional and may be removed.
To delete an entity, click Delete. This will remove the entity from the channel’s list, but not from the system.
Once you finish adding the entities, click Save and Close.
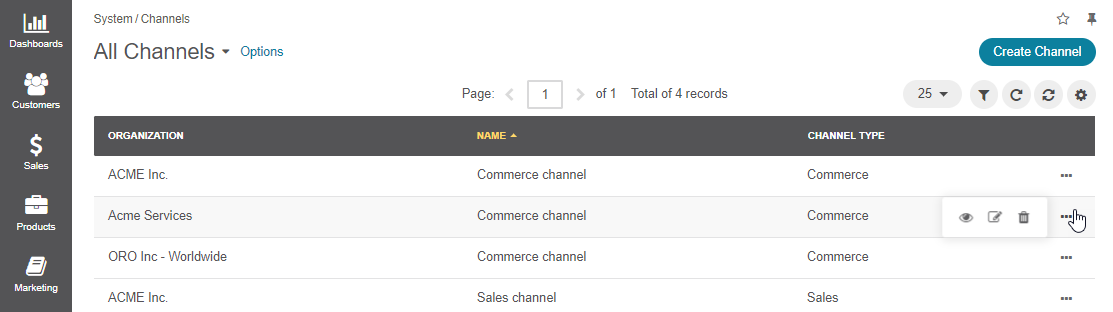
Manage Channels
From the channels grid, you can view, edit, or delete the selected channel by hovering over the More Options menu to the right of the item and clicking the required button.
Caution
Once a channel has been deleted, all of the data related to it will be deleted as well.
From the channel’s details page, you can edit the channel or view and edit the assigned entities.
Note
Note that you will receive an error message if you do not have the necessary permissions to edit entities.