Important
You are browsing the documentation for version 3.1 of OroCommerce, OroCRM and OroPlatform, which is no longer maintained. Read the latest LTS version of the Oro documentation to get up-to-date information.
See our Release Process documentation for more information on the currently supported and upcoming releases.
Manage Users in the Back-Office
Enable/Disable a User
To enable or disable a user in the Oro application:
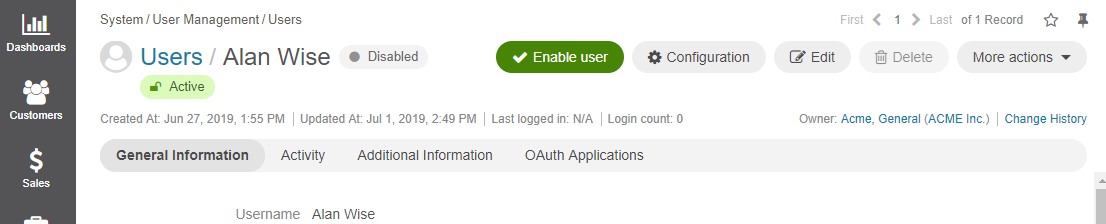
Navigate to System > User Management > Users.
In record table, click once on the name of the selected user to open their page.
On page of the selected user, click Enable User/ Disable User on the top right.

Note
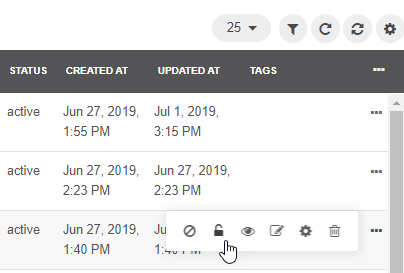
Alternatively, you can enable and disable users from the record table. Hover over the ellipsis menu at the end of the row of the selected user and click on the corresponding icon.
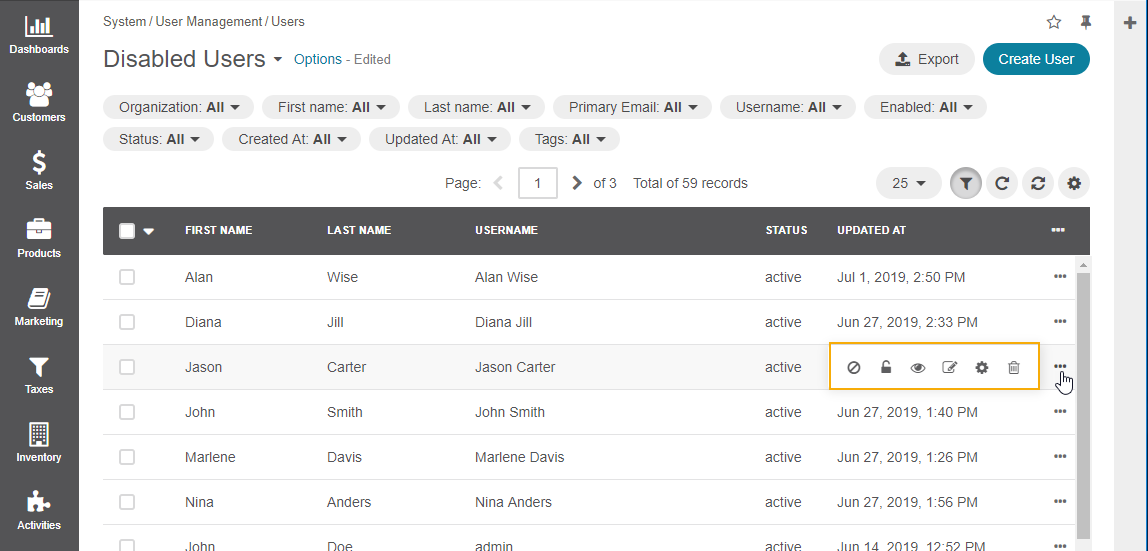
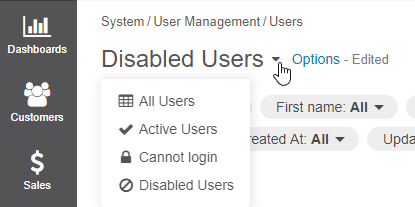
Keep in mind that besides the page with all users, you can get to the pages of only active or disabled users, or those who cannot log in.
Enable/Disable Multiple Users
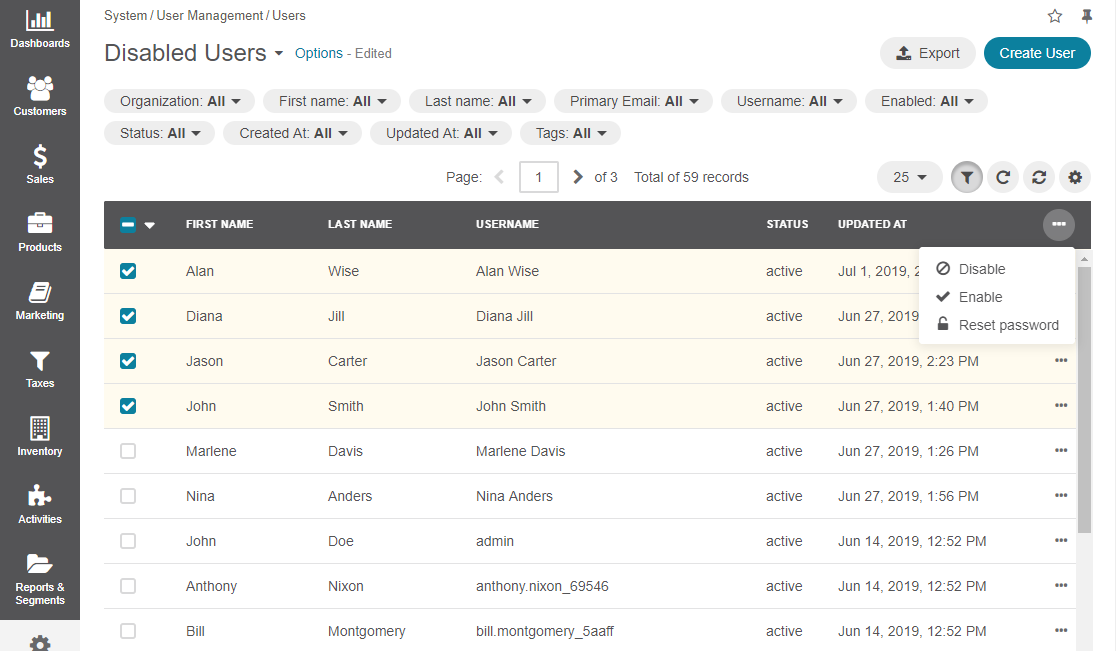
To enable/disable several users at the same time, use mass actions:
Navigate to System > User Management > Users.
In the table of all users, select the check boxes in front of the names of those users whose passwords you want to reset.
Click the ellipsis menu at the right end of the table header row and then click Enable or Disable.
Activate a User
When user exceed allowed number of failed login attempts, the system automatically locks them out. User authentication status changes to Locked and the Activate button appears on the user page.
To activate a user:
Navigate to System > User Management > Users in the main menu.
Click on the selected user once to open their page.
On the user page, click the Activate on the top right.

The user authentication status changes from Locked to Active.
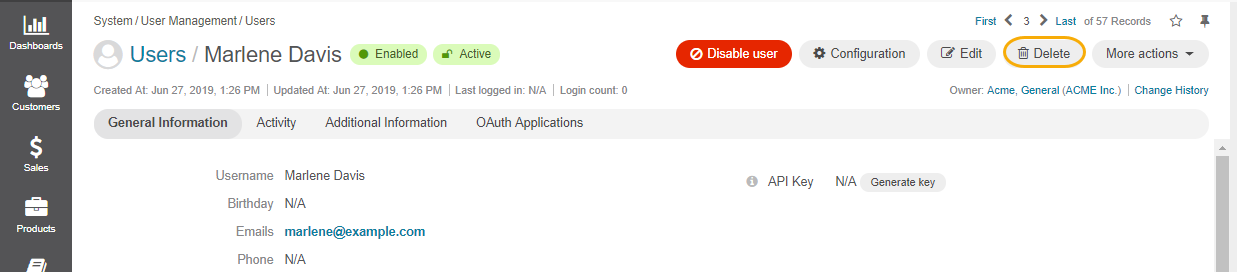
Delete a User
To delete a user from the system:
Navigate to System > User Management > Users.
In the table of all users, hover over the ellipsis menu at the end of the row of the selected user, and click Delete.
Important
Keep in mind that you can delete only those users who have no records assigned to them.

In the Deletion Confirmation dialog box, click Yes, Delete.
Note
Alternatively, you can delete a user from their user page by clicking the Delete on the top right.
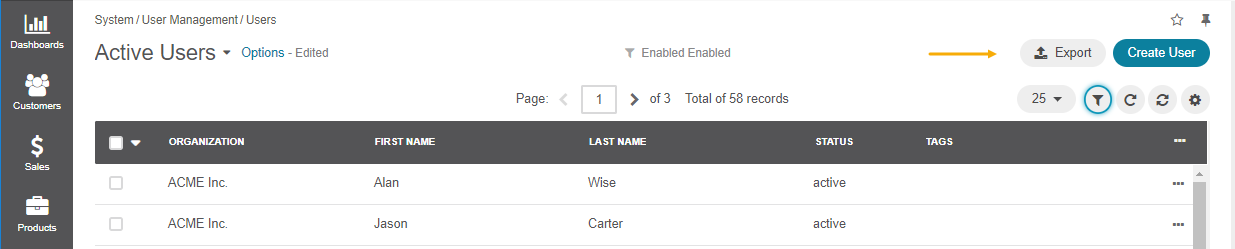
Export Multiple Users
You can export all user records into a .csv file. The exported file will contain all user record fields marked to be exported in the User entity settings. For more information about how to configure which fields will be exported, see the Entity Fields topic.
Note
All existing user records are exported at once. Passwords are stored and exported in the hashed form.
To export user records:
Navigate to System > User Management > Users.
On the page of all users, click Export on the top right.
When the export job finishes, you will receive a notification to your primary email address.

Generate an API Key for a User
When the integration with a third-party software or other work requirements demand a user to have the API access to the Oro application key for the user. This key is used to grant the user access to the required API while protecting their password from being disclosed to the third party.
Navigate to System > User Management > Users in the main menu.
On the page of all users, click once on the selected user to open their page.
In the General Information, click Generate Key next to the API Key field.
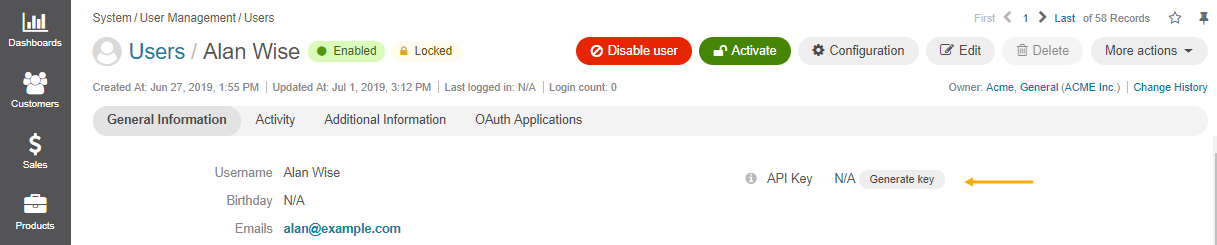
Once the API key is generated, the user can execute API requests via the sandbox, Curl command, any other REST client, or use the API via the custom application.
Important
Only one key can be generated for one user within one organization.
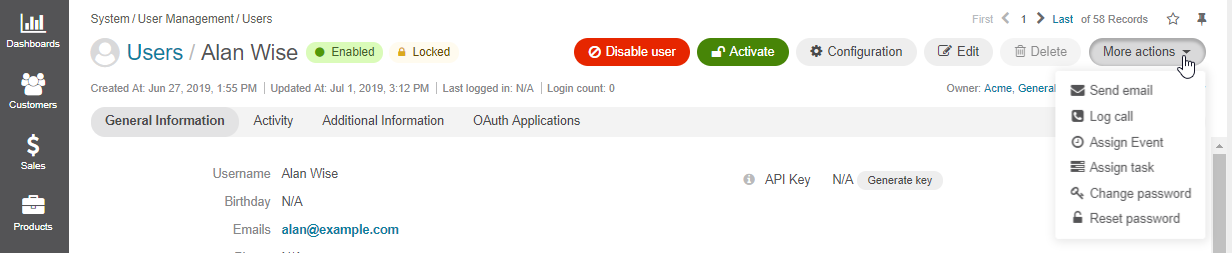
Change/Reset User Passwords
You can change and reset the password for a specific user on their profile page in the More Actions menu:
Navigate to System > User Management > Users.
On the page of all users, click once on the selected user to open their page.
On the user page, click More Actions on the top right.
Click Change Password to open a new dialog and provide a new password. Alternatively, you can click the Suggest Password link to generate a secure random password. To see / hide the entered password, click the Show/ Hide icon next to the New password field. Once a new password is provided, a reset password email is sent to this user.

Click Reset Password to send an email to the user with a new password.

The user will not be able to log into the application until their password is changed. In this case, the user authentication status changes to Password reset. It will return to Active when the user changes the password.

Note
Alternatively, you can reset password for a specific user from the table of all users. For this, hover over the ellipsis menu at the end of the row of the selected user, and click Reset Password.
Reset Multiple Passwords
When you suspect a security breach, you can reset passwords for multiple users at the same time:
Navigate to System > User Management > Users.
In the table of all users, select the check boxes in front of the names of those users whose passwords you want to reset.
Click the ellipsis menu at the right end of the table header row and then click Reset Password.
In the Reset Password dialog box, click Reset. The password reset links are sent to the primary email addresses of the selected users.
Important
The users will not be able to log into the application until their passwords are changed. Note that user authentication statuses change to Password reset. They will return to Active when the users complete password change procedure.
