Important
You are browsing the documentation for version 3.1 of OroCommerce, OroCRM and OroPlatform, which is no longer maintained. Read the latest LTS version of the Oro documentation to get up-to-date information.
See our Release Process documentation for more information on the currently supported and upcoming releases.
Manage Localizations, Languages, and Translations in the Back-Office
Localization is the process of translating and adapting a product for a specific country or region. Oro application allows a user to customize the format of date and time, numeric, percent, and monetary values as well as the format of names and addresses.
Oro application supports localization and provides decent out-of-the-box translation coverage for the most used languages. With out-of-the-box integration to CrowdIn service, Oro applications have live access to the most recent updates from the Oro team and community.
See How to Contribute to Translations for more information about the translation process.
Localization Process
To translate the Oro application’s storefront and back-office to a desired language, make sure to take the following steps in the localization process:
Step 1. In the Languages section, add desired languages to the system, enable them, import translation texts for the language or install translation updates from the CrowdIn project.
Step 2. In the Translations section, check the existing and imported translations for the UI system elements (e.g., labels, checkboxes, buttons, notifications, etc.). There, you can add, modify, or delete translation texts for these items if necessary.
Note
Remember to update the cache after each translation adjustment.
Step 3. In the Localizations section, create a localization that inherits a translation from another language when the translation to the main language of the localization is not available. This helps avoid double efforts when translating to similar and related languages and dialects of the same language.
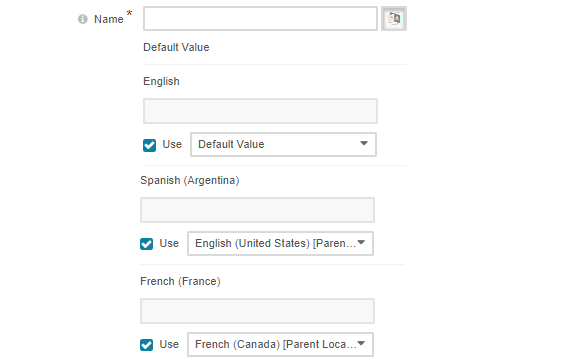
Step 4. Once the necessary localizations are created, you can now translate the content elements (e.g., names, titles, labels, descriptions, etc.) using inline content translation available for most of the text fields.
Step 5. Now, enable all the necessary localizations of the UI system and content elements to be displayed to the user both in the storefront and the back-office in the Localization Settings section.
For detailed information on these topics, please see the following sections: