Important
You are browsing the documentation for version 3.1 of OroCommerce, OroCRM and OroPlatform, which is no longer maintained. Read version 5.1 (the latest LTS version) of the Oro documentation to get up-to-date information.
See our Release Process documentation for more information on the currently supported and upcoming releases.
Configure Global Localization Settings
In the system configuration, you can define the localization options, such as system locale, primary location, address formatting method, system timezone, calendar year settings, temperature and wind speed units on the map. Furthermore, you can set the default language of the UI elements displayed in the storefront.
Additionally, you can provide the translation for all the content elements of your storefront (e.g., product names, descriptions, catalog titles, SEO attributes, etc.):
Create a necessary localization under System > Localization > Localizations.
Add the required localization to the list of enabled localizations under System > Configuration > System Configuration > General Setup > Localization. It enables customers to select a desired language of the website content in the storefront.
Navigate to the content element you want to provide the translation for.
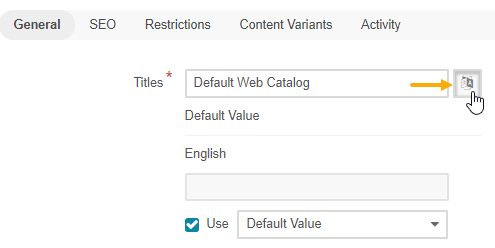
Click the Translations icon next to the required content element to provide spelling for different languages.

The corresponding content translation is displayed in the storefront upon selecting this localization.

Hint
The system configuration of the localization settings are available on four levels: globally, per organization, per website, and per user.
To configure localization settings globally:
Navigate to System > Configuration in the main menu.
In panel on the left, expand General Setup and click Localization.
Note
For faster navigation between the configuration menu sections, use Quick Search.
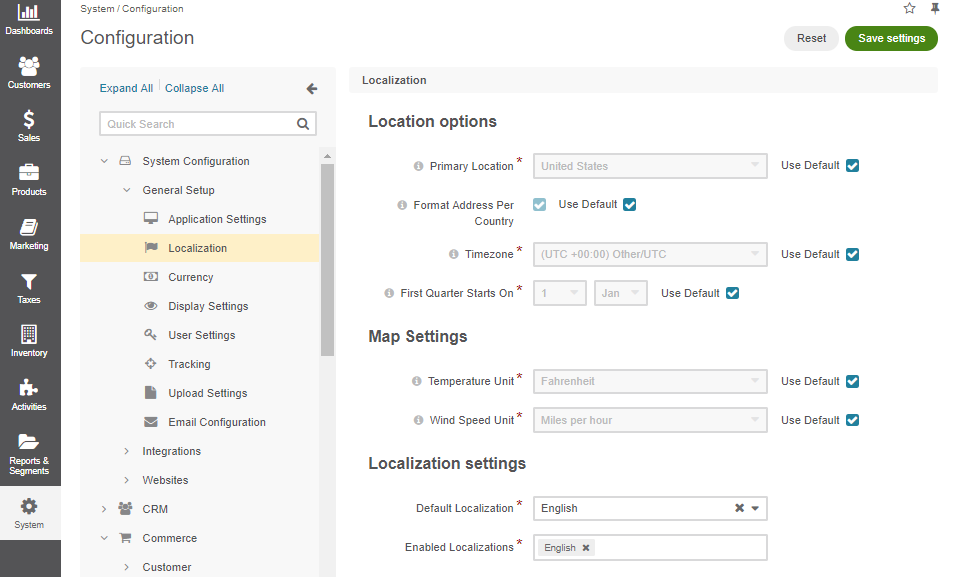
The following page is displayed:

Configure the required options by clearing the Use Default check box and providing your own data.
In the Location Options section, provide:
Primary Location and Format Address Per Country — Define the address formatting to be applied.
If Format Address Per Country is enabled and the country-specific formatting is enabled for the instance, the address will be displayed in compliance with the rules specified for the country. For example, if the chosen country is China, the address is displayed as follows:
ZIP code
Country
State, City
Street
First and Last name
whereas, for the US it is:
First and Last name
Street name
CITY NAME, STATE CODE, COUNTRY, ZIP code
Otherwise, the Primary Location formatting is applied.
Timezone — Defines the timezone to be applied for all the time settings defined in the instance. If the time-zone is changed, all the time settings (e.g. due dates of tasks), time of reminders, etc. change correspondingly. The default value is(UTC -08:00) America/Los Angeles.
First Quarter Starts On — Defines the quarter start date. The default value is January, 1.
In the Map Settings, provide:
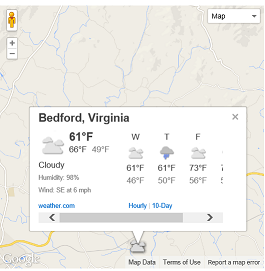
Temperature Unit and Wind Speed Unit to display the weather on the map. The default values are Fahrenheit and miles per hour (MPH).

In the Localization Settings, provide:
Default Localization — The default language of the back-office and storefront UI. The list of available languages depends on the localizations added to the Enabled Localizations list.
Enabled Localizations — The list of localizations is generated automatically based on the data preconfigured in the System > Localization > Localizations menu.
All supported localizations added to this list are displayed in the language switcher in the storefront.

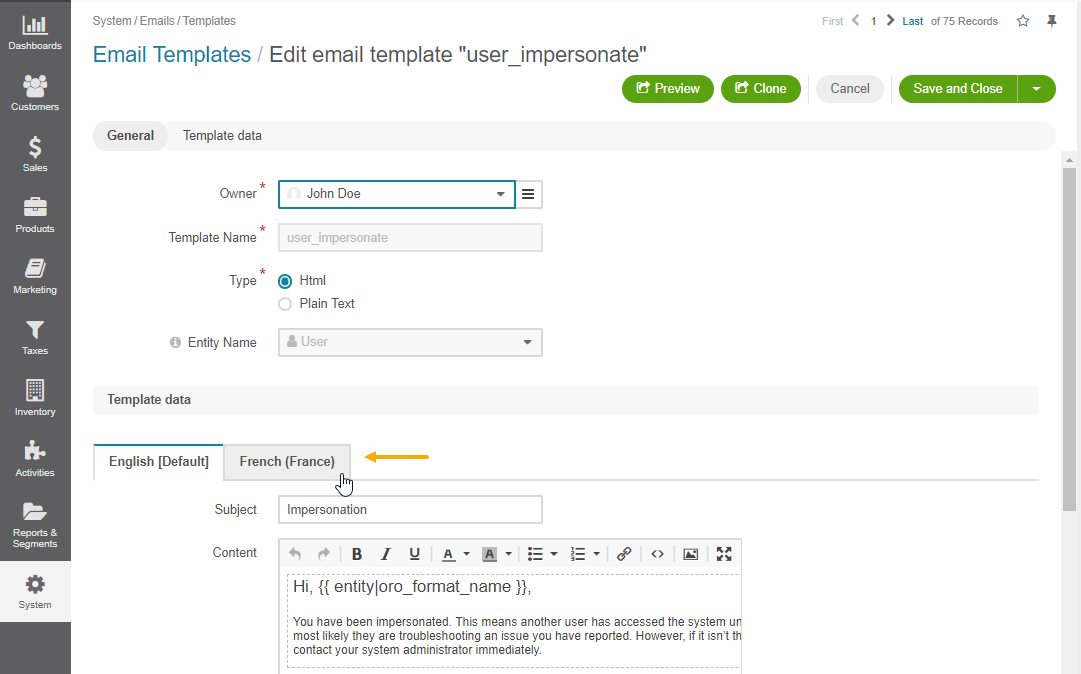
In addition, they determine the languages available for the email notifications. If there is an email template for the supported language, the users who have selected that specific language on the storefront, receive localized notifications.

Note
Refer to the Localizations section for more details.
Click Save Settings.