Important
You are browsing the documentation for version 3.1 of OroCommerce, OroCRM and OroPlatform, which is no longer maintained. Read the latest LTS version of the Oro documentation to get up-to-date information.
See our Release Process documentation for more information on the currently supported and upcoming releases.
Configure Email Settings per User
Hint
Read more on this topic in Emails.
Note
You can configure email settings globally, per organization, per website, per user.
To configure email settings per user:
Navigate to System > User Management > Users in the main menu.
For the necessary user, hover over the More Options menu at the end of the row and click to start editing the configuration.
Click System Configuration > General Setup > Email Configuration in the panel to the left.
Important
To change your own email configuration settings:
Click on your username on the top right.
Click My Configuration.
Follow the steps described below.
On the Email Configuration page, define options applied to all the emails in the application.
Note
To change any of the system-wide options, clear the Use Organization check box first.
Signature — Add a signature to the emails.
Signature Content — Specify the text and formatting of your signature. Bby default, the email signature body is empty.
Append Signature to Email Body — Define whether a signature must be added automatically or manually.
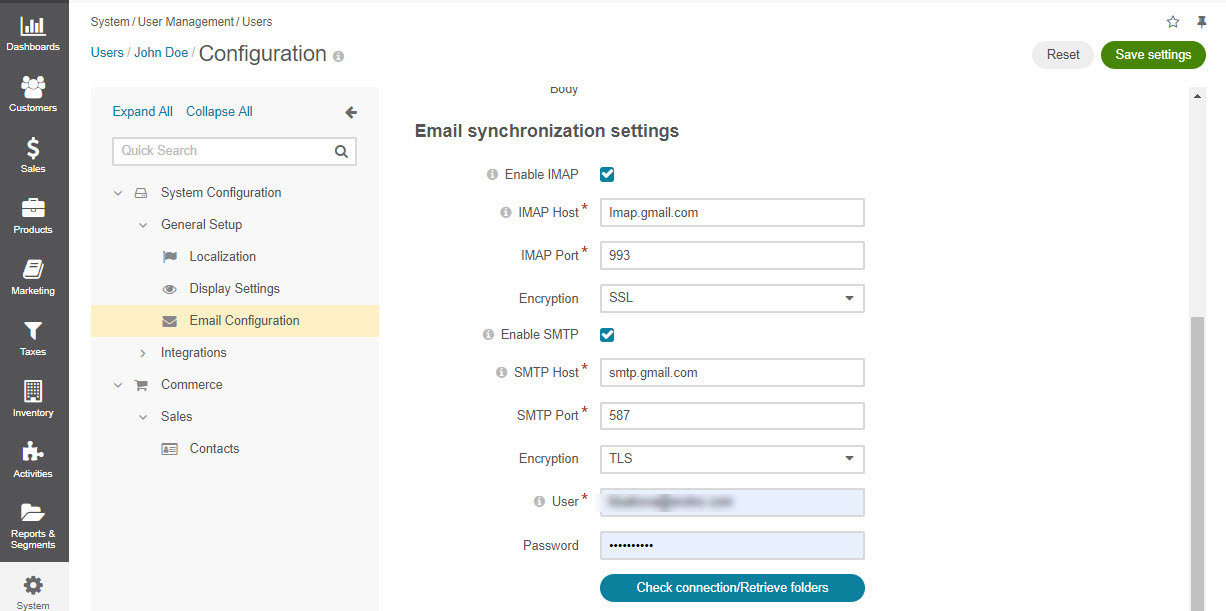
Email Synchronization Settings — provide the following details to configure your personal mailbox:
Enable IMAP — Select the check box to enable retrieving email messages
IMAP Host — Provide the IMAP Host, e.g. imap.gmail.com
IMAP Port — Provide the IMAP Port, e.g. 993
Encryption — Select the encryption type, SSL or TSL.
Enable SMTP — Select the check box to enable sending messages
SMTP Host — Provide the SMTP host, e.g. smtp.gmail.com
SMTP Port — Provide the SMTP port, e.g. 587
Encryption — Select the encryption type, SSL or TSL.
User — Provide your email address
Password — Provide your password
Click Check Connection/Retrieve Folders. After successful connection, a list of folders will be loaded. Check the folders that you wish to be synchronized (e.g. Inbox).
As an example, we have synchronized a Gmail mailbox with OroCRM, having previously turned on access for less secure apps. More details on how to synchronize your Gmail and turn on access for less secured apps can be found in the Use IMAP to check Gmail and Less secure apps & your Google Account topics.
Email Threads — Display Email Conversations As and Display Emails In Activity Lists As define how emails and replies are displayed to the users, as threads or separately. Two options are available: threaded and non-threaded.
Reply — Define which button will be displayed as the default one: Reply is available by default with the Forward and Reply all options in the dropdown. The settings can be changed to have Reply all displayed at the top.
Click Save Settings.
Related Topics