Important
You are browsing upcoming documentation for version 6.1 of OroCommerce, scheduled for release in 2025. Read the documentation for version 6.0 (the latest LTS version) to get up-to-date information.
See our Release Process documentation for more information on the currently supported and upcoming releases.
View Product Details
In the main menu, navigate to Products > Products. The product list opens.
Choose the product you want to modify, and click the corresponding row.
Alternatively, click the More Options menu at the end of the row, and then click the View icon to open the product details page.
Product Details
The exact set of sections (and their content) can vary depending on the configuration of the family to which the product belongs. Each section of the product details reflects the product attribute group configured within the product family and may contain any number of custom fields.
This topic describes only the default sections and fields and the most common ones.
Header

You can see the product name on the top left of the page. Next to it, there is the product status indicating whether the product is enabled or disabled.
In the next row, you can see when the product was created and updated.
Additionally, you can duplicate, edit, or delete the product by clicking the corresponding button.
In the More Actions drop-down, you can:
Manage Visibility — Click this button to configure the product’s visibility at different levels (customer, customer group, region). See the Manage a Product’s Visibility action description.
Manage Inventory — Click this button to configure how many product units are available in each warehouse. See the Manage Inventory action description.
Add Attachment — Click this button to attach a file to this product. In the pop-up dialog, choose the file to attach. You can also add a comment or change the owner if required. Save it.
Add Note — Click this button to make a note related to this product. In the pop-up dialog, enter the required text. Use the rich-text editor (if enabled) to format your message. You can also attach a file to your note and define the additional context for it. Click Add.
In the next row, you can check which user is responsible for the product (owns it). Click the owner name to open the profile of the corresponding user. Enclosed in parentheses is the name of the organization to which the owner belongs. Click the Change History link to see who, how, and when modified the product.
General

Field |
Description |
|---|---|
Category |
The category under which the product is listed. |
SKU |
The stock keeping unit that helps identify the product and track it in inventory. |
Name |
The product’s name as it appears in the user interface. |
Type |
Whether it is a simple product or product that has variants (configurable) — i.e., unites several simple products. An example of a configurable product is a pair of scissors with either red or green handles. |
Is Featured |
Select whether the product is featured. The field is mandatory. To add the featured products block with all the products marked as featured to the website’s storefront, please refer to the featured products documentation. |
New Arrival |
Whether the product is included in the listing of new arrivals. When set to Yes, the product is highlighted in the storefront. |
Brand |
The brand that the product belongs to. |
Tax Code |
The code that helps identify what taxes to apply to the product. |
Description |
A detailed information about the product. It appears in the product details. |
Short Description |
A short but meaningful product description. It is displayed in the catalog listing. |
If the product’s family contains the group with the code “general”, all attributes from the group also appear in this section.
Product Variants

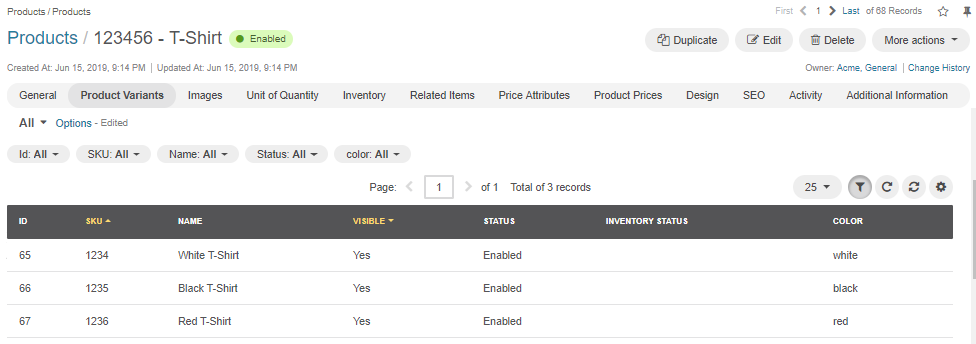
This section is available only for a configurable product. Here you can find a list of product variants aggregated in the product.
For each product variant, the following information is displayed:
Field |
Description |
|---|---|
ID |
The unique identifier of the product variant. |
SKU |
The stock keeping unit that helps identify the product variant and track it in inventory. |
Name |
The name of the product variant how it appears on the user interface. |
Visible |
Whether the simple product is visible in the storefront. |
Enabled |
Whether the product variant is enabled and can be used. |
Inventory Status |
Whether the product variant is in stock. |
Images
There is a list of images associated with the product in this section. For each image, you can see:
The file name and preview.
Whether this is the main image that represents the product and appears in the product details view.
Whether this image appears in the catalog listing.
Whether this image appears among the additional product pictures.
If the product’s family contains the group with the code “images”, all attributes from the group also appear in this section.
Unit of Quantity
This section contains information about the units this product is measured in.
Field |
Description |
|---|---|
Unit |
The main product unit that is used as default in the product details in the storefront and the acceptable precision (number of digits after the decimal point) for it |
Additional Units |
The list of additional quantity units applicable for the product. For each unit, the following information is displayed:
|
Inventory
This section contains information related to the tracking of the product inventory.
Field |
Description |
|---|---|
Inventory Status |
Whether the product is in stock, out of stock, or discontinued. |
Managed Inventory |
The inventory management method.
|
Inventory Threshold |
A minimum quantity of the product that is treated as ‘in stock’. When a product quantity drops below this value, the product is considered to be out of stock. |
Backorders |
Defines whether backorders are accepted. The feature is only available in the Enterprise edition.
|
Decrement Inventory |
Whether the inventory is decremented upon order.
|
Minimum Quantity to Order |
A minimum quantity that a buyer or sales person can claim in the RFQ, a customer order, quote, or a shopping list. |
Maximum Quantity to Order |
A maximum quantity that a buyer or sales person can claim in the RFQ, a customer order, quote, or a shopping list. |
For more information on inventory management, see Inventory.
Price Attributes
This section presents additional price information that may be useful for determining the product pricing strategy. Manufacturer’s suggested retail prices (MSRP) and minimum advertised prices (MAP) for the product are the most common examples of such information.
For more information, see the Price Attributes topic.
Product Prices
In this section, you can find information on the prices set for the product. You can see in which currency a price is set, for which unit of measurement and quantity, and the price list it is stored in.
Click the View icon at the end of the row to open the corresponding price list.
Shipping Options
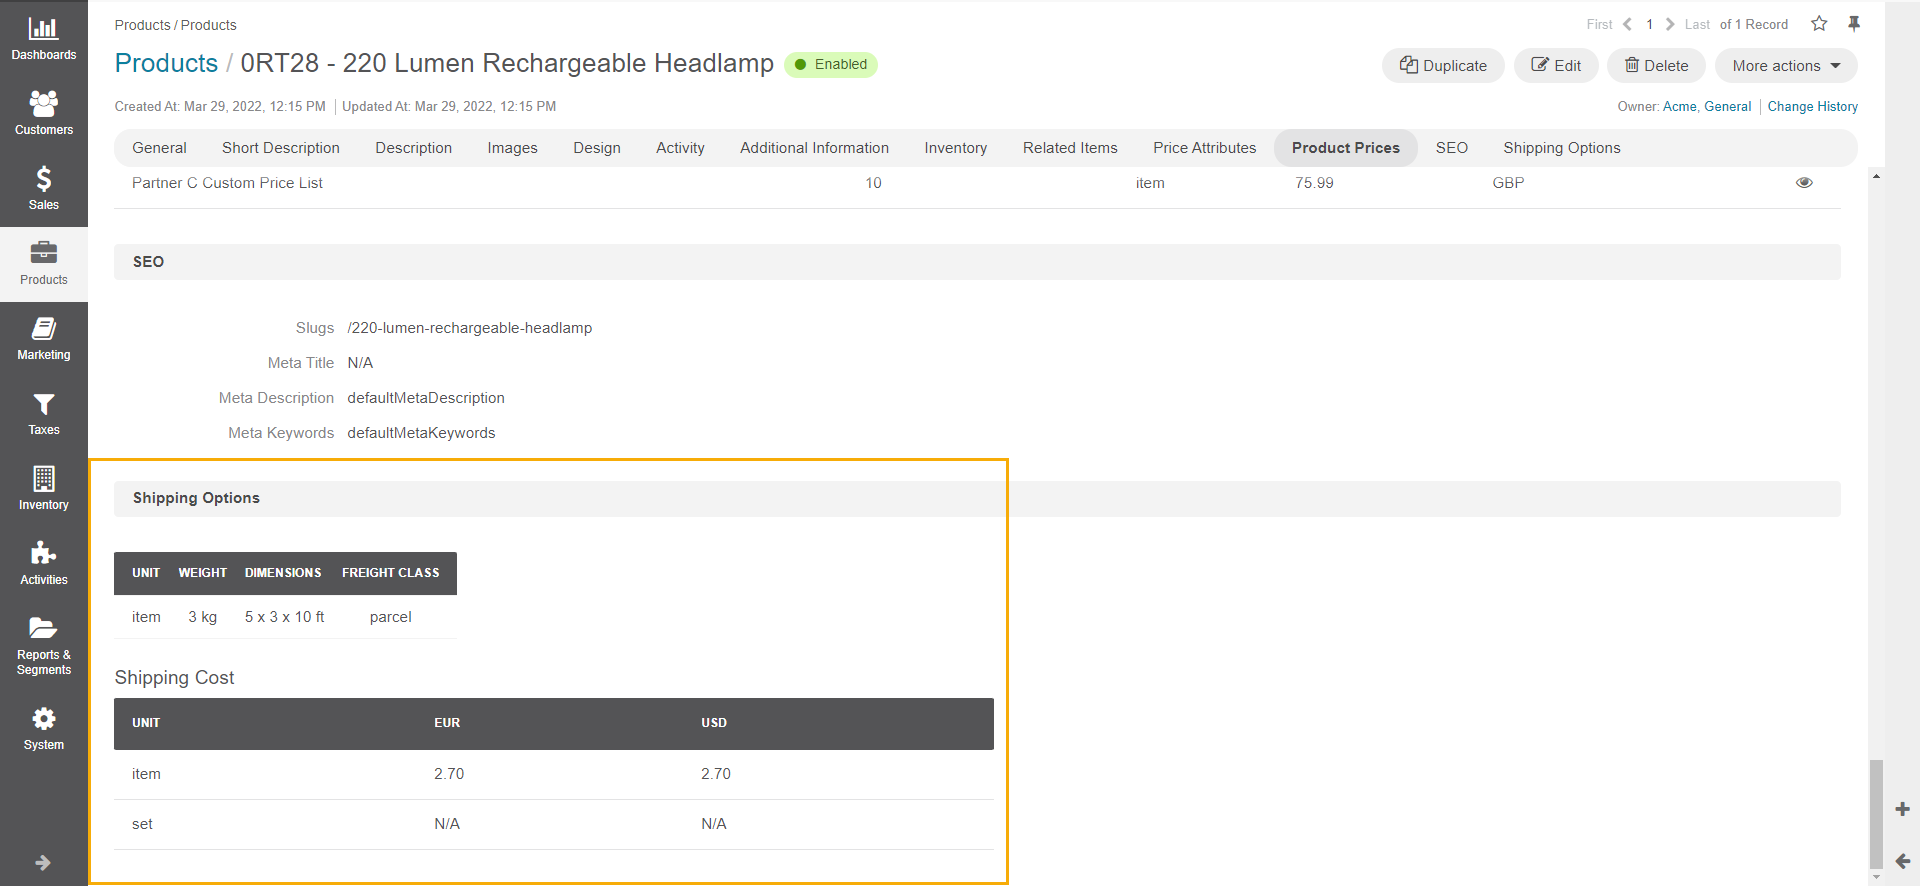
This section presents information about package weight, dimensions, freight class, shipping cost, price attribute with selected currency, and unit options.

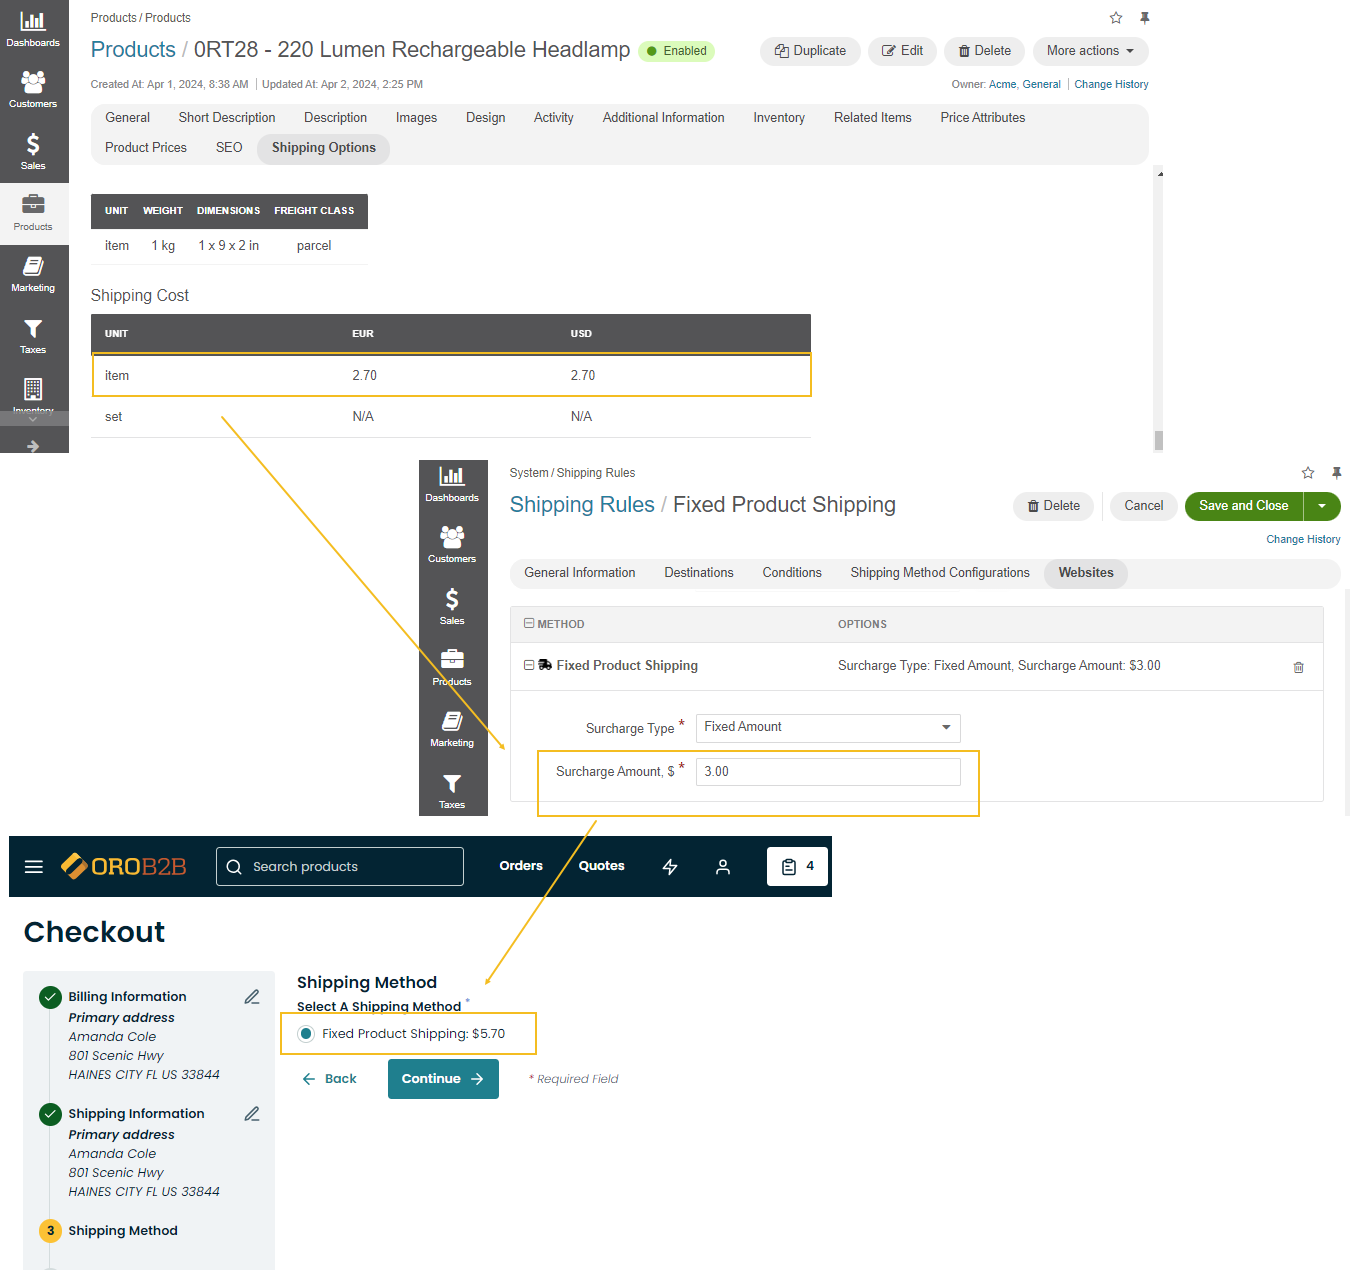
Shipping cost can work in conjunction with a shipping method, such as Fixed Shipping Cost. For example, if the shipping cost for a product is set to $2.70 and the surcharge configured for the Fixed Shipping Cost shipping method is $3, then the shipping charge at checkout will equate to $5.70.

Design
This section presents information about the template used to render the product page in the storefront.
For more information, see the Manage Product Page Design with Page Templates topic.
SEO
There is information on how the product front-store web page is optimized for the search engines.
Field |
Description |
|---|---|
Slugs |
A URL slug that is used to build a human-readable URL for the product page in the storefront. |
Meta Title |
A meta title is what is seen by search engine users and helps search engines to index the page. |
Meta Description |
A meta description summarizes the page content. Search engines show a meta description in search results when the searched phrase is found in the description. |
Meta Keywords |
Meta keywords are search terms that help search engines understand what the topic of the page is and find the page. |
Activity
This section contains information about the activities related to the product. By default, the Product entity has only the Note activity enabled.
You can filter activities by type and by date (e.g., an exact date, or a date range that covers the activity date) and browse them from the newest to the oldest and vice verse.
You can see who started the activity, its type, name and description, when it was created, and a number of comments made on it.
Click the activity to see detailed information about it.

To edit the activity, click the More Options menu at the end of the row and click Update Note. In the dialog that appears, make required changed and then click Save.
To delete the activity, click the More Options menu at the end of the row and click Delete Note. In the confirmation dialog, click Yes, Delete.
You can add and delete an activity context.
To add a context to the activity, click the More Options menu at the end of the row, and then click Add Context. In the Add Context Entity dialog, choose the desired context by clicking on it.
To delete a context from the activity, click the x icon next to the context you want to remove.
You can add a comment under a particular activity. To do this: Click the activity to expand it and click Add Comment. In the Add Comment dialog, type your message. Use the built-in text editor to format your comment. You can also attach a file to your comment. For this, click the Upload link in the dialog and locate the required file. When the comment is ready, click Add.
To edit or delete a comment, click the More Options menu next to it and click the Edit or Delete icon correspondingly.
For more information about activities, see the Activities guide.
Additional Information
There is a list of attachments related to the product in this section.
To view or download an attachment, click the file name.
To edit an attachment, click the Edit icon at the end of the row.
To delete an attachment, click the Delete icon at the end of the row.
To delete multiple attachments, select checkboxes in front of the files you want to delete, click the More Options menu at the end of the list header and then click Delete.
Business Tip
Searching for digital transformation examples in manufacturing? In our post, you’ll find business cases and digitization success stories.