Important
You are browsing upcoming documentation for version 7.1 of OroCommerce, scheduled for release in 2027. Read the documentation for the latest LTS version to get up-to-date information.
See our Release Process documentation for more information on the currently supported and upcoming releases.
Manage RFQs
Hint
This section is part of the RFQ and Quote Management topic that provides a general understanding of the RFQ and quote concepts in OroCommerce.
From the Requests for Quote page, you can perform the following actions:
You can also engage RFQs in various activities, such as adding a note, sending an email or adding an event to an RFQ.

Create a Quote from an RFQ
To create a new quote from a specific RFQ:
Navigate to Sales > Request for Quotes in the main menu.
Find the required RFQ and click on it.
Click Create Quote.
See more information about creating a quote from the RFQ in the relevant Create a Quote from the RFQ topic.
Additionally, you can perform the following actions by clicking on the corresponding buttons on the far right of the Quote page:
Click to edit the quote.
Click to clone the quote.
Click
 to delete it.
Click Send to Customer to send a notification email message the customer user regarding their quote.
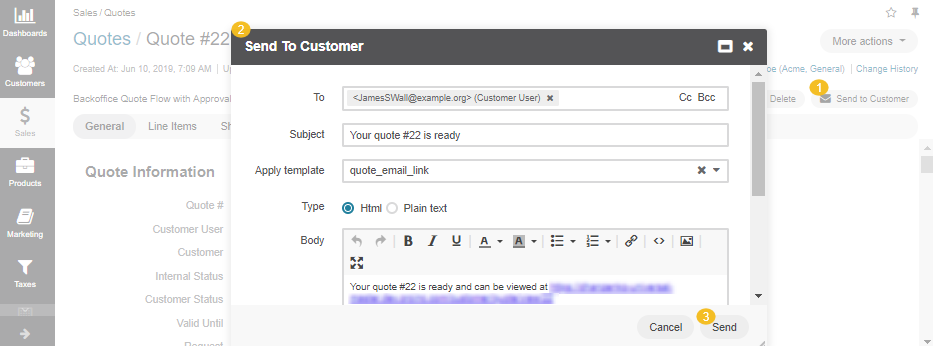
Once the message is prepared and sent, the quote backoffice status is changed to Sent to customer.
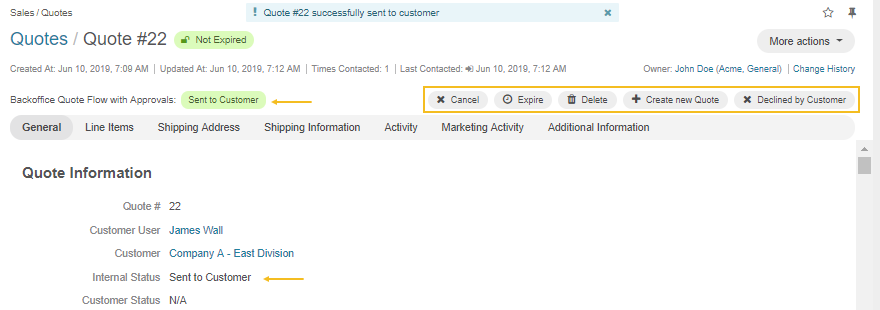
From this page, you can cancel or expire the quote, delete the quote, and the back-office status will change to Closed.
Additionally, you can create a new quote for the customer, or if the customer declined the offer, you can mark it as Declined by Customer.
For more detailed information, please check the Quote Management Flow to learn additional details on the steps and actions available at every step.
Create an Order from an RFQ
To create an order from an RFQ:
Navigate to Sales > Request for Quotes in the main menu.
Find the required RFQ and click on it.
Click Create an Order at the top right.
Note
You can find more information on how to create an order from an RFQ, add additional products, add offers specifically for the customer, edit or add shipping and billing information, calculate shipping options, add discounts, and more in the relevant Create an Order from an RFQ topic.
The More Actions menu enables users to add notes to the order, send an email to the customer or add an event. An event could be used to schedule a call or a meeting.

Edit an RFQ
To edit an RFQ:
Navigate to Sales > Request for Quotes in the main menu.
Find the required RFQ and click on it.
Click Edit at the top right of the page.
Check the fields required in the General section and modify the information, if necessary.
Add notes and assignees.
Adjust target prices and quantity and add additional products.
Click Save and Close at the top right to save all the changes made.
Use RFQ Transitions
Note
The workflow transitions are available for customers and sales representatives when RFQ Submission Flow and RFQ Management Flow workflows are activated in the system configuration.
To control RFQ using transitions exposed by RFQ workflows (RFQ Submission Flow and RFQ Management Flow):
Navigate to Sales > Request for Quotes in the main menu.
Find the required RFQ and click on it to open RFQ details.
Now you can perform the following actions with an RFQ in the back-office:
Once a customer submits the RFQ in the storefront, it becomes immediately available in the RFQ back-office in the Open status.
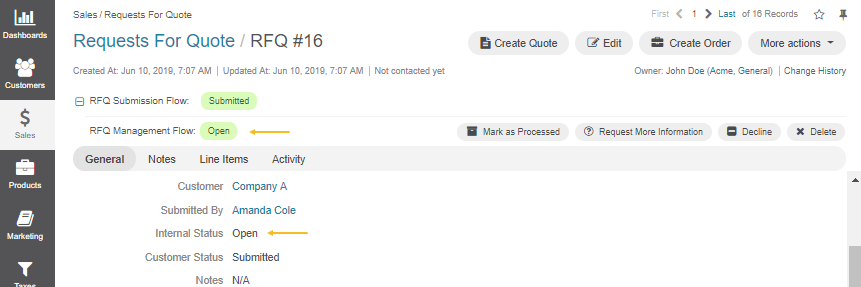
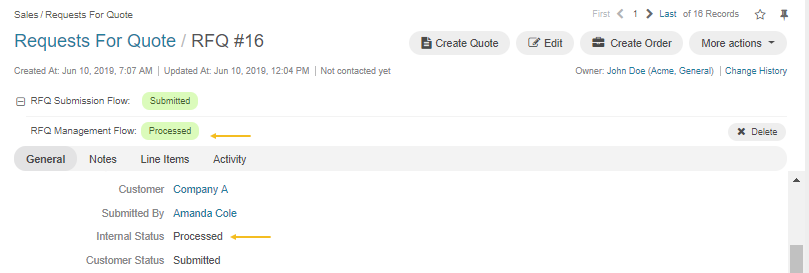
Mark the RFQ as Processed
Click Mark as Processed on the RFQ page to mark the RFQ as processed. This will notify the assigned sales representative that the quote is being processed.
Marking RFQ as processed will change its internal status to Processed.
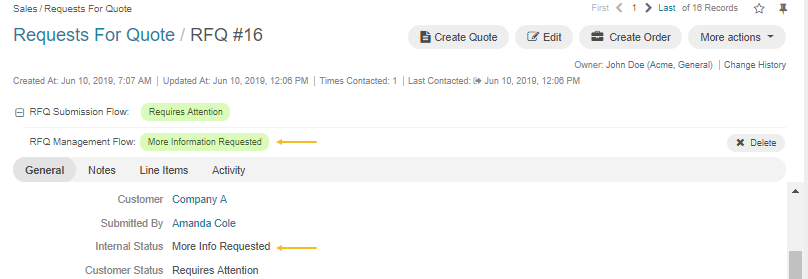
Request More Information from the Customer
To request more information from a customer:
Click Request More Information to open a text dialog for you to communicate with the customer.
Enter a comment.
Click Submit.
The customer will be notified by email and through the customer’s store account that more information is required.
The internal status should then change to More Information Requested, and the customer status should change to Requires Attention.
Once the customer responds to the request for additional information, the assigned sales representative is notified that the customer has provided the requested information and can continue processing the request.
The internal status changes back to Open, and the customer status changes back to Submitted.
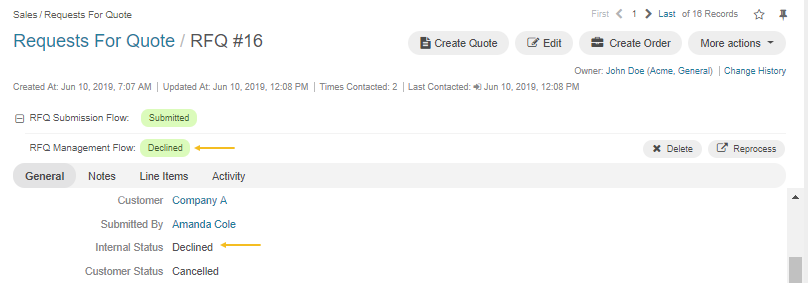
Decline an RFQ
To decline the RFQ, click Decline on the RFQ page.
This will change the internal status to Declined and the customer status to Cancelled.
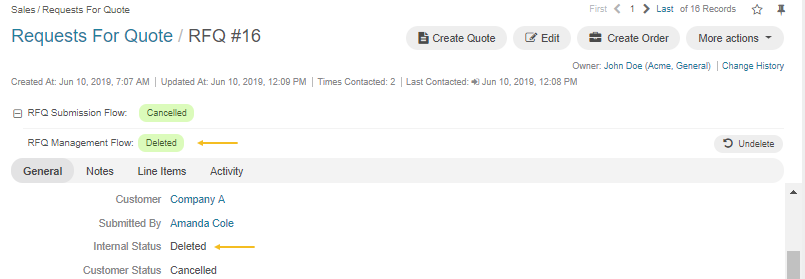
Delete an RFQ
Click Delete on the RFQ page to delete the RFQ from the list.
The RFQ will be removed from the customer user’s account.
The internal status will be changed to Deleted.