Important
You are browsing upcoming documentation for version 7.1 of OroCommerce, scheduled for release in 2027. Read the documentation for the latest LTS version to get up-to-date information.
See our Release Process documentation for more information on the currently supported and upcoming releases.
Create an Opportunity
Opportunities can be related to any customer type and customers introduced by various third-party extensions. They can also be related directly to accounts. This is the most straightforward application setup if you do not need to track multi-channel sales. You can always enable the additional complexity of multiple customer channels when the need arises. You can create opportunities from all related entities (e.g., from OroCommerce customer, account), by converting a lead to an opportunity and by creating an opportunity manually.
Create an Opportunity from a Related Entity
OroCommerce Customer
To create an opportunity from a Commerce customer view page, ensure you have the related features enabled in the system configuration.
Navigate to Customers in the main menu, and click Commerce Customers.
Select your customer and open their view page.
Click More Actions in the top right corner.
Click Create Opportunity in the drop down.
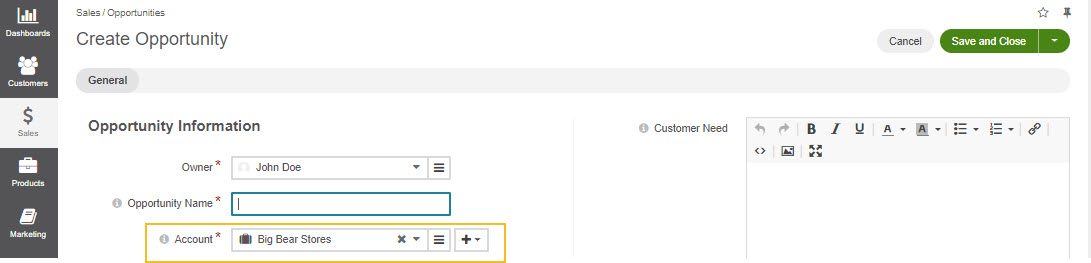
A Create Opportunity form will open with an Account field pre-filled in with your selected Commerce customer.


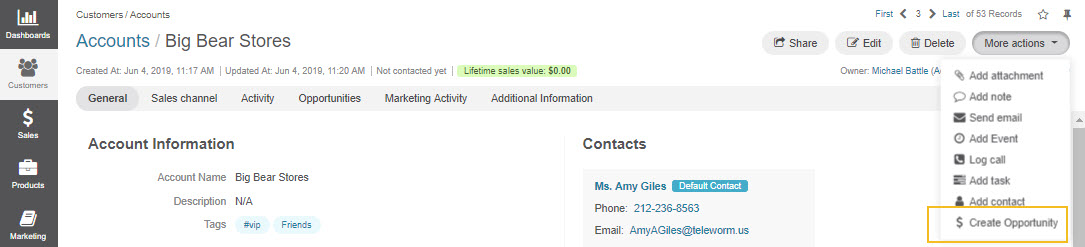
Account
To create an opportunity directly from an account view page:
Navigate to Customers > Accounts in the main menu.
Click on the required account in the grid.
Navigate to More Actions in the top right corner.
Select Create Opportunity from the list.
A Create Opportunity form will open with an Account field already filled in with your selected account.
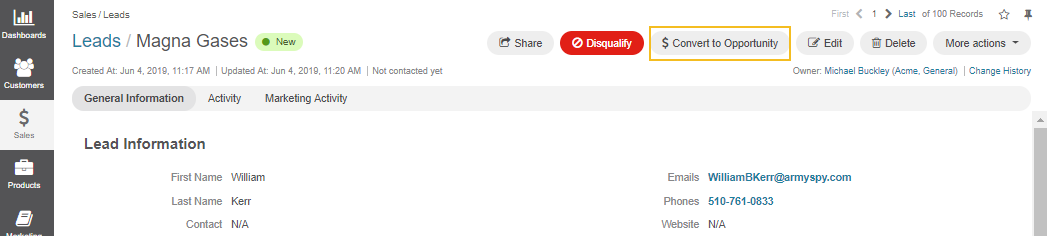
Convert a Lead to Opportunity
As soon as a lead is ready to be qualified, you can convert it into an opportunity:
Navigate to Sales > Leads in the main menu.
Open the lead from the grid.
Click Convert Lead to Opportunity on the lead page.
Provide details in the Opportunity Information section.
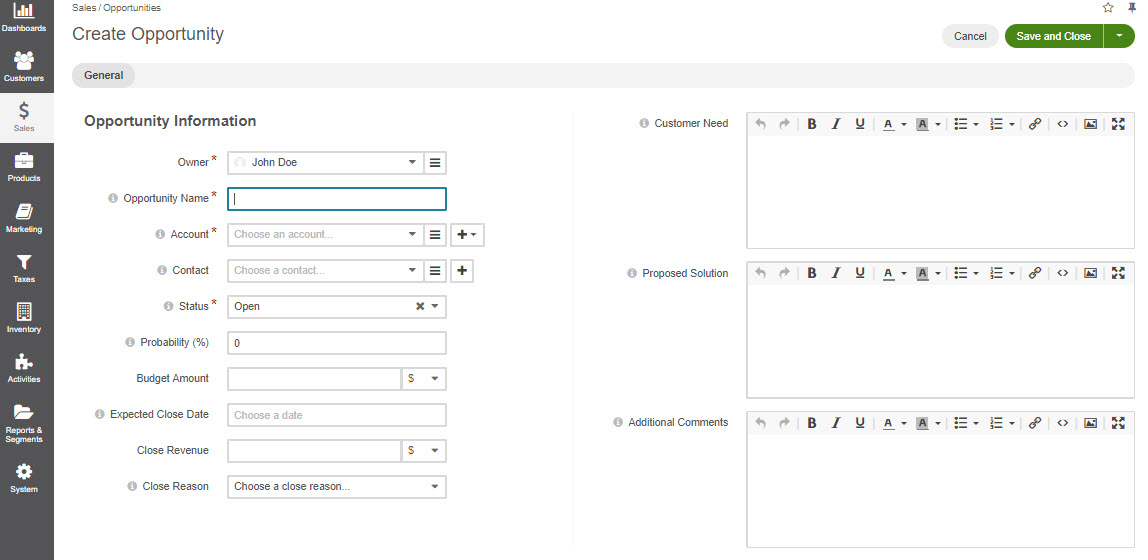
Owner — Limits the list of users who can manage the opportunity to users, whose roles allow managing opportunities assigned to the owner (e.g., the owner, members of the same business unit, system administrator, etc.). By default, the user creating the record is chosen.
Opportunity Name — The name used to refer to an opportunity in the system.
Account — Allows to select or create a customer account to which the opportunity will be related.
The account field will be filled in with the company name if such a name was provided when creating a lead.
To create a new account, click + at the end of the Account field.
Alternatively, use write-in functionality to enter a new account name. Type the name in the field and click Add New Account.
Contact — The person on the customer side who is directly related to the opportunity.
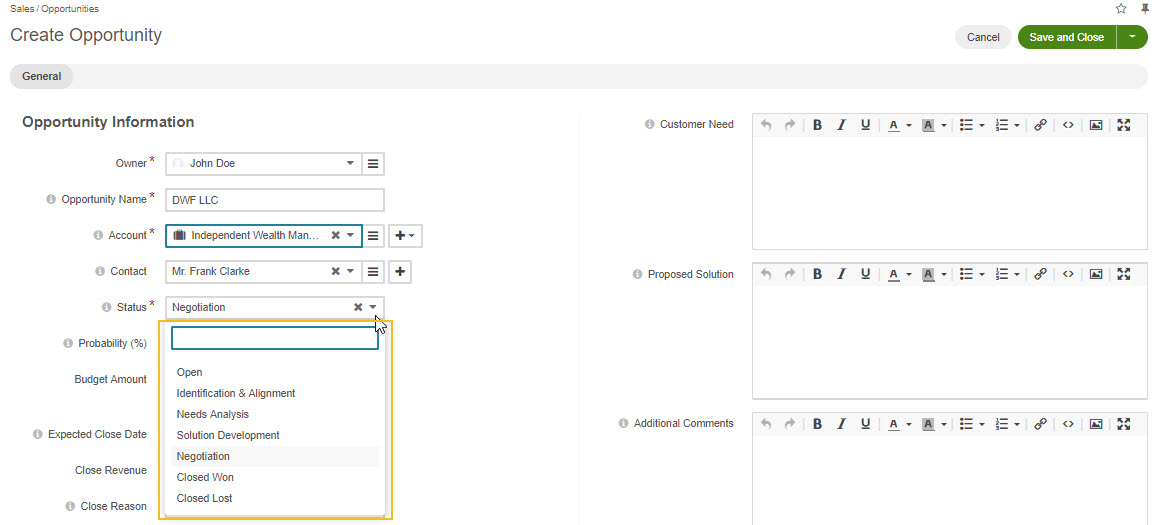
Status — A stage in the process of a sale. Open, Closed Won, and Closed Lost are non-deletable system statuses. An admin can add and customize other statuses in the system configuration settings.
Probability — The perceived probability of an opportunity being successfully closed. Probability is related to Status. For each status, a certain percentage of probability is pre-configured automatically. You can configure percentage for each status in the system configuration.
Budget Amount — Budget amount is the discussed potential deal value. For the Oro Application Enterprise Edition, you can select the currency of the deal. The currencies available in the dropdown will depend on your system configuration. You can find more on multi-currency functionality further below this guide.
Expected Close Date — Expected close date of the deal.
Close Revenue — The amount actually received as the result of the deal. For example, if the predicted budget was $10 000, but the result of the deal was $500 lower than the budget amount, the close revenue would constitute $9 500.
Close Reason — The reason for closing the deal, e.g., won, outsold, canceled, etc.
Customer Need — Enter customer needs if known.
Proposed Solution — Enter your offers and/or solutions for the customer if any were proposed.
Additional comments — Enter additional comments if necessary.
Provide the details in the New Contact Information section. Since the lead has fulfilled its purpose and is no longer required, a new contact will be created based on lead data entered in this form. It is possible to enter multiple phones, emails, and addresses for an opportunity. You can choose which phone, email, or address is primary. You can also delete the entered phone, email, or address by clicking X on the right of the corresponding fields.
Note
Within the opportunity grid, only one phone, email, and address are displayed even if multiple phones, emails, and addresses are added.
Click Save and Close to save the opportunity.
See more information in the Lead Qualification topic.
Create an Opportunity Manually
To create an opportunity manually:
Navigate to Sales > Opportunities in the main menu.
Click Create Opportunity in the top right corner.
Provide the following information:
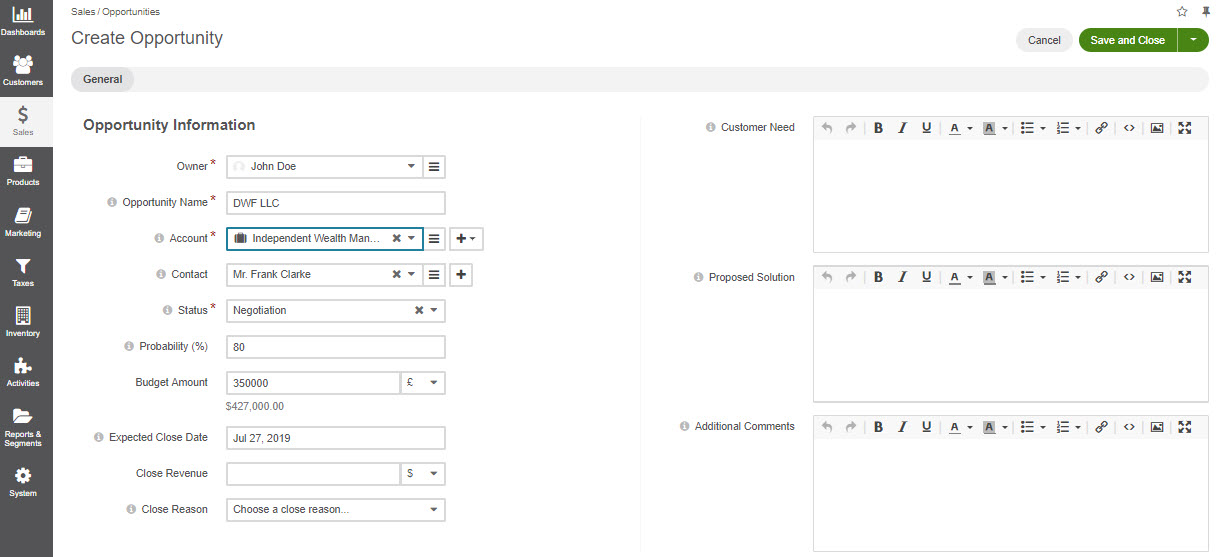
Owner — Limits the list of users who can manage the opportunity to users whose roles allow managing opportunities assigned to the owner (e.g., the owner, members of the same business unit, system administrator, etc.). By default, the user creating the record is chosen.
Opportunity Name — The name used to refer to an opportunity in the system.
Account — Allows to select or create a customer account the opportunity will be related to.
The account field will be filled in with the company name if such a name was entered when creating a lead.
To create a new account, click + at the end of the Account field.
Alternatively, use write-in functionality to enter a new account name. Type the name in the field and click Add New Account.
Contact — A person on the customer side who is directly related to the opportunity.
Status — A stage in the process of a sale. Open, Closed Won, and Closed Lost are non-deletable system statuses. An admin can add and customize other statuses in the system configuration settings.
Probability — The perceived probability of an opportunity being successfully closed. Probability is related to Status. For each status, a certain percentage of probability is pre-configured automatically. You can configure percentage for each status in the system configuration.
Budget Amount — A budget amount is the discussed potential deal value. For the Oro application Enterprise Edition, you can select the currency of the deal. The currencies available in the dropdown will depend on your system configuration. You can find more on multi-currency functionality further below this guide.
Expected Close Date — The deal’s expected close date.
Close Revenue — The amount actually received as the result of the deal. For example, if the predicted budget was $10 000, but the result of the deal was $500 lower than the budget amount, the close revenue would constitute $9 500.
CLose Reason — The reason for closing the deal, e.g., won, outsold, canceled, etc.
Customer Need — Enter customer needs if known.
Proposed Solution — Enter your offers and/or solutions for the customer if any were proposed.
Additional comments — Enter additional comments if necessary.