Important
You are browsing upcoming documentation for version 7.1 of OroCommerce, scheduled for release in 2027. Read the documentation for the latest LTS version to get up-to-date information.
See our Release Process documentation for more information on the currently supported and upcoming releases.
Manage Roles in the Storefront
Roles are predefined sets of permissions. In the Roles section, you can view, edit and create new roles to define the level of permissions and access to the actions and data in OroCommerce storefront for the users of a specific role.
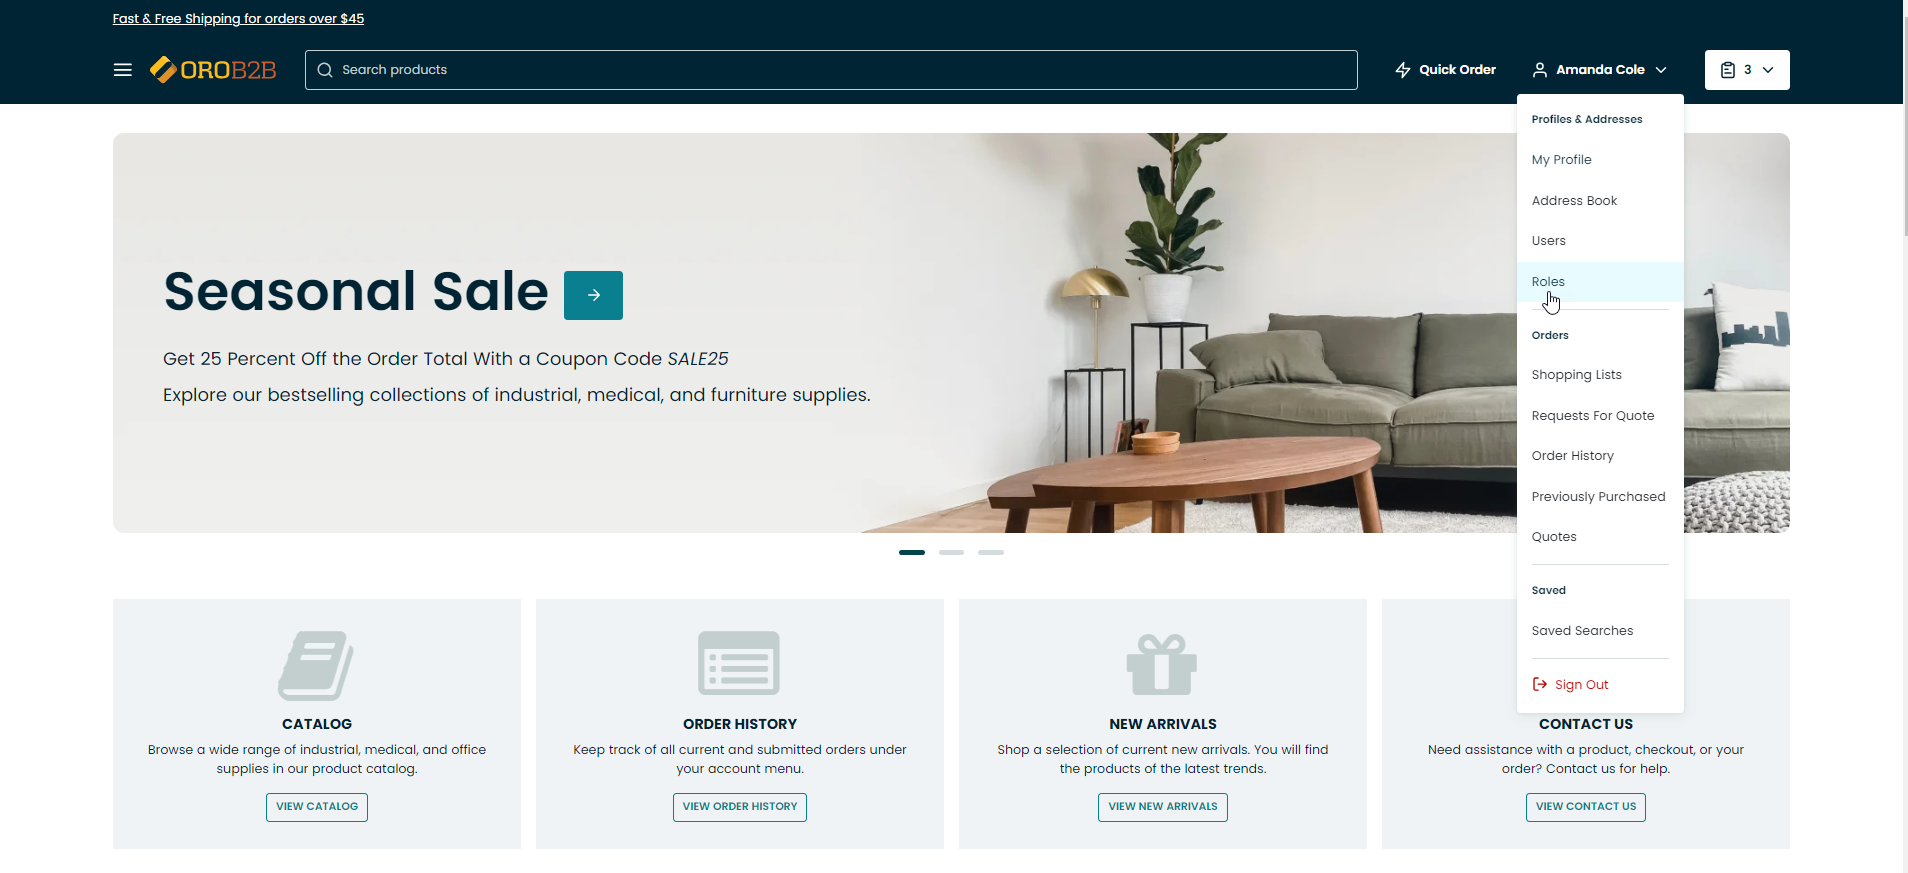
You can access the list of storefront roles in the menu under your profile name in the top navigation bar.
Roles Grid
On the All Roles page, you will be able to see the list of roles available in the system. By default, the following roles are predefined and available for every customer:
Administrator
Buyer
The roles table shows the following data:
Role
Type (Predefined, Customizable)
More Actions (View, Edit, Delete)
Within the table you have the following actions buttons available:
Refresh
 the view table.
Reset
 the view table to clear view table customization and return to default settings. Reset applies to all filters, records per page and sorting changes that you have made.
Manage
 table settings to define which columns to show in the table.
Manage filters
 .
.
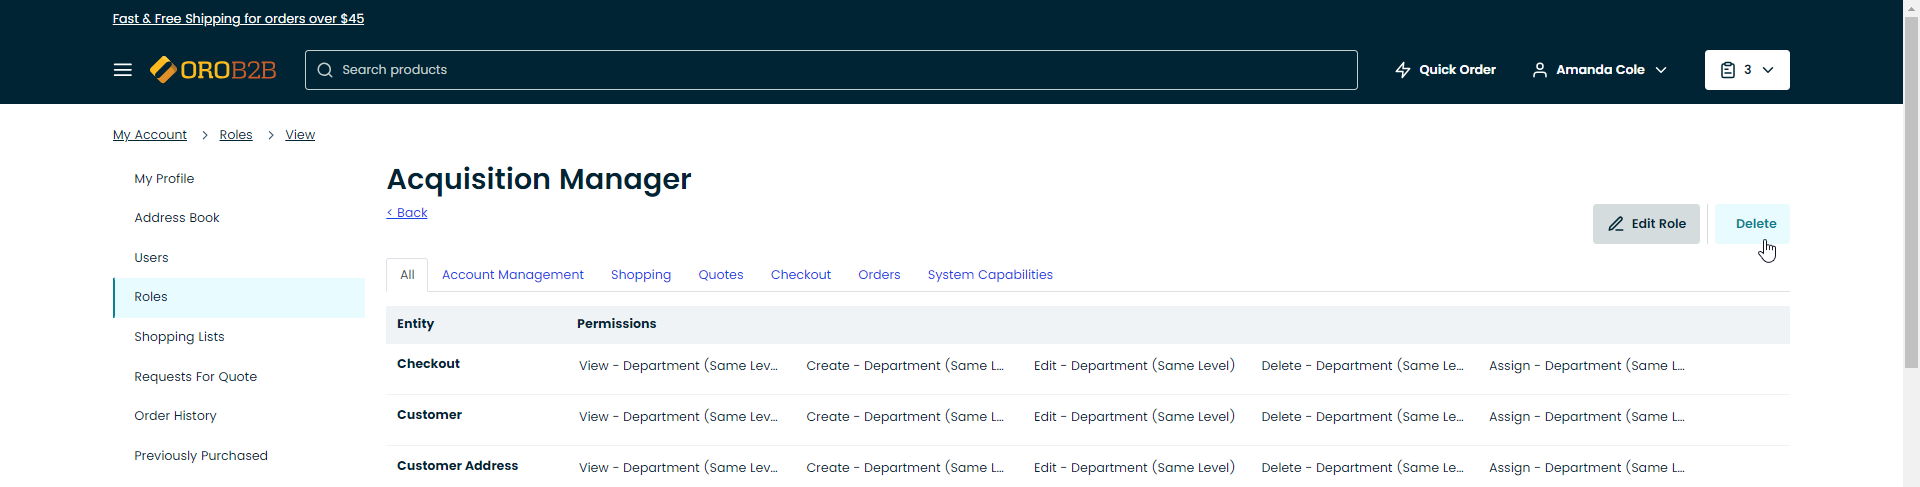
Role View Page
To open a specific role: click on the selected role in the view table.
To edit a specific role from its view page: click  Edit Role on the right of the page.
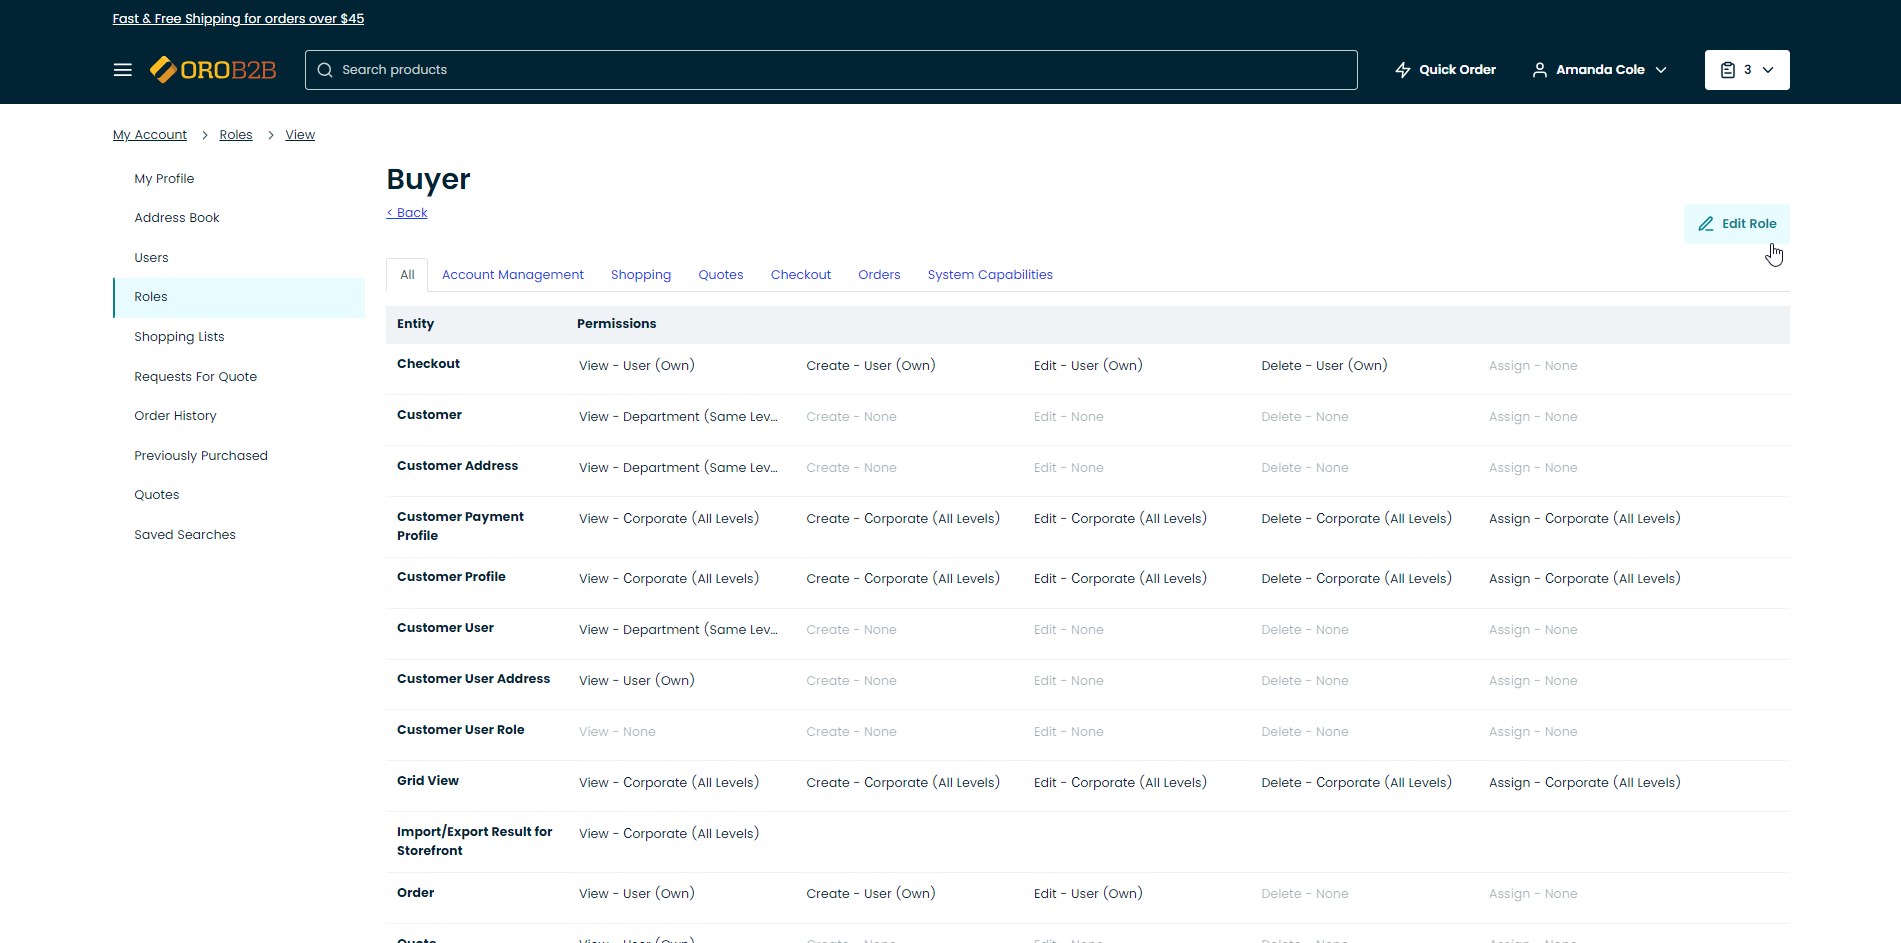
To delete a specific customizable role from its view page: click  Delete
Note
If the role is predefined, it cannot be deleted. Neither can it be deleted if it is assigned to a user/users. Reassign the assigned users to a different role to be able to delete it.
Create a New User Role
To create a new user role, click +Create Customer User Role on the top right of the page, next to the table name.
A form will emerge with the following data to provide:
Customer
Role Title
Access- and permissions-related settings
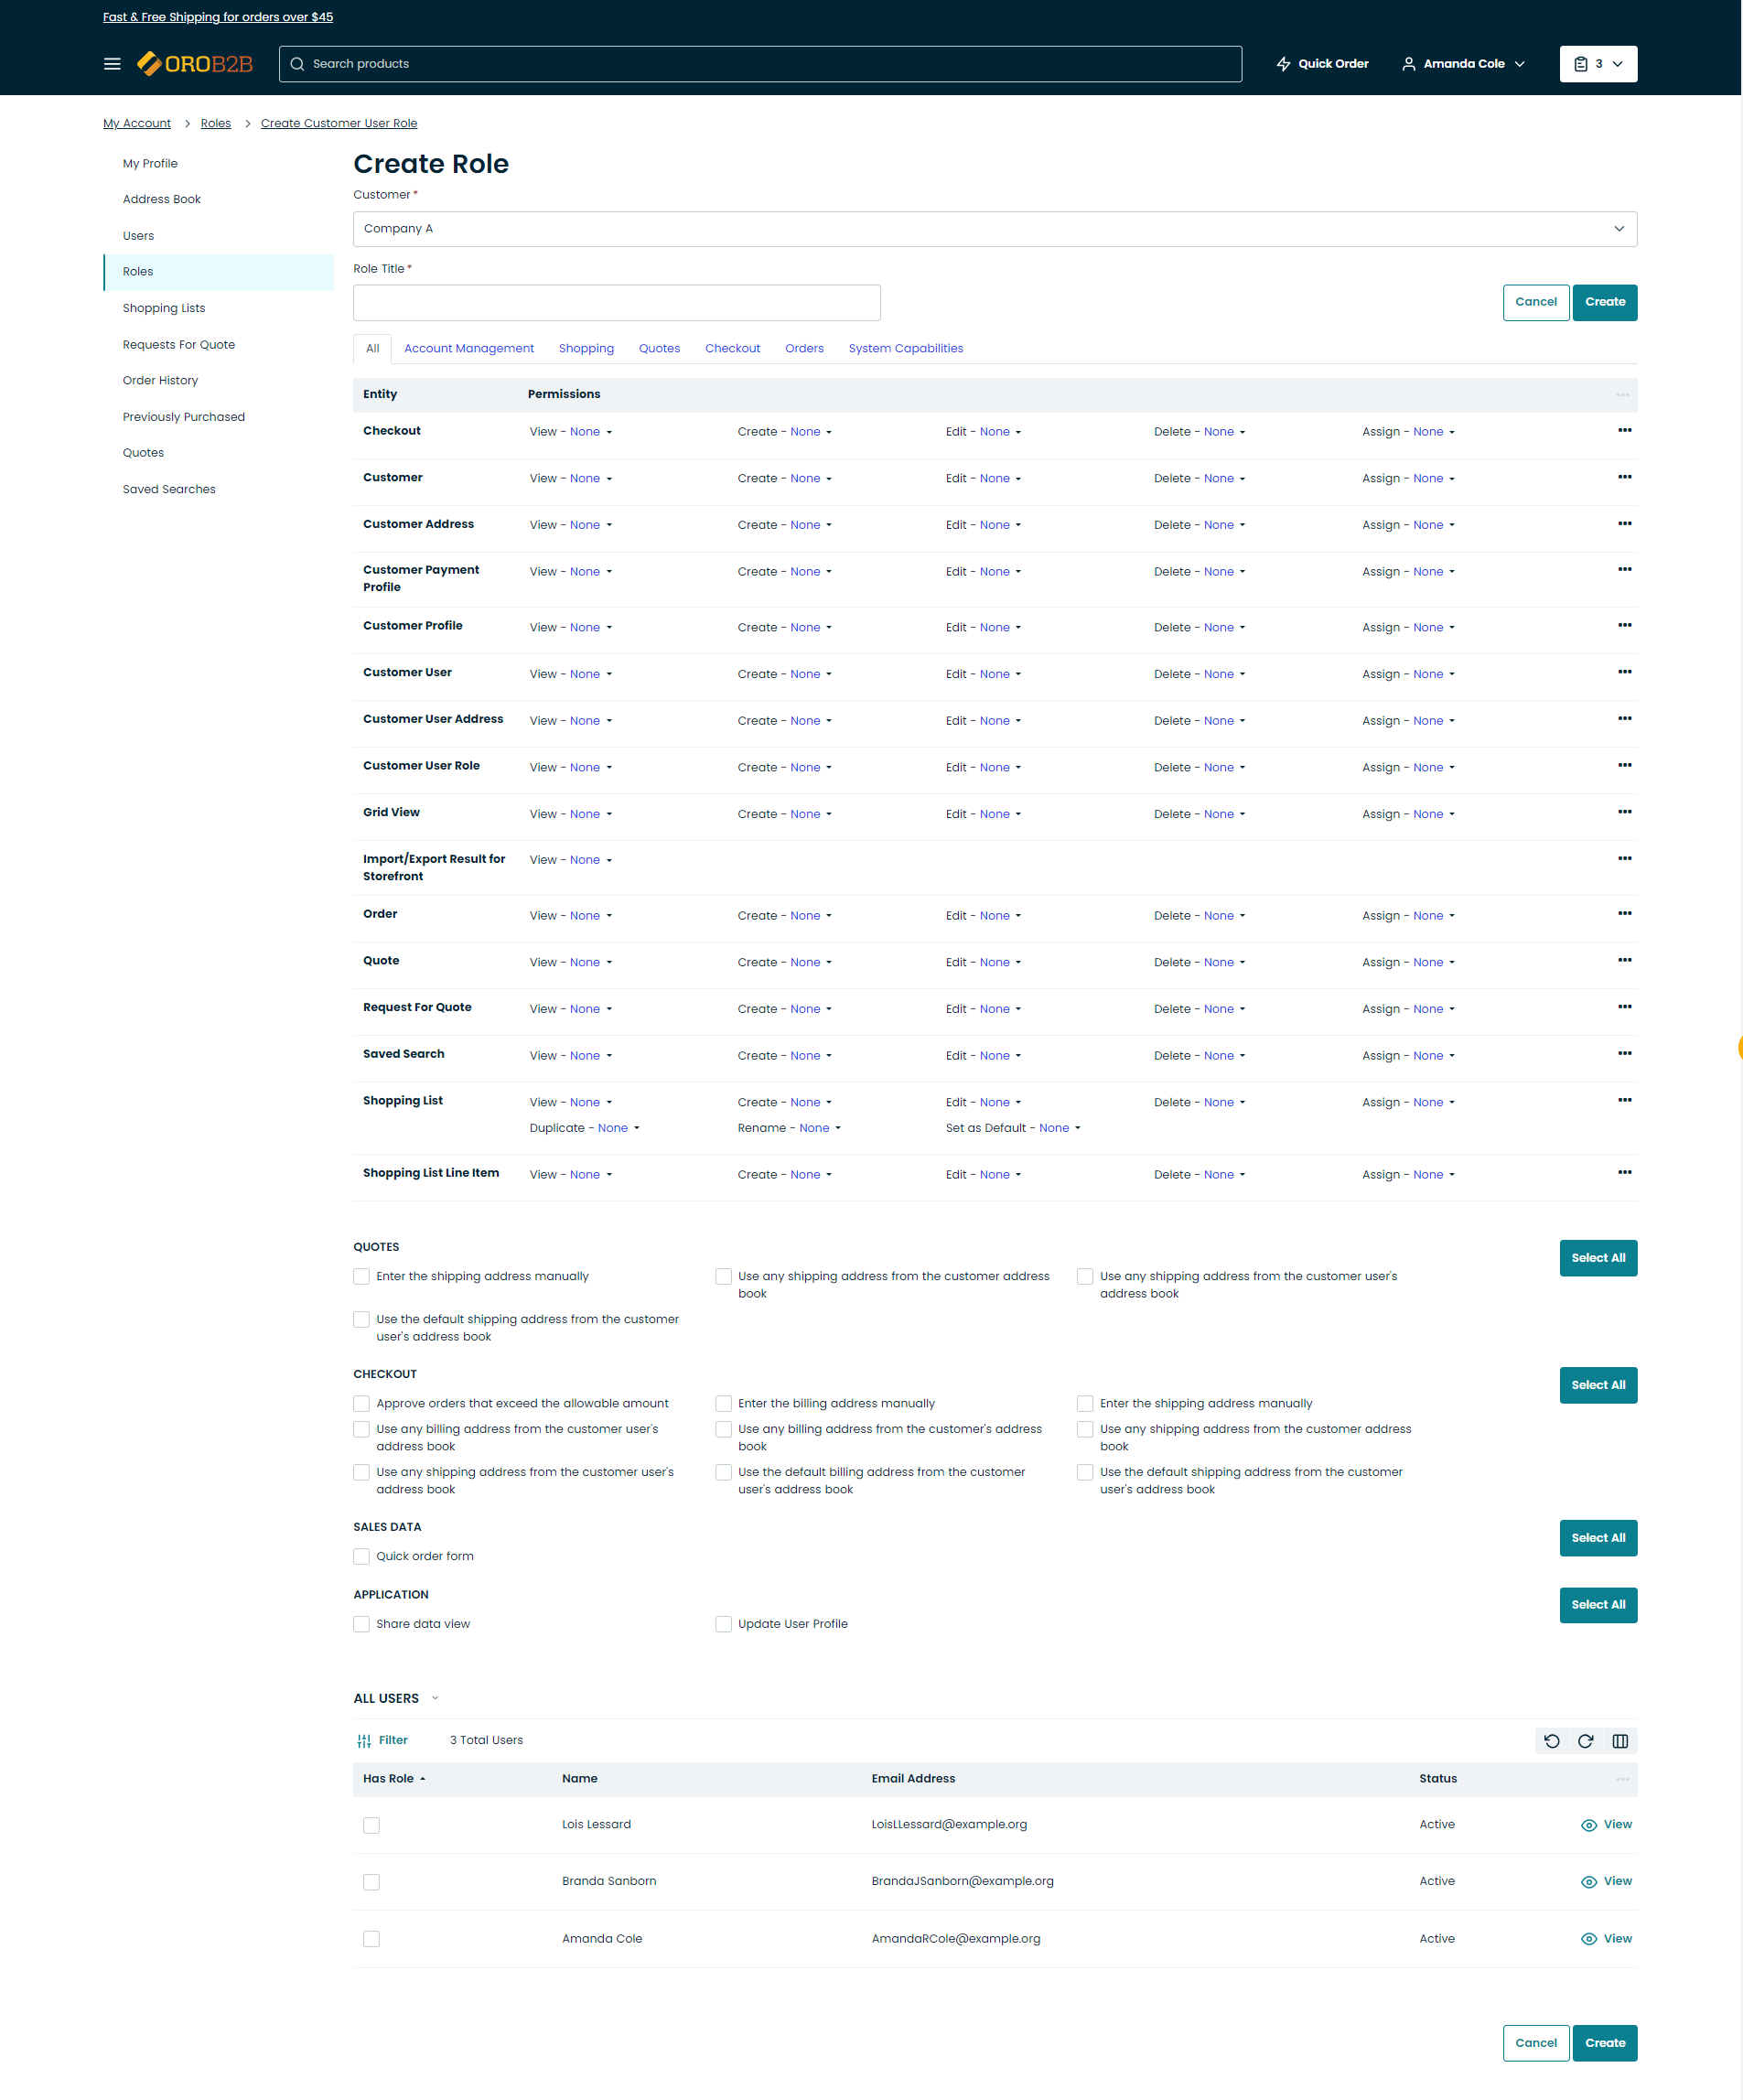
The following permissions are available:
Permission |
Level |
|---|---|
|
|
With the Customer User Role you can manage the following access- and permissions-related settings and capabilities:
Field |
Entities |
Capabilities (Checkboxes) |
|---|---|---|
All |
Address, Customer User, Customer User Address, Customer User Roles, Grid (Table) View |
Account Management:
Checkout:
Application:
|
Account Management |
Address, Customer User, Customer User Address, Customer User Role, Grid View |
|
Shopping |
Shopping List |
— |
Quotes |
Quote, Request For Quote |
— |
Checkout |
Checkout |
|
Orders |
Invoice, Order |
— |
System capabilities |
— |
Share Data View |
Note
Predefined roles cannot be edited directly. All the original data is copied so that you can save it as a new user role for your organization. All users will be moved from the original role to this new role after you click Save.
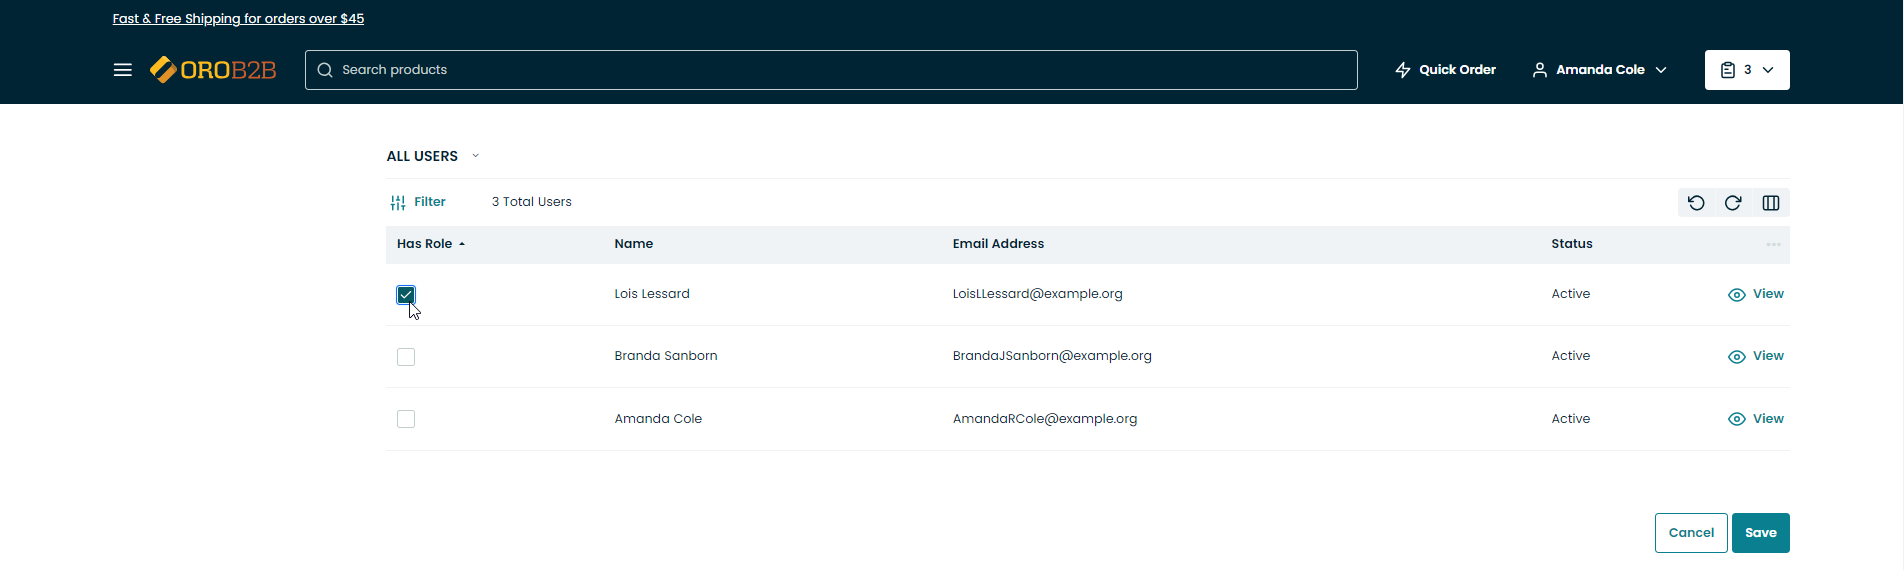
To apply a role to a specific user:
Scroll down to the bottom of the Edit Role page.
Enable the checkbox next to the selected user.
Click Save.