Important
You are browsing upcoming documentation for version 7.0 of OroCommerce, scheduled for release in 2026. Read the documentation for version 6.1 (the latest LTS version) to get up-to-date information.
See our Release Process documentation for more information on the currently supported and upcoming releases.
Manage Order History in the Storefront
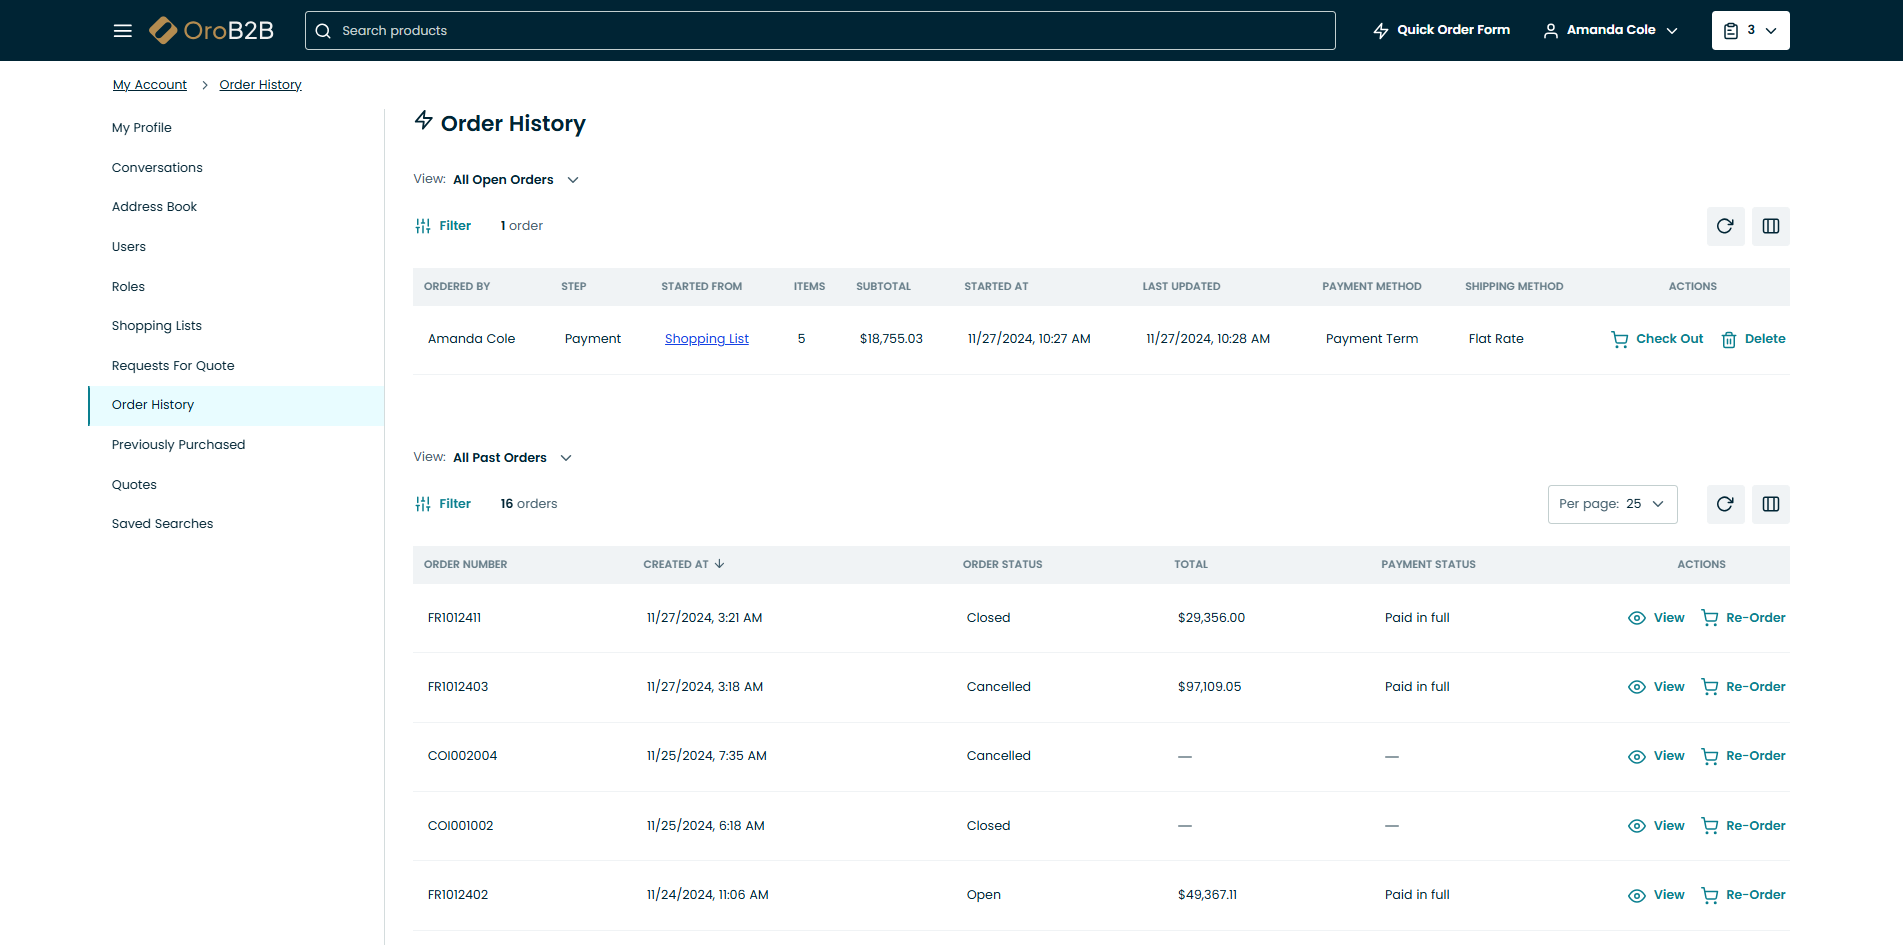
The Order History section stores the information on all open and submitted orders of registered users. Here, you can check the details on the order number, the date it was created, the address this order was shipped to, the total amount, the payment method and the payment status, and whether the order was created by a seller or not.

To open the Order History menu, open user menu and click Order History from the drop-down.
The Order History page contains two sections:
All open orders
All past orders
From the all open orders table, you can:
Click the order in the table to open it.
Click
Check Out at the end of the row to proceed to the checkout. You will be redirected to the ordering process page (the step where you left off).
From the all past orders table, you can:
Click
View at the end of the row to view an order or click the order to open it. To return to the Order History page, click Back to Orders List on the bottom left of the view page.
Click
Re-Order at the end of the row to submit the same order
Information displayed in the tables depends on the columns selected in the grid settings. Within each of the tables, you have the following action buttons available:
Refresh (to update the view table).
Reset (to clear view table customization and return to default settings. Reset applies to all filters, records per page and sorting changes that you have made).
Adjust (to define which columns to show in the table).
Filter the displayed orders (see more in Filters).
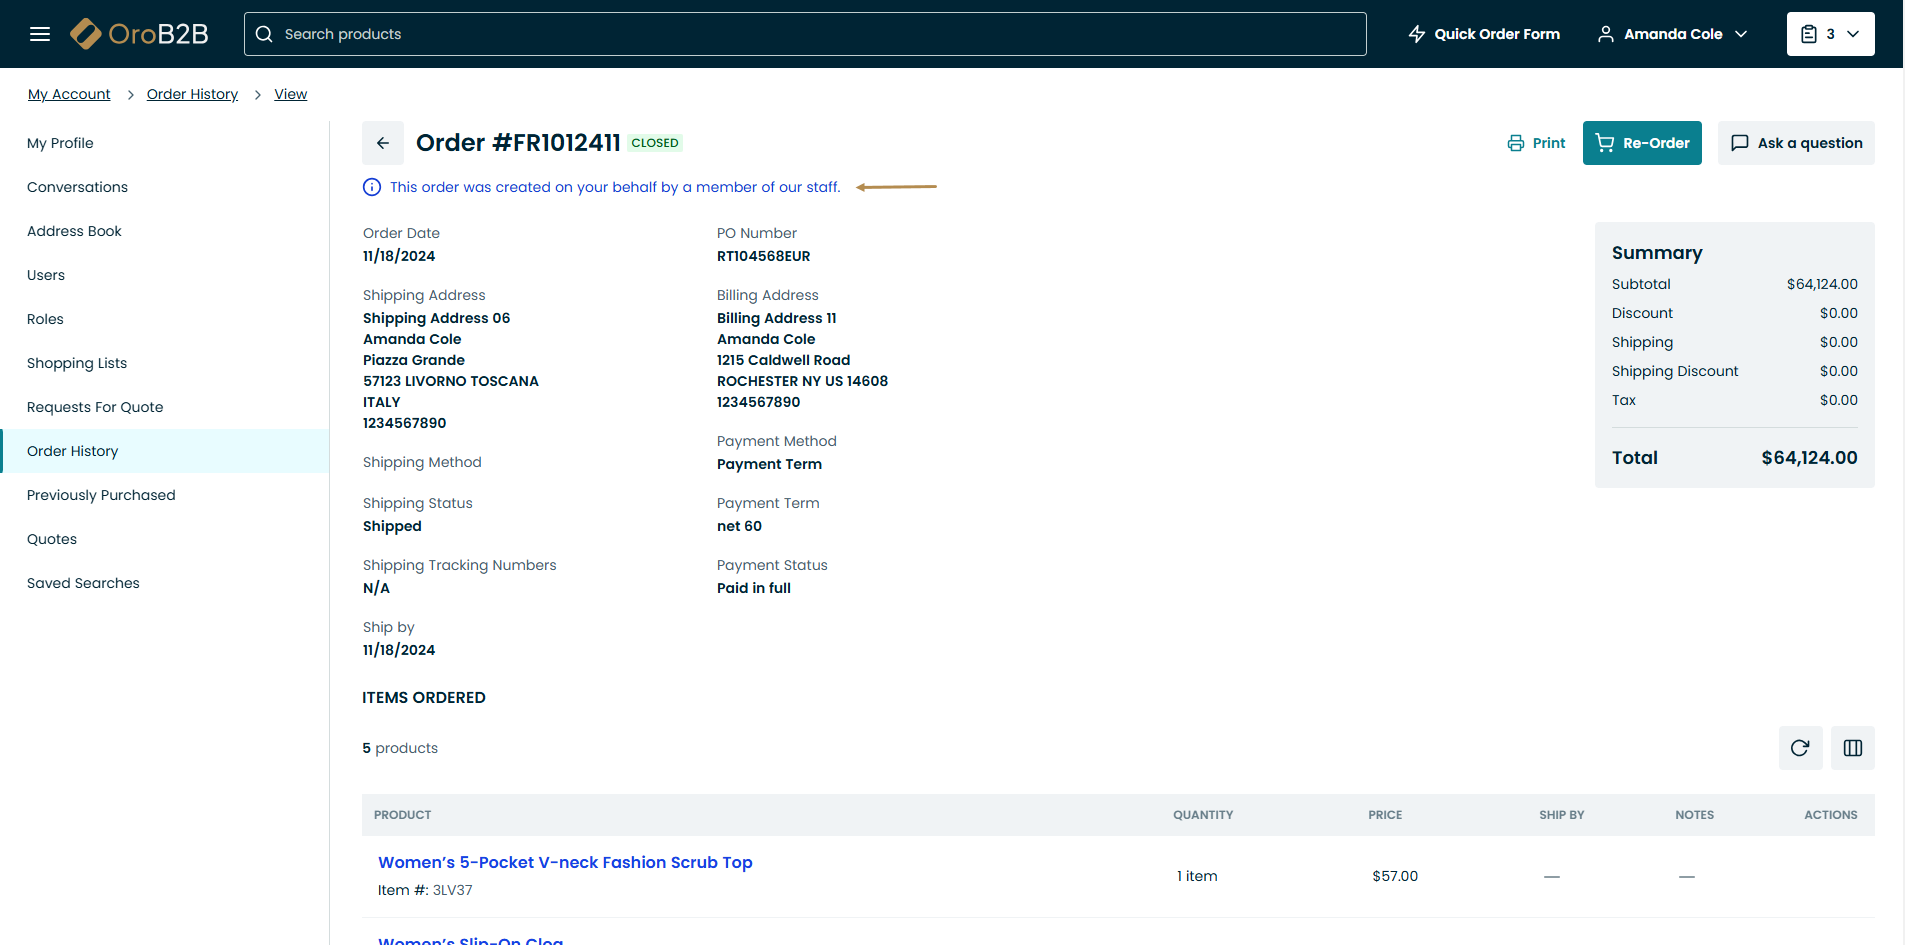
If the order was created on behalf of the buyer, this will be reflected on the order view page with the following note: This order was created on your behalf by a member of our staff.

You can also start a conversation by clicking Ask a question on the order view page.
Note
More details on how to review ordered items, billing and shipping information, and re-order products from the previous orders are described in the Orders section of the Storefront guide.