Important
You are browsing upcoming documentation for version 7.1 of OroCommerce, scheduled for release in 2027. Read the documentation for the latest LTS version to get up-to-date information.
See our Release Process documentation for more information on the currently supported and upcoming releases.
Manage My Profile in the Storefront
Once you are logged in to the OroCommerce storefront, you can access your profile by clicking on your name on the top navigation bar, and selecting My Profile from the drop-down
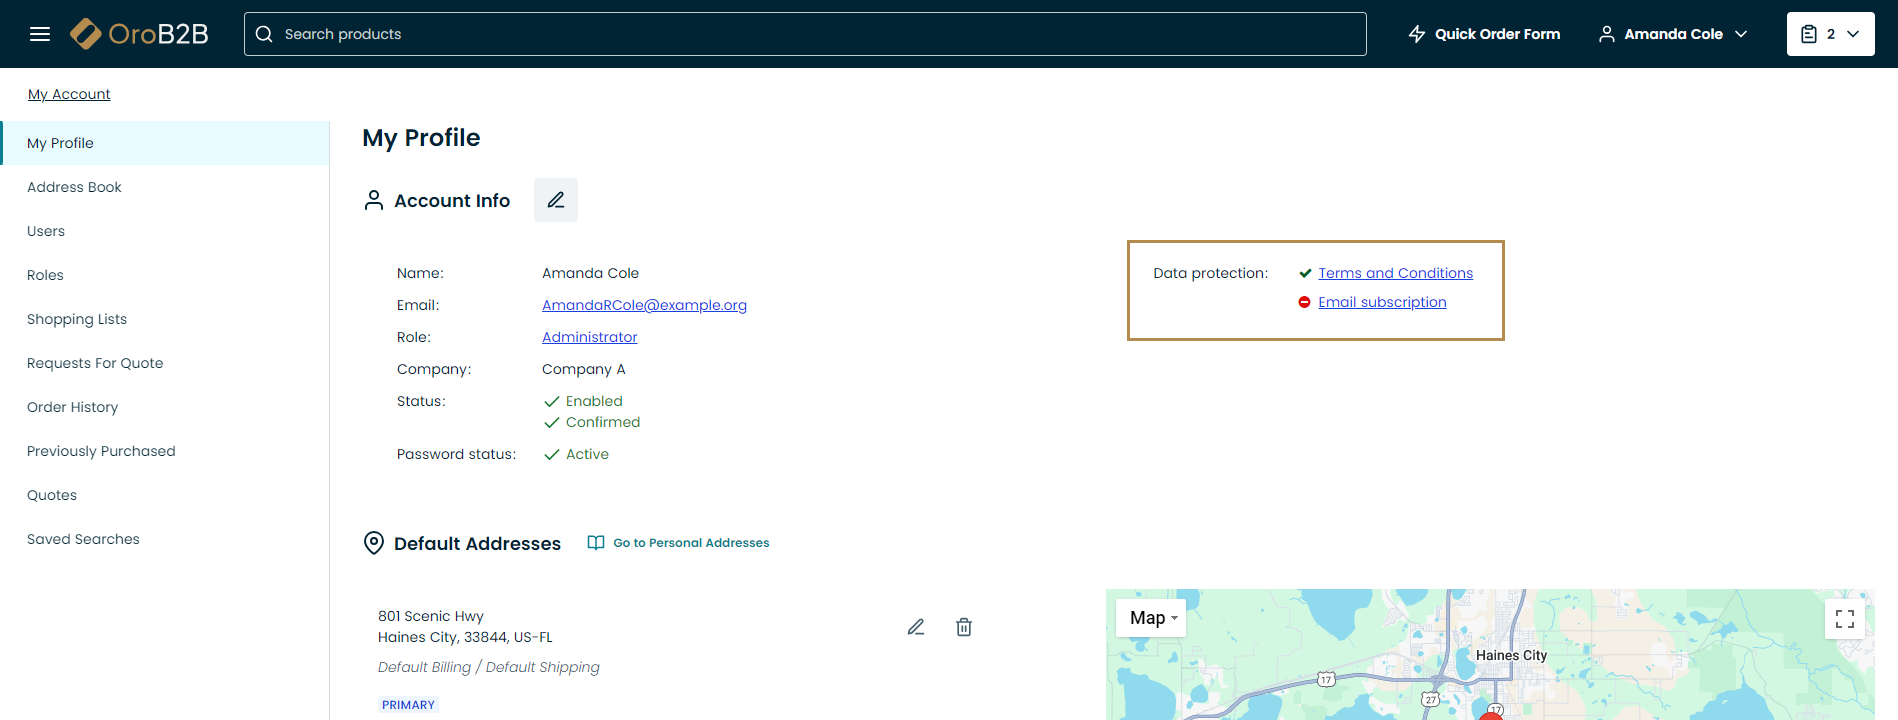
My Profile has three sections, Account Info, Sign In & Security, and Default Addresses.
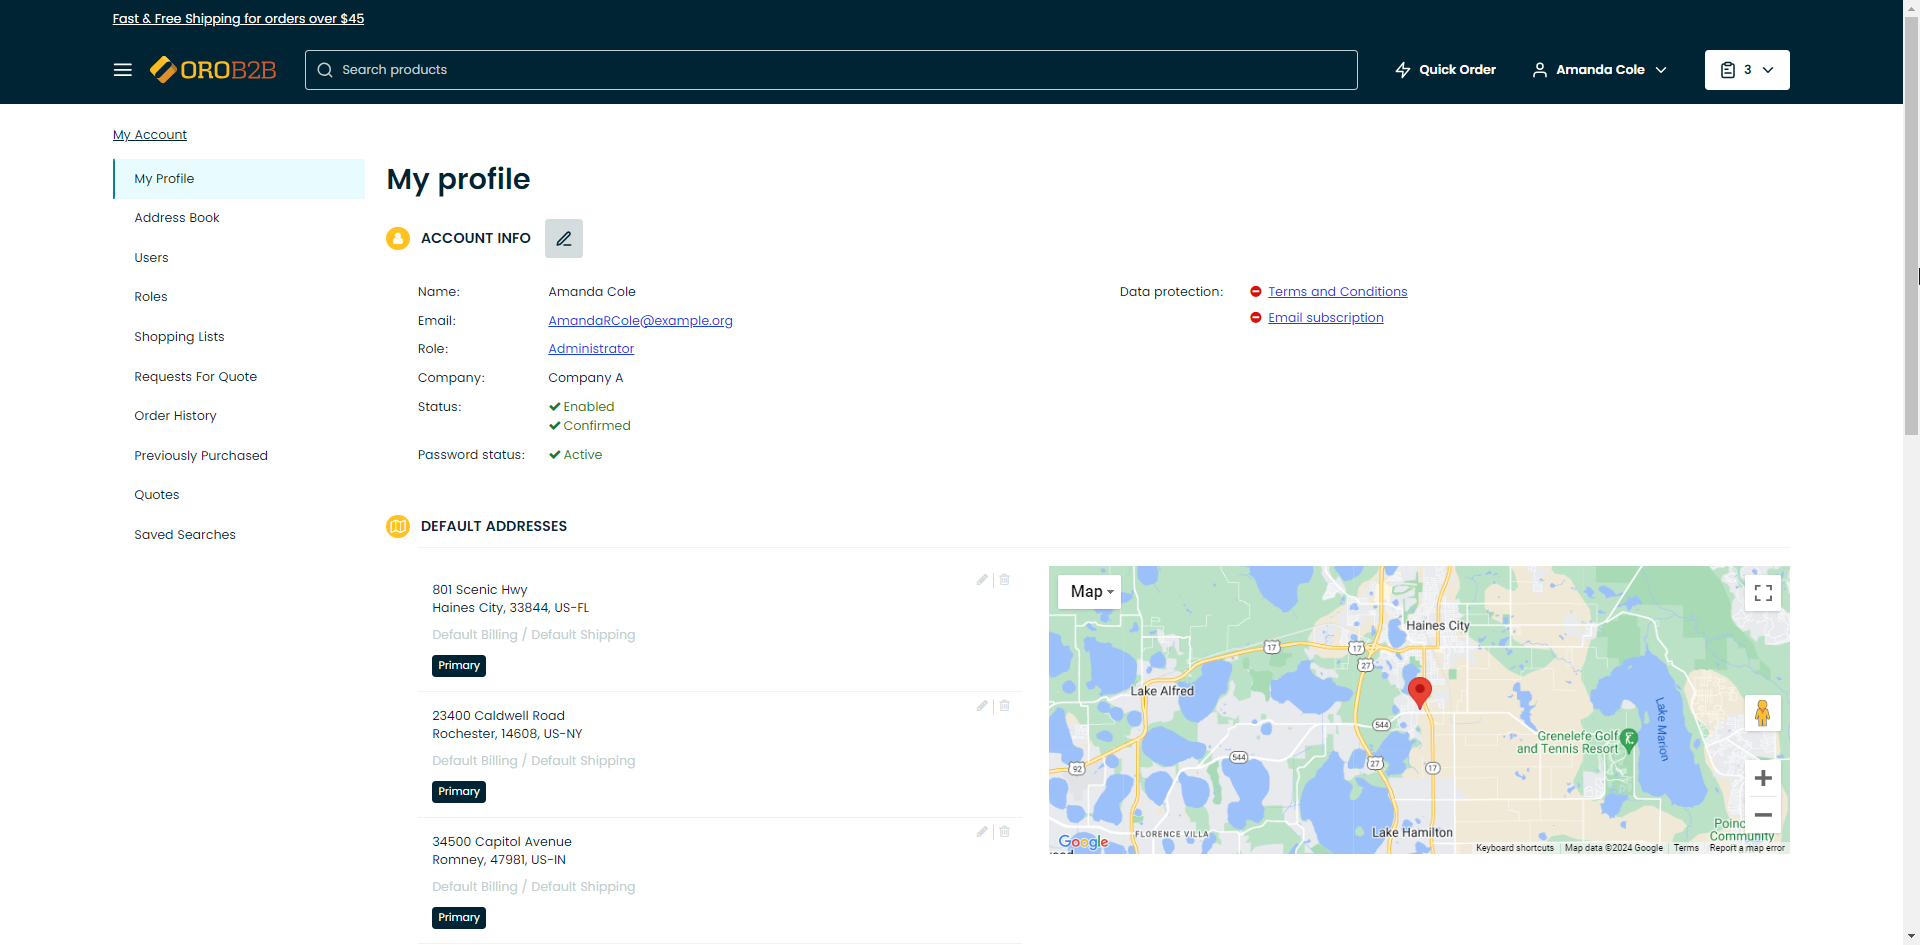
Account Info
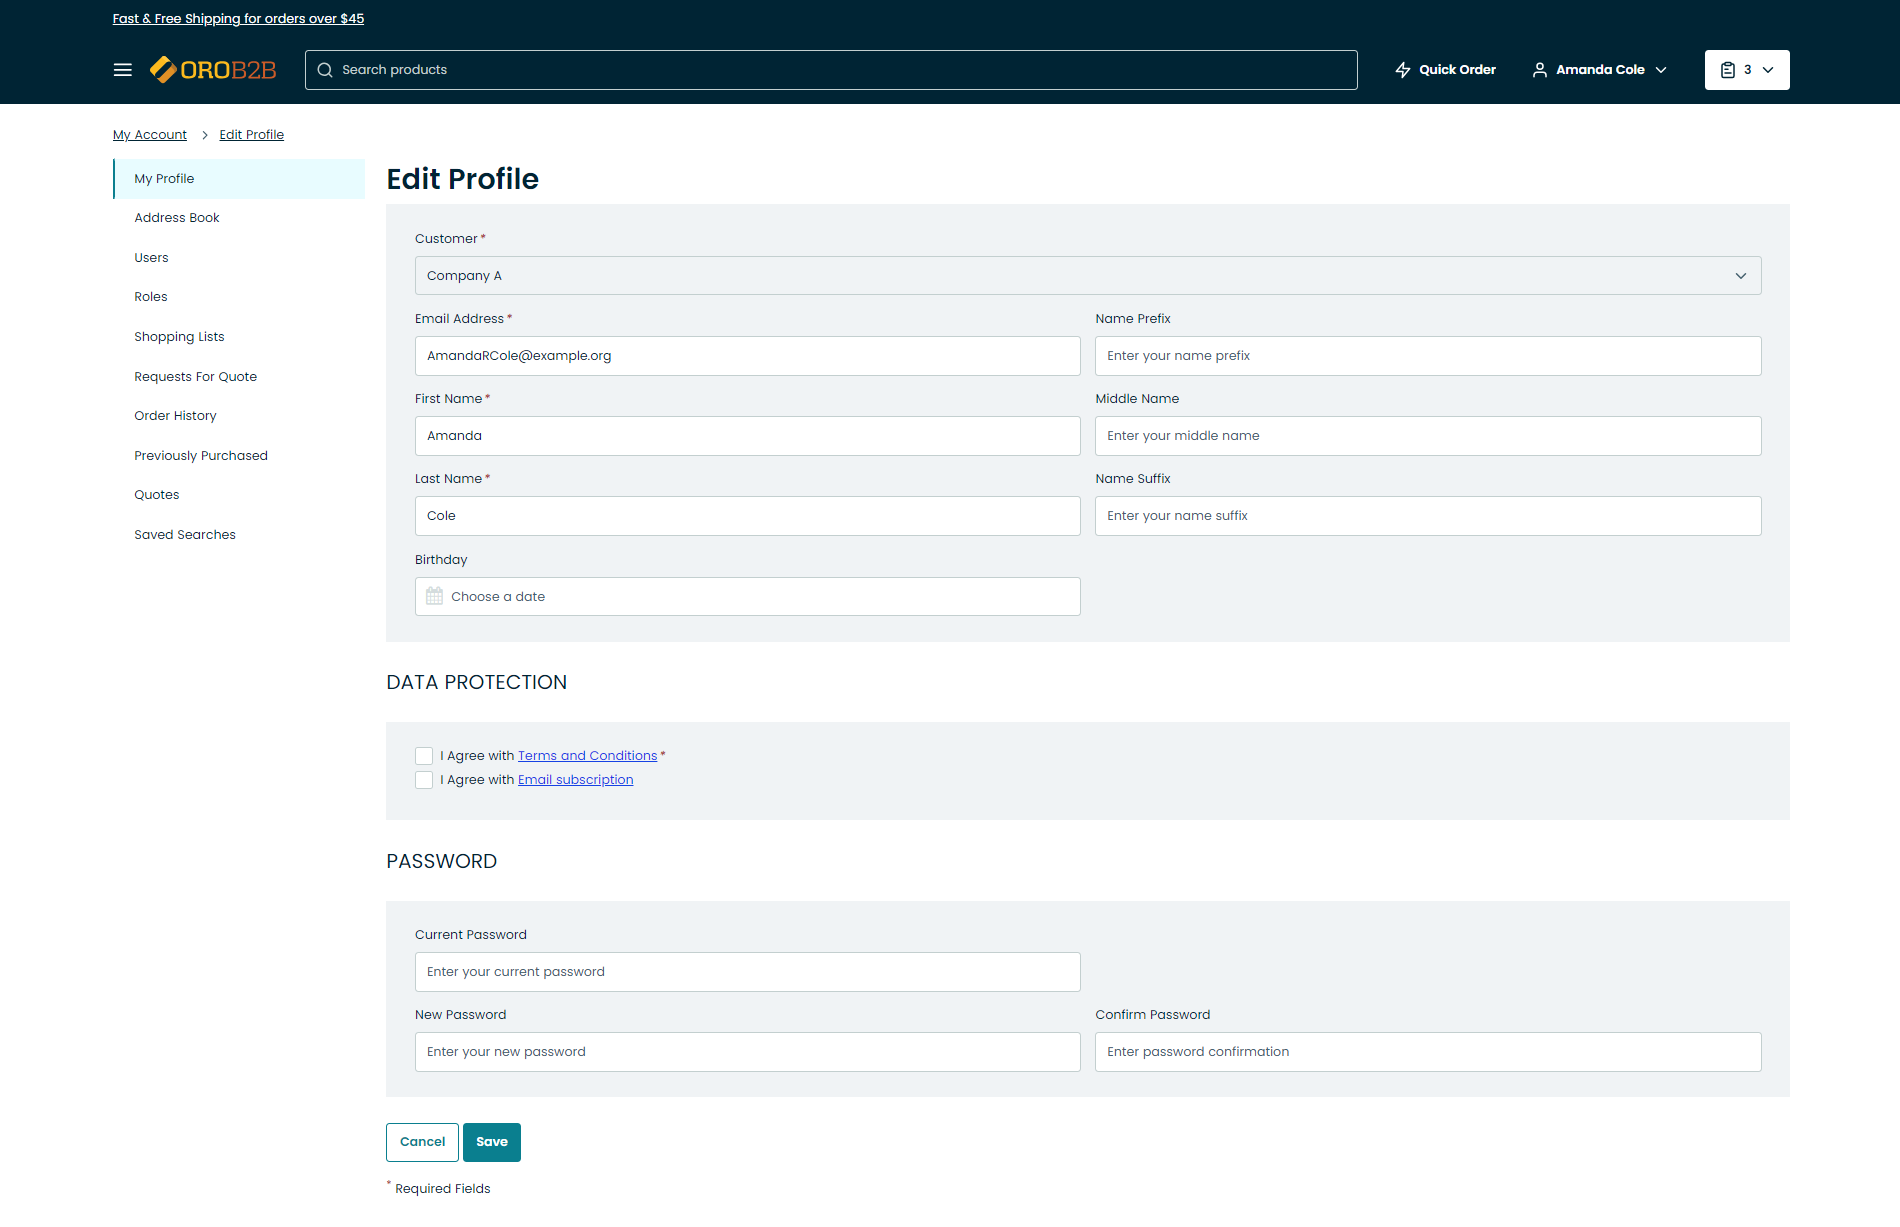
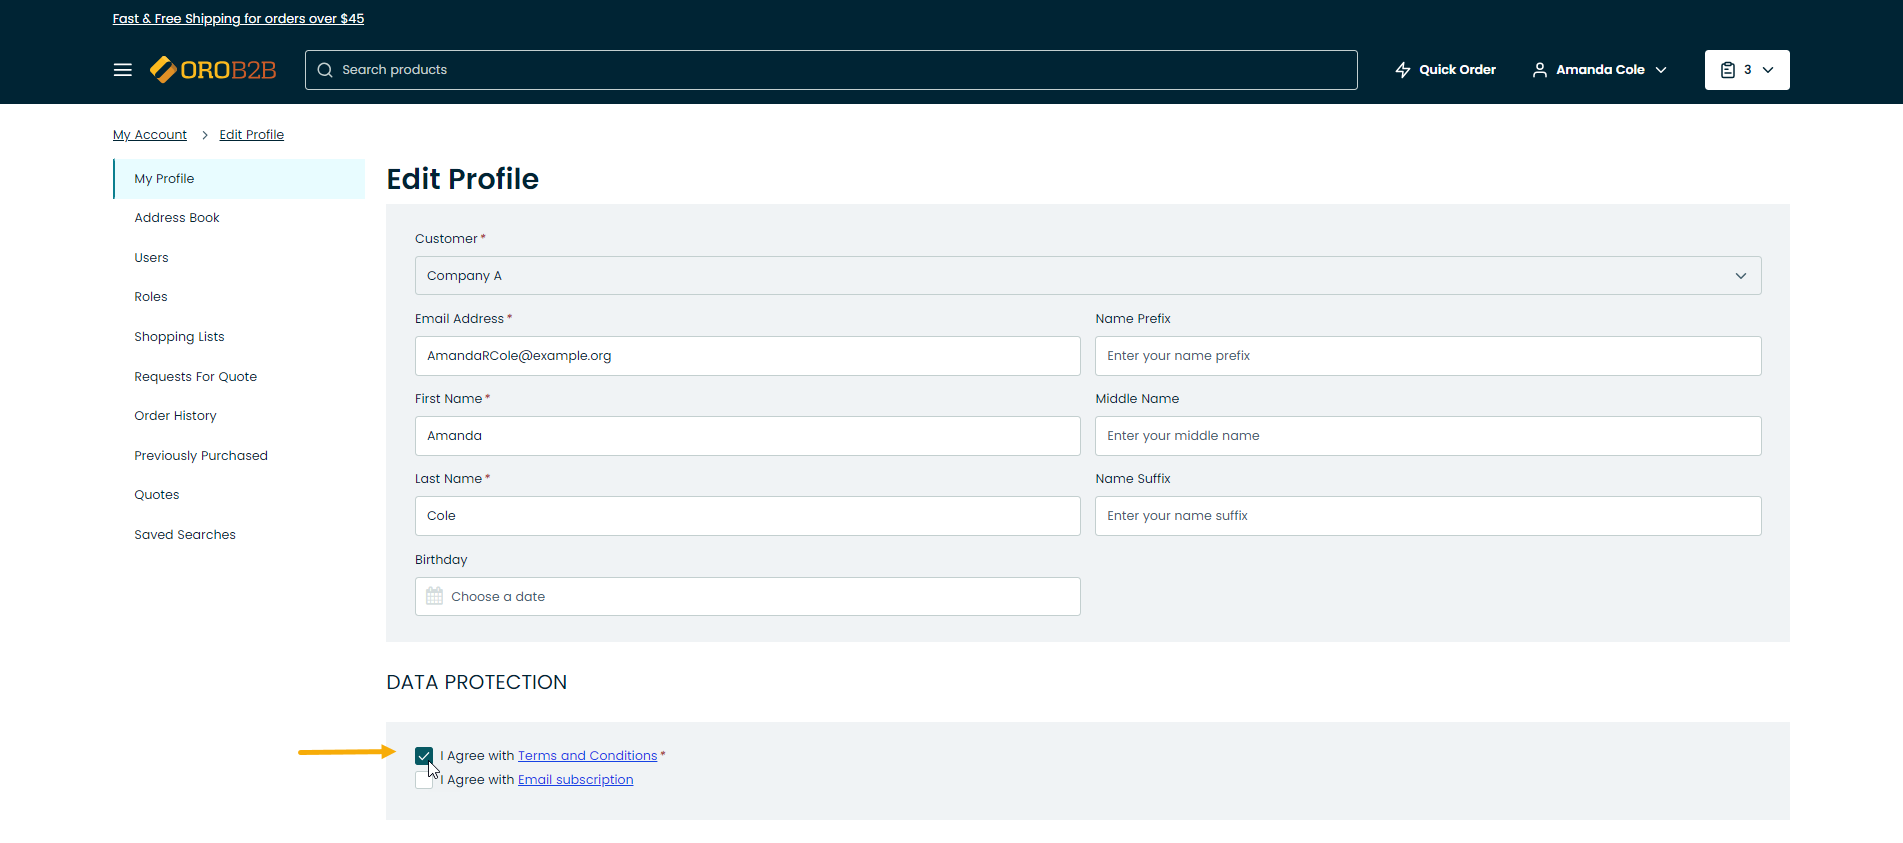
In the Account Info section, you can view your name, role, and company information. To edit your profile details, click  next to Account Info. In the editing mode, you can amend the following details:
Company
Name Prefix
First Name
Middle Name
Last Name
Name Suffix
Birthday
Data protection (accept or revoke mandatory or optional consents to process personal data)
Note
Please note that the ability to edit your account information depends on the permissions that correspond to your role. These are defined by the administrator.
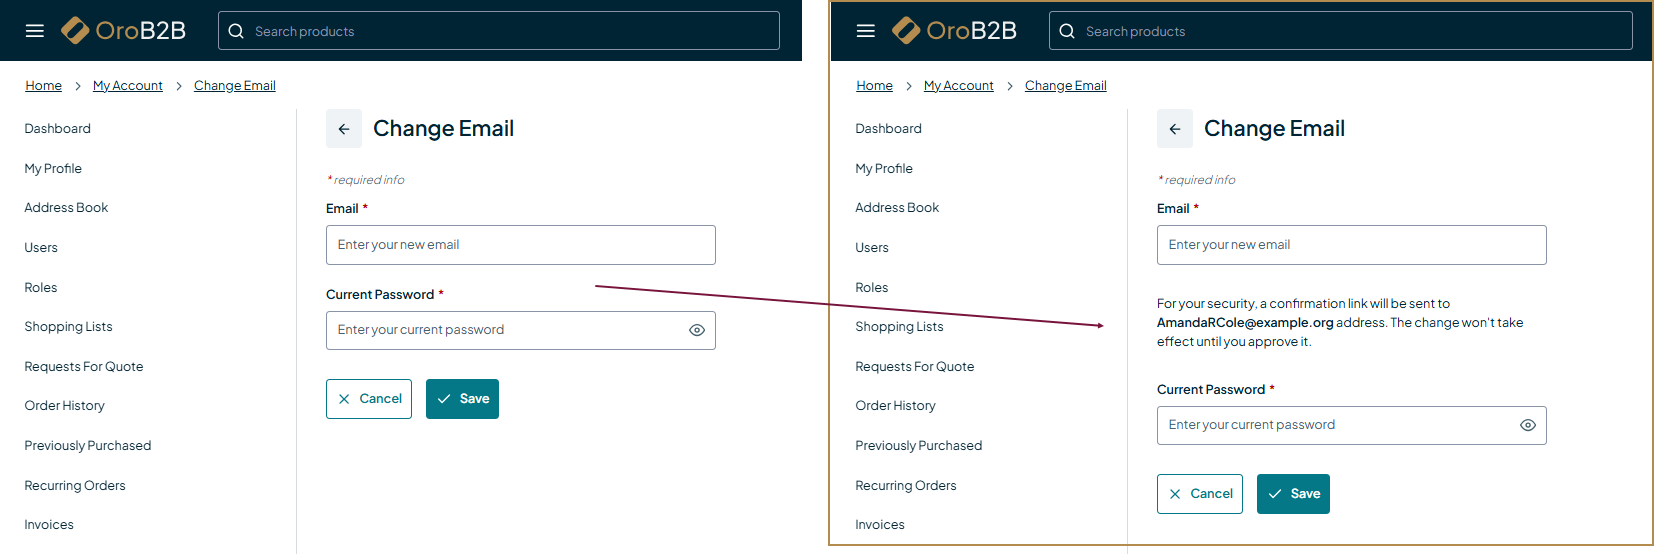
Sign In & Security
In the Sign In & Security section, you can view and update your email address and password. To make changes, click next to the relevant field and save your updates.
Note
Depending on the back-office email configuration, changing your email address may either take effect immediately after saving or require confirmation via a verification link sent to your current email address.
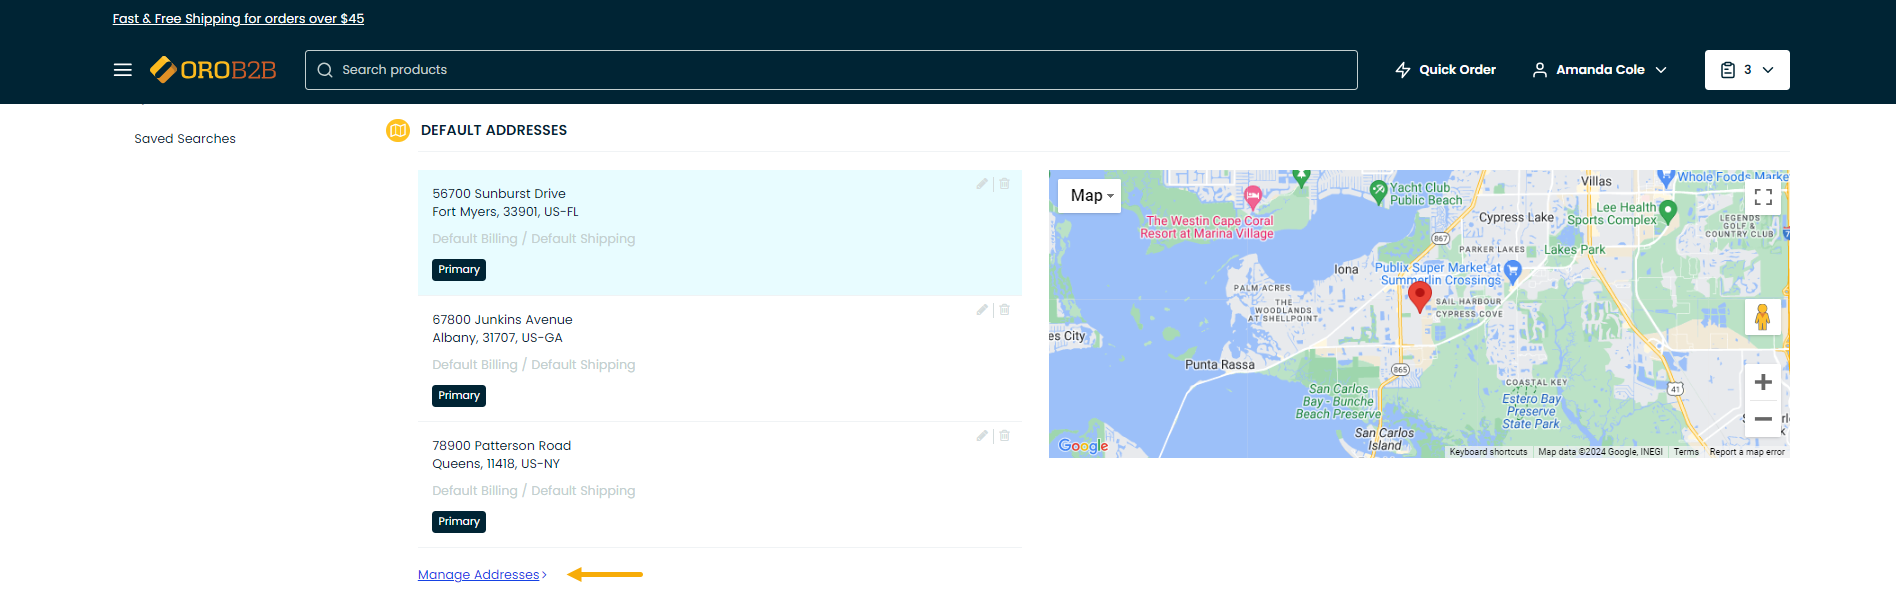
Default Addresses
The Default Addresses section displays the addresses associated with the signed-in user. The primary addresses are shown by default.
For each listed address, you can perform the following actions:
Edit
Delete

To manage default addresses in the address book, click Go to Personal Addresses or navigate to the Address Book section in the menu on the left.
Note
Depending on the storefront settings, the address book lists may appear in the compact format with a map displayed on the right. Please be aware that a valid Google API key is required to display maps in the storefront. Please see the back-office settings for more information.
Data Protection
Hint
Read more on this topic in Data Protection and Consent Management.
To comply with the data protection regulations (such as CPPA, GDPR, etc.), explicit consent for the application to process your personal data may be required. All applicable consents are located under My Profile in the Sign In & Security section.
Consents can be mandatory and optional:
Mandatory consents restrict you from proceeding to the checkout or creating RFQs, unless you accept them. Mandatory consents are marked with an asterisk.
Optional consents do not restrict you from working with the application and are usually used to retrieve permissions to send them email newsletters, inform about upcoming sales or seasonal discounts, etc.
The following key rules apply to consents in OroCommerce:
All consents are obtained through explicit actions
The checkboxes next to consents are never pre-selected and you can opt in only by explicitly clicking Agree under the consent.
Consents are informed
You can be aware of how exactly your data is going to be processed and shared, and what marketing communications you can expect once you provide your consent. Therefore, you can view all your accepted and pending consents (and their detailed description) in your profile under My Profile > Sign In & Security in the storefront.
Consents can be revoked
If you are no longer happy with a consent, you can revoke it in the storefront when editing your Account Info in the My Profile section.
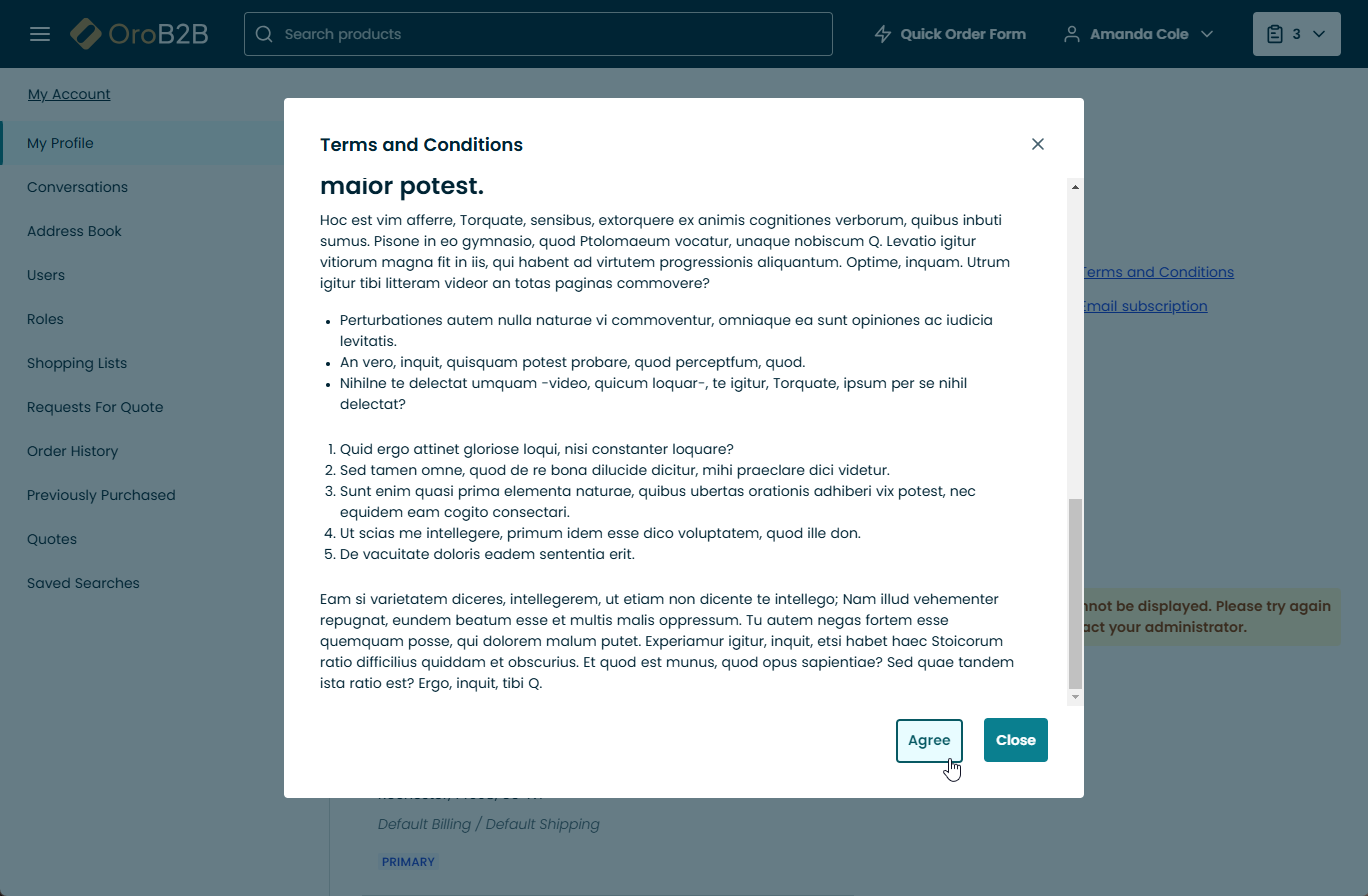
Accept a Consent
You can be asked to accept consents when:
When editing your Account Info in the My Profile section
At checkout
You can accept a consent from the page of your profile, by clicking Edit next to the Account Info section.
Note
You can view the description of the available consents in the Account Info by clicking on the consent links. The  icon indicates that the consent has not been accepted, while the
  indicates that it has been read, understood and accepted.
In the Data Protection section, select the checkbox next to the consent that you want to accept. At this point you are prompted to read the text of the consent. Click Accept to agree to the terms of the consent and Click Save at the bottom left.
Revoke a Consent
You can decline the consent that you have previously accepted, by clicking Edit next to the Account Info section.
Note
You can view the description of the available consents in the Account Info section by clicking on the consent links. The icon indicates that the consent has not been accepted, while the indicates that it has been read, understood and accepted.
In the Data Protection section, clear the checkbox next to the consent that you want to revoke and click Save at the bottom left of the page.