Important
You are browsing upcoming documentation for version 7.1 of OroCommerce, scheduled for release in 2027. Read the documentation for the latest LTS version to get up-to-date information.
See our Release Process documentation for more information on the currently supported and upcoming releases.
Manage Marketing Campaigns in the Back-Office
Marketing Campaign records in Oro application are used to capture general details of the campaign and monitor key metrics. Metrics can include leads generated, pages visited, or any other metrics necessary to quantify results of the marketing effort.
You can include any number of Email Campaigns and Tracking Website records into one campaign and get the full picture to evaluate the campaign efficiency.
This article describes the ways to create, manage, and view the campaign records.
Create a Campaign Record
To create a new marketing campaign:
Navigate to Marketing > Campaigns in the main menu.
Click Create Campaign in the top-right corner to get to the Create Campaign page.
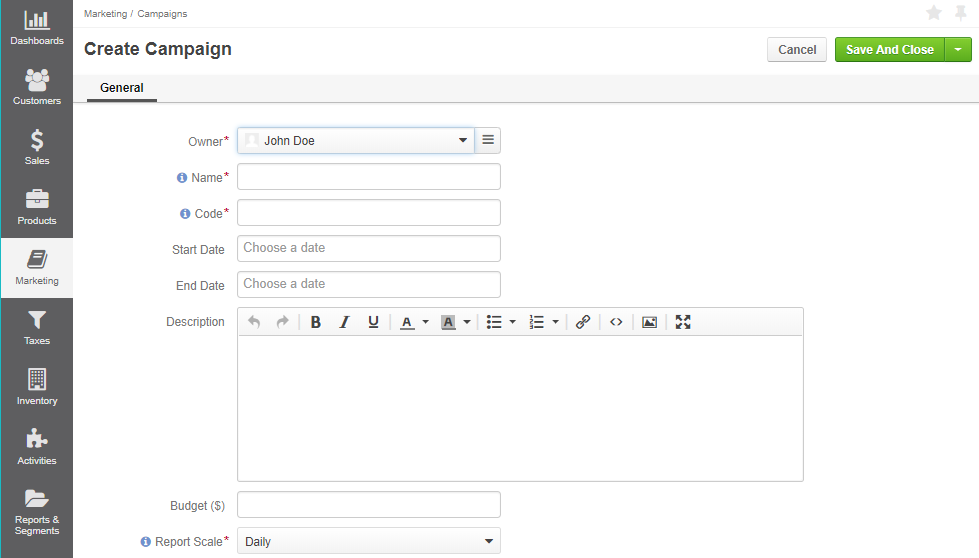
In the General section, provide the following information:
Owner — Limits the list of users that can manage the campaign to users, whose roles allow managing campaigns of the owner (e.g., the owner, members of the same business unit, system administrator, etc.).
Name — The name is used to refer to the campaign in the system.
Code — A unique code of the campaign that is used to generate its tracking settings. May contain only alphanumeric symbols, dashes, and underscores.
Start Date — This field is optional.
End Date — This field is optional.
Description — This field is optional.
Budget — This field is optional.
Report Scale — Defines the default time scale of the events graph. Provides the schedule for the consumer to prepare the reports. You can choose between the hourly, daily or monthly options.
Note
Keep in mind that usually the consumer takes some time to run the job queue. However, if you want to check the performance immediately, you can enable dynamic tracking in the system configuration under System > Configuration > System Configuration > General Setup > Tracking. By default, this option is disabled, as this behavior is preferred for the production environment. But for testing purposes, you can enable this option to bypass the consumer and log visits and other events as soon as they occur.
Note
Custom fields may be added, subject to specific business needs.
Once you finish configuring the marketing campaign, click Save and Close in the top-right corner of the page.
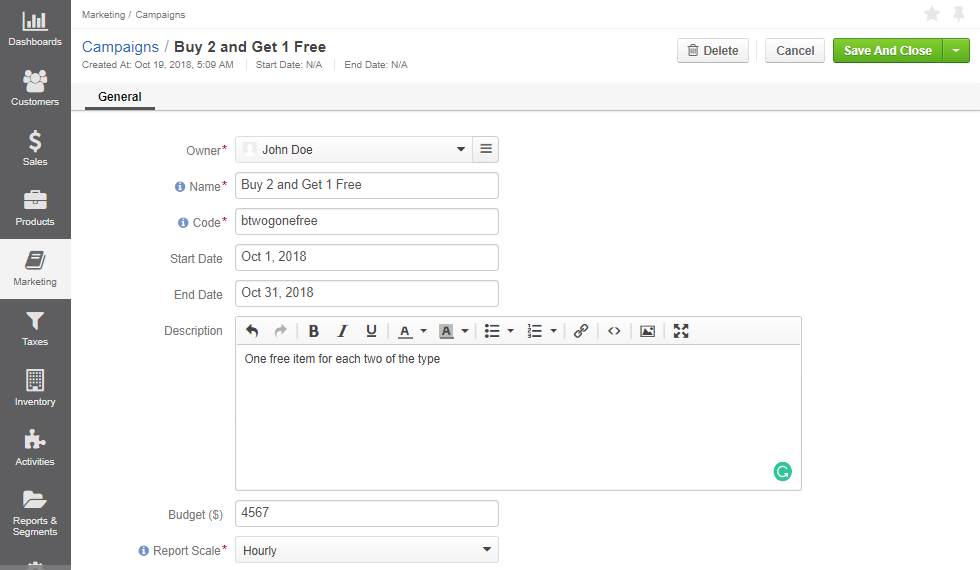
View the Marketing Campaign Details
To view the details of any marketing campaign:
Navigate to Marketing > Campaigns in the main menu.
Click the selected marketing campaign to preview its content.
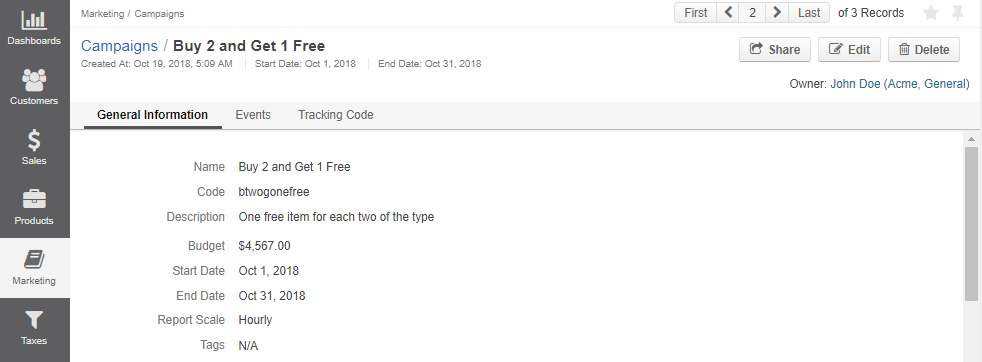
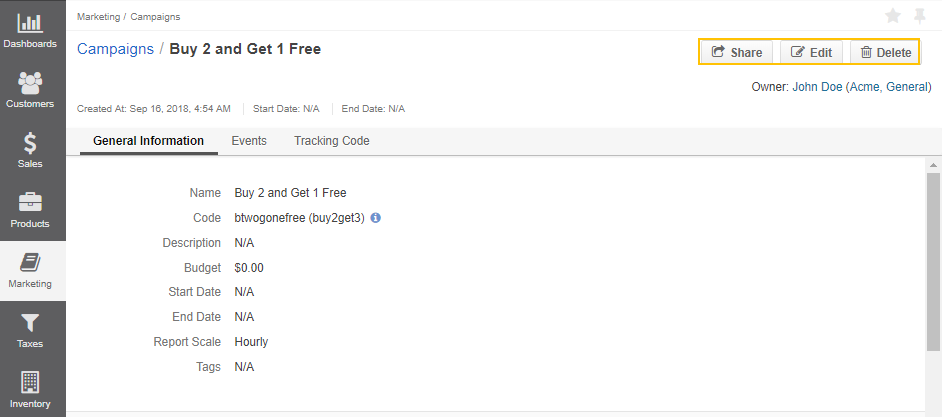
The details page is divided up into three sections: General, Events, and Tracking code.
In the General section, you can see the campaign plan or configuration (name, code, schedule, budget, etc.).
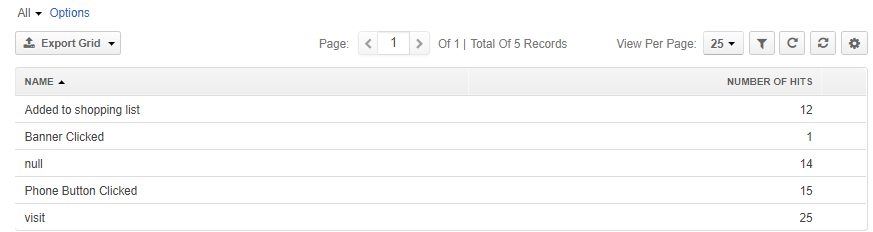
The Events tab contains the list of campaign events. Here, you will see the events summary chart and detailed events report collected from the related marketing sources. Each event represents one point of action when a user has accessed a predefined part of the website following the campaign. Recurring access is logged as a separate event.
Campaign events include the events logged for related Email Campaigns and Tracking Website records.
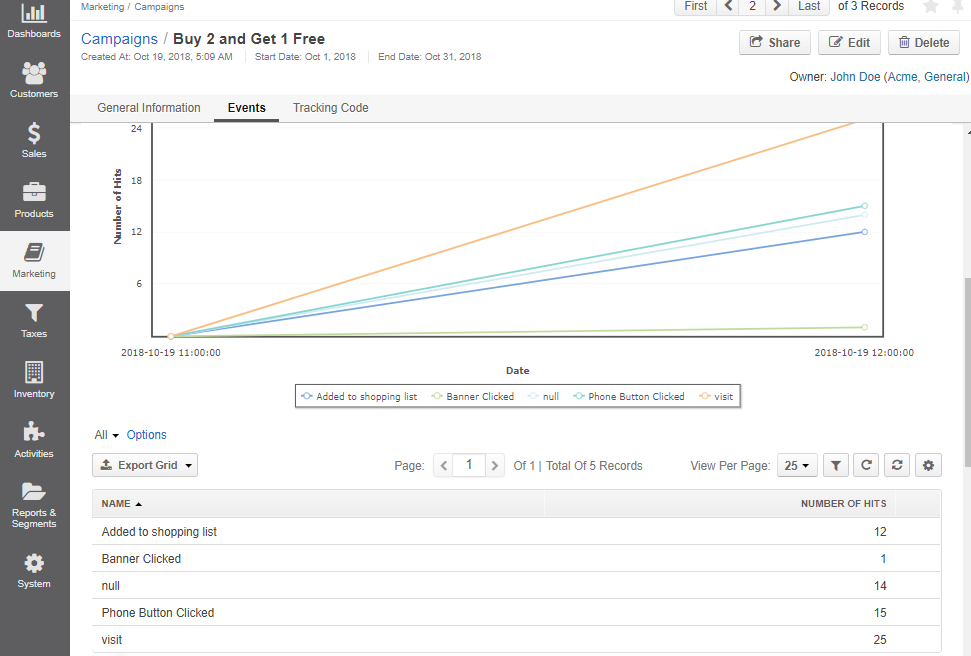
In the example above, users accessed the site 25 times, twelve times out of these times they added products to the shopping list, one time they clicked a banner, and fifteen times they clicked the phone button.
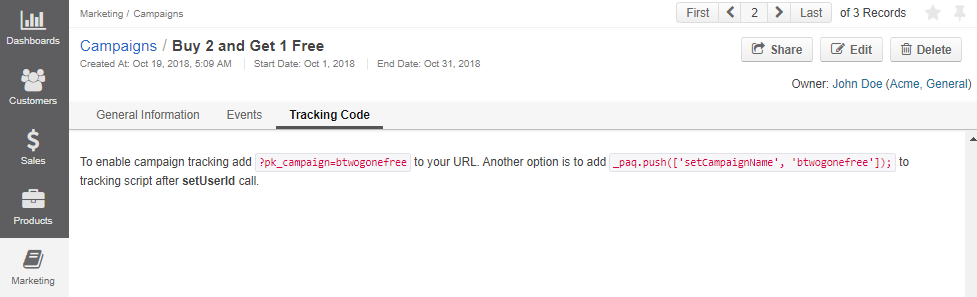
In the Tracking Code section, you will find two tracking codes generated specifically for the selected marketing campaign. Those are a URL parameter and a push code.
Compare a URL Parameter and a Push Code
The URL parameter and the push code provide you with different options to log a visit. They may be incorporated into the URL or the script on the website page.
URL Parameter
The first option is a URL parameter:
?pk_campaign=buy_2_get_1_free
It is used when you have a tracking website, and you want to calculate the events for multiple campaigns and from different sources, such as an email link, Youtube, social media, paid ads or organic search visits. It should be added to the URL of the website you want to monitor. The event is logged only when a user reaches the website via the specific link with this parameter (for example, sample-site.net?pk_campaign=buy_2_get_1_free).
In the Events section on the campaign’s page, you will see all the events logged under this campaign.
The idea behind the URL parameter is that each campaign is assigned its own unique URL. So if you run several campaigns on one website, you can easily track each event back to its source campaign by changing the parameter.
Push Code
The second option is a push code:
_paq.push(['setCampaignName', 'buy_2_get_1_free']);
This code is used when you run only one marketing campaign on your website, so all user interactions within your website should be uniquely assigned to this particular campaign regardless of the source the visitors used to reach your website.
In this case, you need to insert this push code into the javascript code of your website (after the setUserId call) so that all user activities are assigned to this particular campaign no matter which sources visitors used to reach your website.
<script type="text/javascript">
    var _paq = _paq || [];
    _paq.push(['setUserId', 'guest' ]);
    _paq.push(['setCampaignName', 'buy_2_get_1_free']);
No matter which code you choose, a URL Parameter or a Push Code, the results will be displayed in the report.
You can export this report at any time by clicking the Export Grid button.
Manage Marketing Campaigns
You can manage marketing campaigns directly from their details page. Here, you can perform the following actions:
share the details of a marketing campaign with other Oro application user
edit the existing campaign record
delete the unnecessary marketing campaign
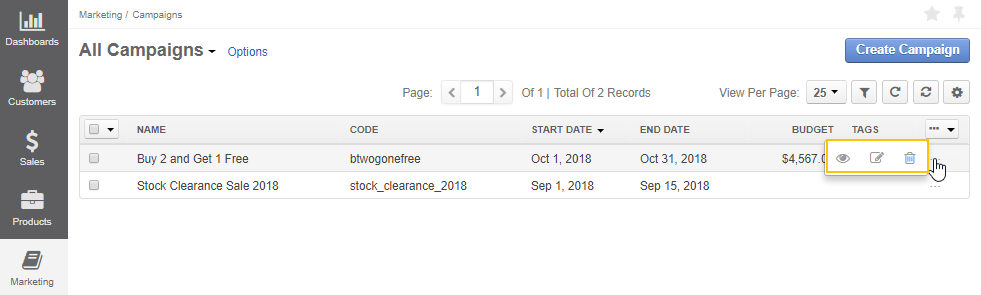
The same actions are available for a campaign after you navigate to Marketing > Campaigns in the main menu.
Hover over the More Options menu to the right of the required tracking website and select the necessary action, either View, Edit, or  Delete.
Share a Marketing Campaign
Note
Sharing records is available in the Enterprise edition applications and if the feature is enabled in the back-office configuration settings.
To share a marketing campaign with other Oro application user:
Navigate to Marketing > Campaigns in the main menu.
Click the selected campaign to preview its content.
Click Share at the top right corner of the page to open the Sharing Settings popup dialog.
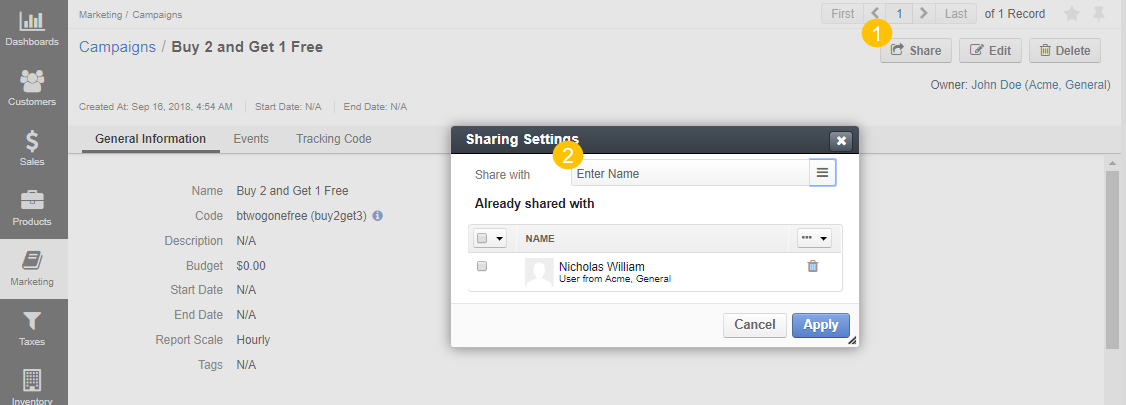
Type in the username in the Share with field, or search for the necessary user: click , find the person you need, select the checkbox next to their name, and click Add.
The Already shared with section gets automatically populated with the person you have added.
Click Apply to save the changes.
To cancel the campaign sharing with a particular person, click Share, and then click
next to the username. Use mass actions to cancel sharing for more than one user.