Important
You are browsing upcoming documentation for version 7.1 of OroCommerce, scheduled for release in 2027. Read the documentation for the latest LTS version to get up-to-date information.
See our Release Process documentation for more information on the currently supported and upcoming releases.
Manage Master Catalog in the Back-Office
Hint
This section is part of the Master Catalog concept guide topic that provides a general understanding of the master catalog concept in OroCommerce.
Master Catalog is a tree structure that organizes all the products of your store under corresponding categories. A category combines the products of the same type into groups and helps enforce the unified selling strategy by configuring a special set of product options, visibility, and SEO settings that best fit the resulting product family.
Once the categories are in place, you can:
Add a category description and visuals.
Link a corresponding product or a set of products to the selected category.
Configure the default product options.
Set up an activity type and a date for its implementation.
Manage the category visibility.
Configure SEO options.
To view the master catalog, navigate to Products > Master Catalog in the main menu. The page displays all the categories created under this catalog.
Create a Master Catalog Category
By default, there is only one master catalog in the OroCommerce application. To customize this catalog, you can add or delete a category, creating a group of products and linking it to the corresponding web catalog.
To create a master catalog category:
Navigate to Products > Master Catalog.
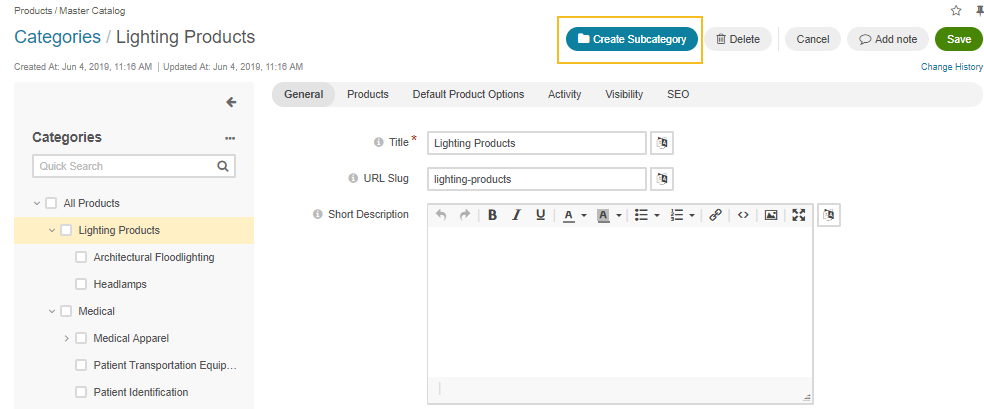
Click Create Category.
In the General section, provide the following information:
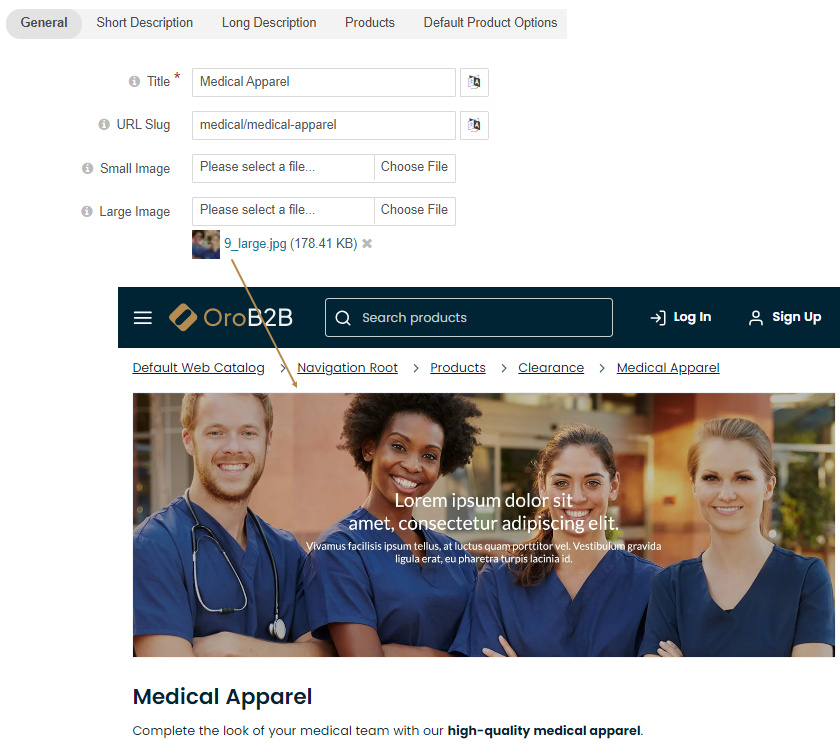
Title — A meaningful name for the category. Click the Translations icon to provide spelling for different languages. Click the same icon again to return to the single-language view.
URL Slug — A web address generated automatically once the title of the category is defined. It is used to build a human-readable URL for the product page in the storefront. Click the Translations icon to provide spelling for different languages. Click the same icon again to return to the single-language view.
Small Image — An image used to represent the category in the storefront. The setting applies to OroCommerce version 5.1 and below and is retained in the current version only for legacy backward compatibility.
Large Image — An image used to represent the category in the storefront.
In the Short Description section, provide a short but meaningful description of the category you are creating as a default value. Move from tab to tab to localize the description by setting the required fallback option. You can select whether to fall back to the default value, parent localization, or a custom value from the dropdown. When selecting the custom value, provide the localized version of the short description in the text field.
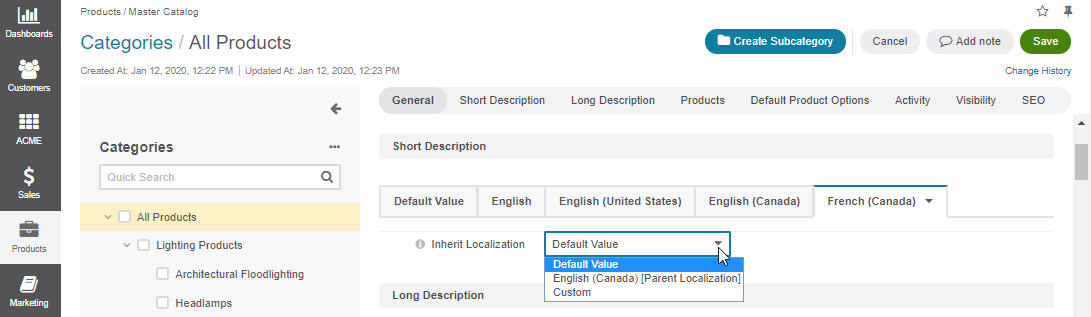
In the Long Description section, provide a long default description of the category. Move from tab to tab to localize the description by setting the required fallback option. You can select whether to fall back to the default value, parent localization, or a custom value from the dropdown. When selecting the custom value, provide the localized version of the long description in the WYSIWYG field. For more details on WYSIWYG management, see the WYSIWYG Editor topic.
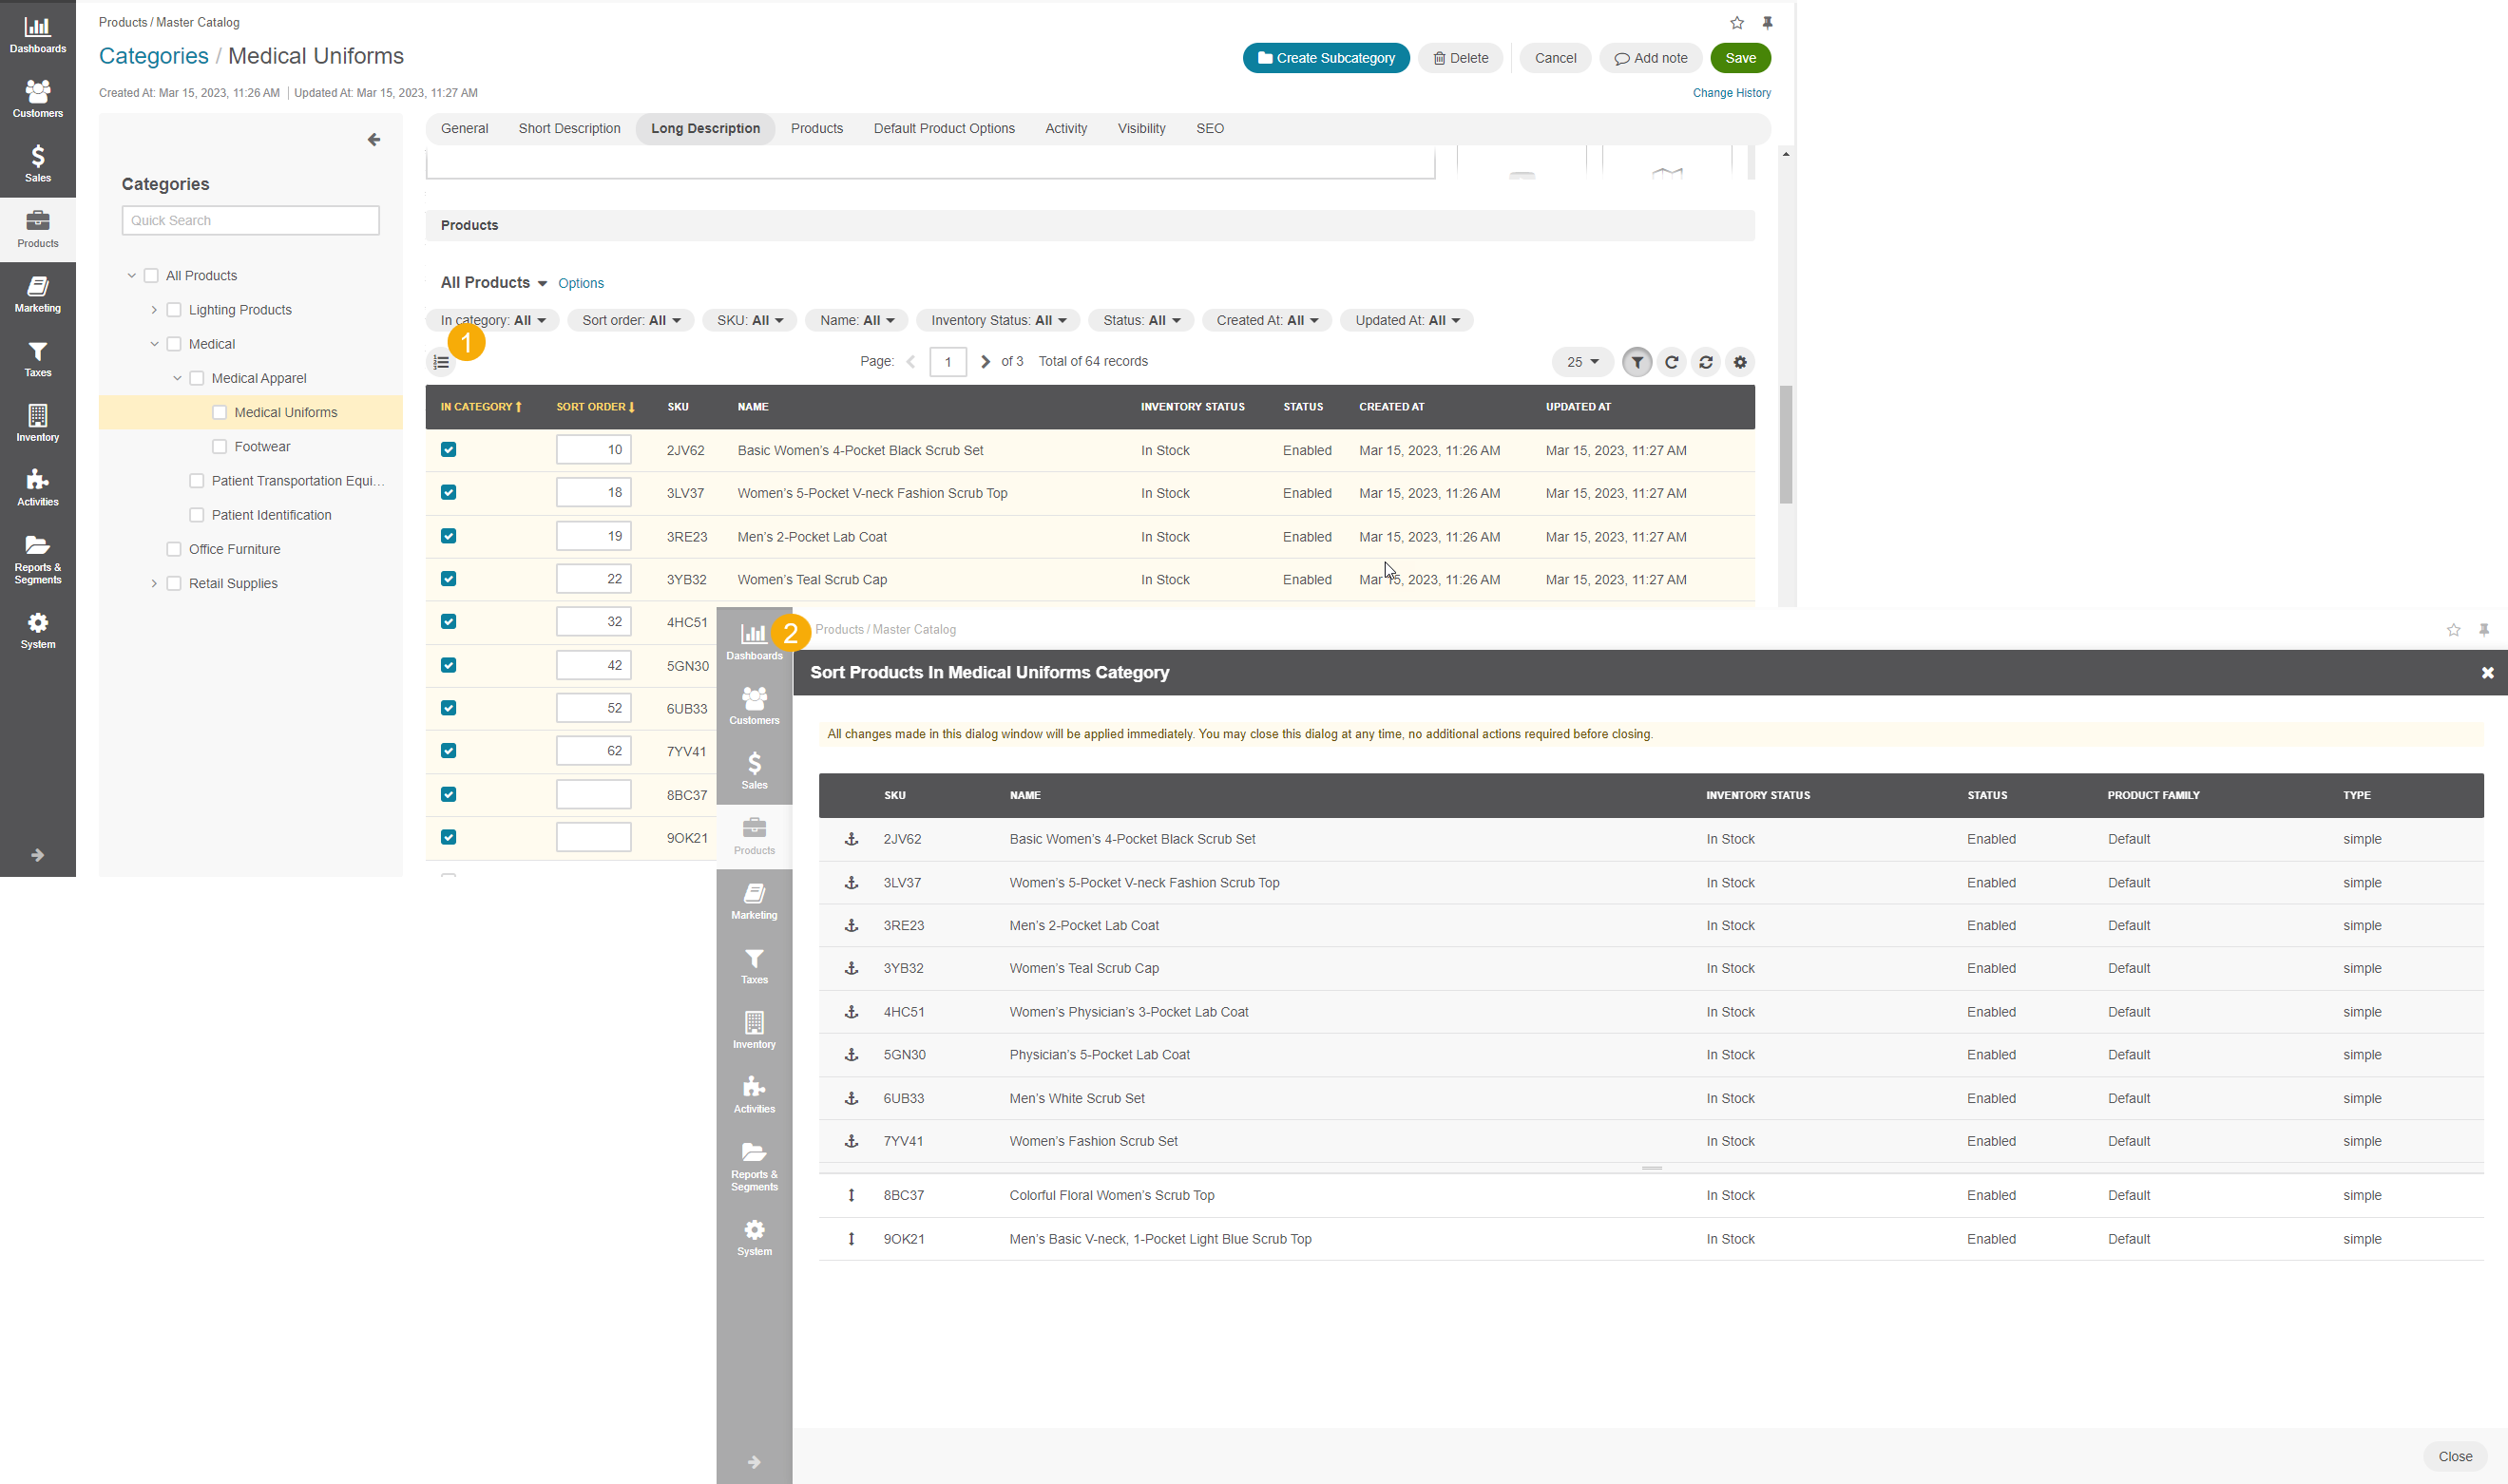
In the Products section, select the items for the category you are creating. Use available filters to narrow your search and speed up the selection of the necessary product items. Each product you select can have a sort order associated with it that will define the default order in which the product will appear in the storefront (0 is the highest priority). You can also click on the Manage Sort Order button to be able to manage the sort order of products in the category in a separate pop-up window. Products with grey background have sorting number assigned. Product with white background have no sorting order. You can drag and drop the horizontal background separator up and down to apply or clear the sorting order. All changes made to the sorting order in this dialog window will be applied immediately.
In the Default Product Options section, configure the following settings:
Field
Description
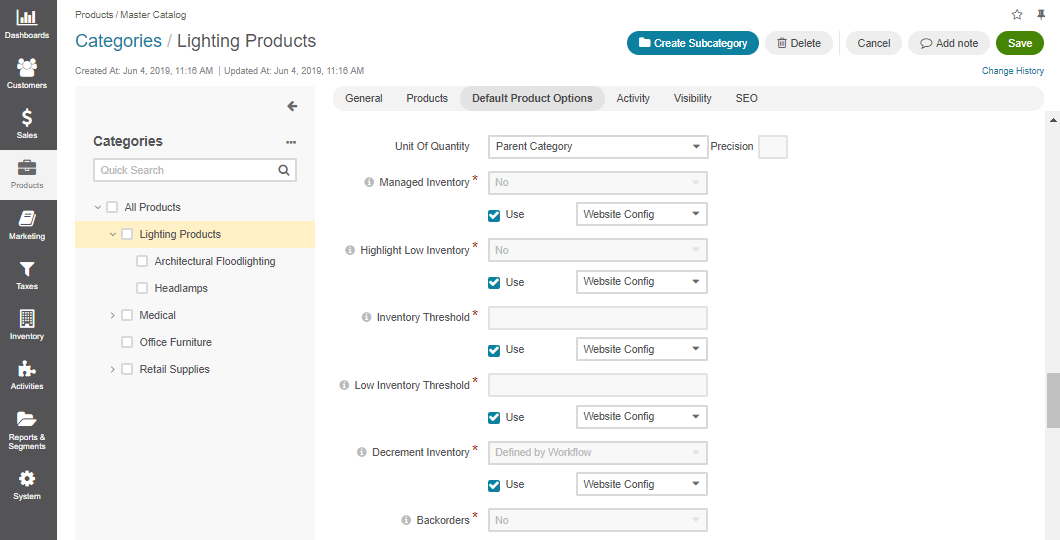
Unit Of Quantity
A product unit that is shown by default in the product details page in the storefront. Available options are each, hour, item, kilogram, piece, set, and Parent Category. The latter refers to the same product quantity unit configured for the corresponding parent category.
Precision
An acceptable value (number of digits after the decimal point) for the quantity that a user may order or add to the shopping list. Items and sets are usually whole numbers, and units like kilograms may get precision of 2 to allow buying a custom volume (e.g., 0.5 kg).
Field
Description
Inventory Status
This setting enables you to define and modify status information for the stock of the product.
Managed Inventory
This setting defines the method for inventory management. With Use category defaults, the product’s Manage Inventory inherits the setting selected for the product’s parent category. With Use system config, the product uses the system configuration setting. Selecting Yes enables interactive updates based on the product inventory information from the Inventory > Warehouses section. Selecting No disables connection to the inventory, and uses the static Inventory Status value.
Highlight Low Inventory
This option defines if low inventory for products is displayed in the storefront.
Inventory Threshold
A minimum quantity of the product treated as In stock. When a product quantity drops below this value, the product inventory status becomes Out Of Stock.
Low Inventory Threshold
The minimum stock level defined for the product. Reaching the defined level will trigger a warning message to the buyer in the storefront.
Backorders
A flag that indicates whether OroCommerce accepts backorders (EE feature). When set to Yes, buyers and sale teams can order products in quantities not currently available in the warehouses. The remaining portion of the order will be sustained until the product is back in stock.
Decrement Inventory
A flag that indicates whether OroCommerce decrements inventory upon order. A product quantity can become negative when both Decrement Inventory and Backorders are enabled.
Minimum Quantity to Order
A minimum quantity that a buyer or salesperson can claim in the RFQ, customer order, quote, or a shopping list.
Maximum Quantity to Order
A maximum quantity that a buyer or salesperson can claim in the RFQ, customer order, quote, or a shopping list.
Is Upcoming
This option informs a customer that the product of the selected category is not currently in stock but will be available later. When set to Yes, an additional Availability Date is displayed. To remove the upcoming products label, set the option to No or customize the required behavior in the system configuration.
Availability Date
The date which indicates the exact date and time when the selected product will be restocked.
The Activity section displays all the activities available for the selected category, such as call, task, email, note, or calendar event. You can use filters to select any activity type and the date of its implementation.
In the SEO section, fill in the following details to help search engines show your master catalog content to the relevant audience.
Meta Keywords — Enter the meta keywords for the product. A meta keyword is a specific type of meta tag that appears in the HTML code of a web page and helps tell search engines what the topic of the page is.
Meta Title — Enter the meta title for the product. A meta title is what is seen by the search engine users and helps a search engine to index the page.
Meta Description — Enter the meta description for the product. A meta description summarizes a page’s content. Search engines show a meta description in search results if they see the searched phrase in the description.
Click the Translations icon to provide spelling for different languages. Click the Default Language icon to return to the single-language view.
Click Save on the top right.
Note
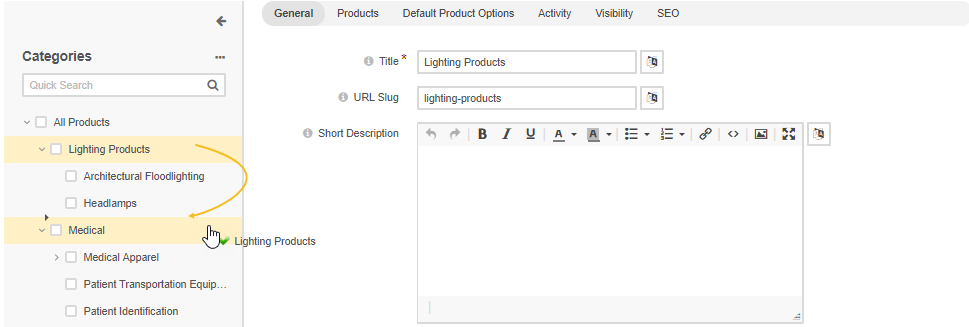
You can drag the created category to a different position within the content tree on the left of the page, as illustrated below:
Manage Category Visibility
In the Visibility section, you can set a visibility restriction for the master catalog category and the products assigned to this category. However, visibility per individual product is controlled by the product visibility settings.
Click the necessary tab to configure the visibility of the selected category.
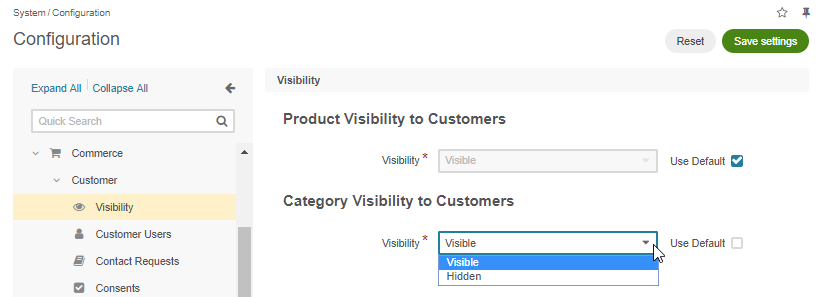
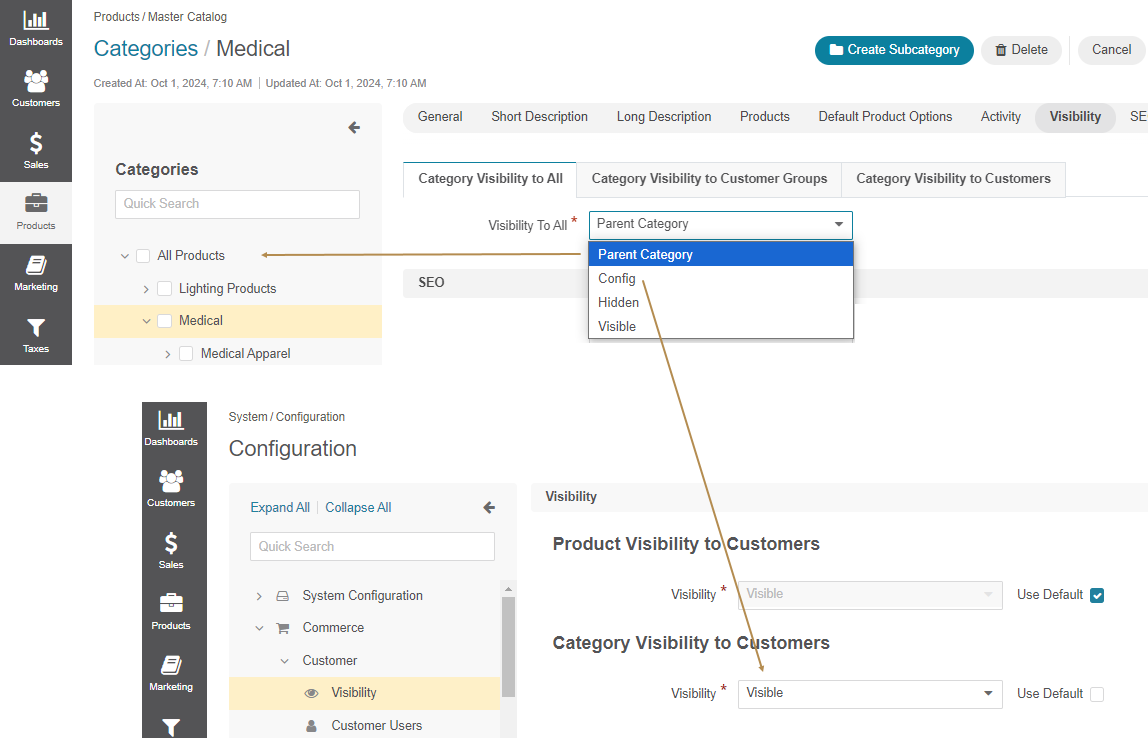
Important
You can define system-wide category visibility for existing customers. This setting applies only whenever a category visibility configuration is set to Config. These settings apply globally and can be toggled under System > Configuration > Commerce > Customer > Visibility.
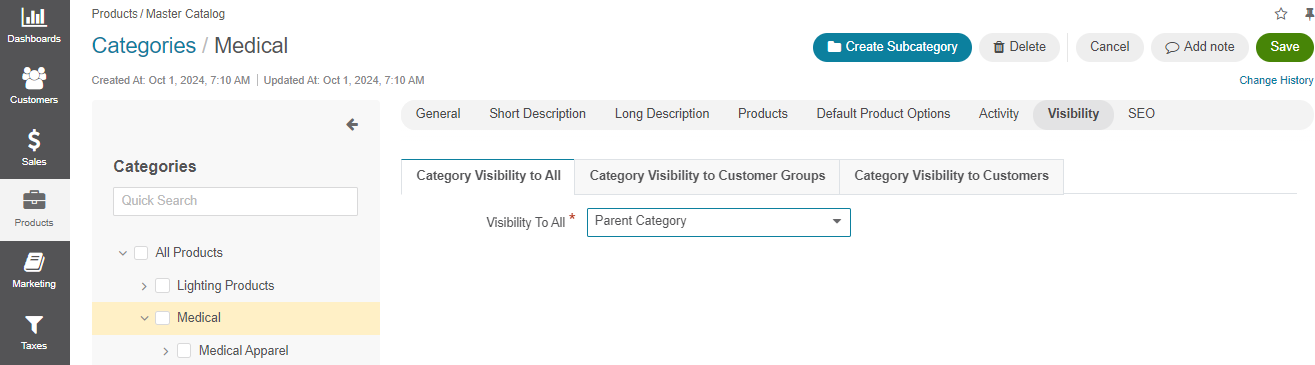
Category Visibility to All
This setting controls the default visibility for the selected category and applies to all customers and customer groups unless otherwise configured. The available options include:
Parent Category – Inherits configuration from the parent master catalog category. It means that the current category visibility settings equal the value defined in the Category Visibility to All field of the parent master catalog category. This option is available only for non-root categories.
Config – Inherits settings from the global system configuration.
Hidden – The category is hidden from the storefront for all customers.
Visible – The category is visible to all customers in the storefront.
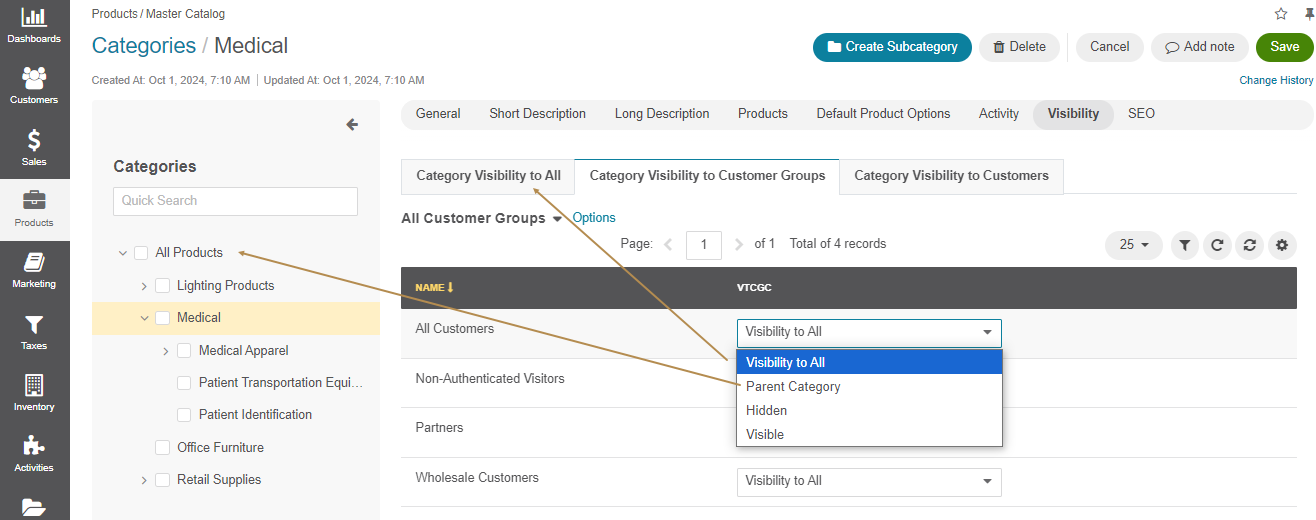
Category Visibility to Customer Groups
The setting controls if the category is shown to the customers who are members of a particular customer group (wholesalers, retailers, VIP customers, or guests, etc). You can configure specific settings for these groups based on their relationship with your business. Use one of the following options:
Visibility to All – Inherits the default category visibility configuration, meaning it matches the settings defined under the Category Visibility to All section for this category. By default, this setting is pre-populated for any new customer group.
Parent Category – Inherits configuration from the parent master catalog category. It means that the current category visibility settings equal the value defined in the Category Visibility to Customer Groups field of the parent master catalog category. This option is available only for non-root categories.
Hidden – The category is hidden from the storefront for the selected customer group.
Visible – The category is visible to the selected customer group in the storefront.
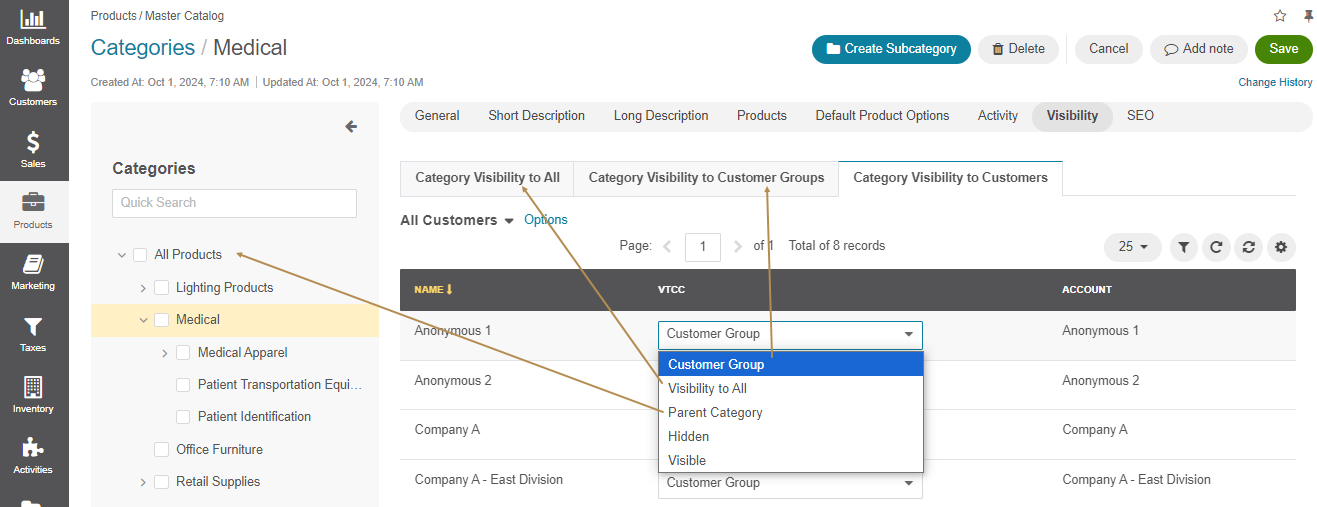
Category Visibility to Customers
The setting controls if the category is shown to individual customers or businesses (Customer A, Customer B, etc). For instance, if a category is only available to selected customers, you can hide it from others. Use one of the following options:
Customer Group – Inherits the category visibility configuration from the customer group to which the selected customer is assigned, meaning it matches the settings defined under the Category Visibility to Customer Groups section for this category. By default, this setting is pre-populated for any new customer.
Visibility to All – Inherits the default category visibility configuration, meaning it matches the settings defined under the Category Visibility to All section for this category.
Parent Category – Inherits configuration from the parent master catalog category. It means that the current category visibility settings equal the value defined in the Category Visibility to Customers field of the parent master catalog category. This option is available only for non-root categories.
Hidden – The category is hidden from the storefront for the selected customer.
Visible – The category is visible to the selected customer in the storefront.
Category Visibility Priorities
System-wide Category Visibility: This is the global category visibility setting that applies across the entire system whenever the category visibility configuration is set to Config.
Parent Category Visibility: Inherits settings from the parent category unless specifically overridden by a subcategory or product visibility.
Category Visibility to All: Controls the visibility of the product’s category and overrides the parent category visibility.
Customer Group Visibility: Overrides the default category visibility. If a category is visible to a customer group, it applies to all customers in that group.
Customer Visibility: Overrides visibility for a customer group. If a category is set to be visible per individual customers, it remains visible to these customers even if visibility for a customer group to which the customer is assigned is set to be hidden.
Create a Master Catalog Subcategory
Once you have created the main master catalog category, proceed to its subcategory creation.
To distribute the product items into more specific and detailed product families, create a master catalog subcategory:
Select a category to link a new subcategory to.
Click Create Subcategory.
Provide the information following the guide in the Create a Master Catalog Category section.
Note
Please note that you cannot link one product item to both a category and a subcategory.
Link the Master Catalog Category to a Web Catalog
When the master catalog category is created, you need to link it to a web catalog for the customer to view it from the storefront.
Proceed with the following steps:
Create a web catalog as described in the Create a Web Catalog section.
Add the master catalog category following the guide illustrated in the Add a Category (Web Catalog Content) section.
Important
As a follow-up, see the Configure Product and Category Visibility to Customers topic for the details on how to control the default visibility settings for master catalog categories and subcategories through the back-office.
Related Articles