Important
You are browsing upcoming documentation for version 7.1 of OroCommerce, scheduled for release in 2027. Read the documentation for the latest LTS version to get up-to-date information.
See our Release Process documentation for more information on the currently supported and upcoming releases.
Configure Languages in the Back-Office
Hint
This section is part of the Localization and Translation concept guide that provides a general understanding of the localization and translation processes in OroCommerce.
Note
The Languages settings are accessible from the Global organization only. Find more on working with organizations in the Company Structure and Organization Selector.
In the Oro applications, language is a core component of system localization and content translation. It performs the following functions:
Groups translations for all the text system elements available to the user (labels, UI, etc).
Enables download (export) and upload (import) of the system elements identifiers and their translation to the target language. This enables you to customize translation and update it in the current instance only.
Enables installation of the translation updates from the third party translation services.
To view and update the existing languages, or add new ones, navigate to System > Localization > Languages in the main menu.
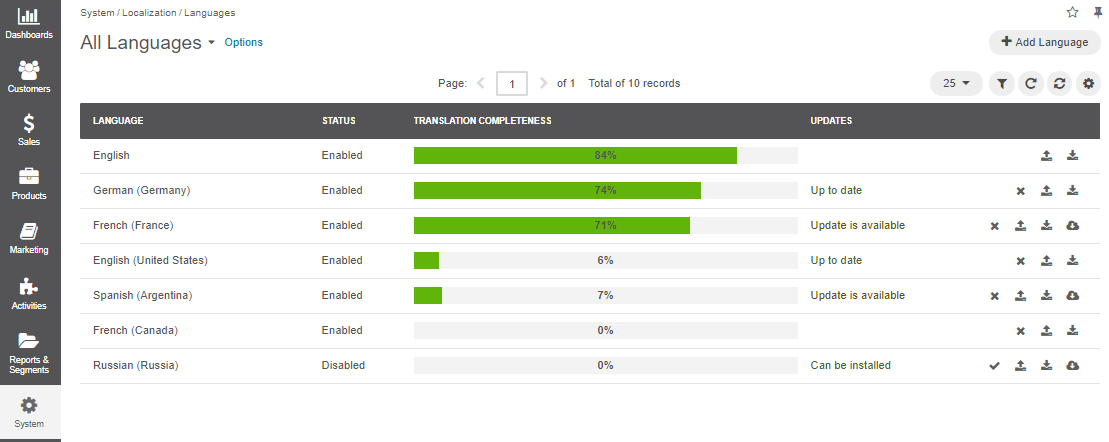
The following information about the languages is available in the All Languages list:
Name |
Description |
|---|---|
LANGUAGE |
The language of the text system elements available to the user. |
STATUS |
The status of the target language that identifies whether the translation is enabled or disabled for the Oro application. |
TRANSLATION COMPLETENESS |
The translation completion progress measured in percentages. |
UPDATES |
The status that defines whether the corresponding language translation can be installed and updated via the Crowdin service. |
Every language covers the Oro application elements translation for a specific localization. For example, French (Canada) or English (Canada) localization may be linked to a respective language with translations that apply to Canada only.
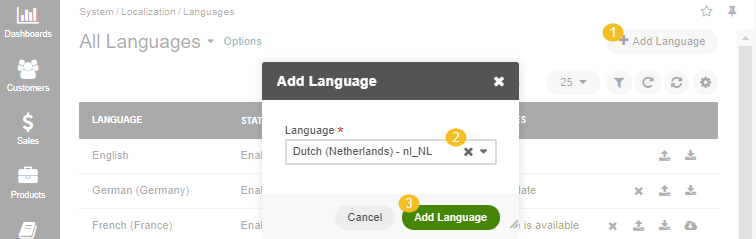
To add a new translation and start using it for localization:
Click Add Language at the top right corner.
Select the target language from the available list in the popup dialog. Start typing the language name in the blank field to narrow down the choices.
Click Add Language at the bottom right of the dialog.
Now, once the language has appeared in the list, you can perform the following actions:
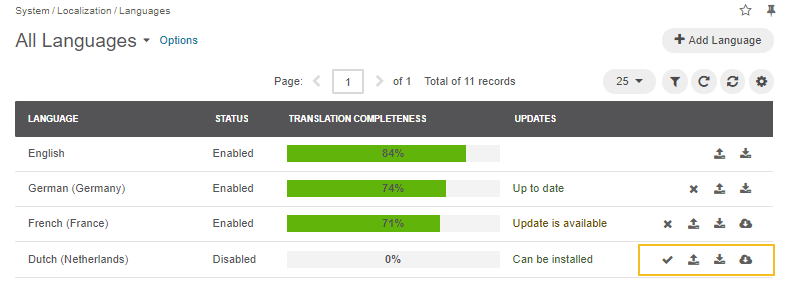
Import the file with the system elements translation from the Crowdin service into the Oro application by clicking the icon at the end of the row and then Install in the popup form. The import is available if the status in the Updates column is set to Can be installed signifying that the corresponding translation has been provided on the Crowdin website. More information on how to contribute to the Oro application translation is described in the Contribute to Translations section.
If there is no translation available on the Crowdin website, or it is not enough to cover all the text system elements in the application, provide your own translation:
Click and download the file with all the items required for translation.
Receive the email with the exported file upon completion.
Fill in the file with the proper translation of the UI elements.
Once the translation is completed, you can upload the file into the application:
Click to trigger a popup import dialog.
Click Choose File and select the .csv file you have prepared.
Select the strategy for uploading the file.
Add and Replace strategy adds a translation to the elements that had no translation before and overrides the existing translation with the one mentioned in the file.
Reset and Add strategy removes all the existing translations for the selected language and adds only the ones mentioned in the file.
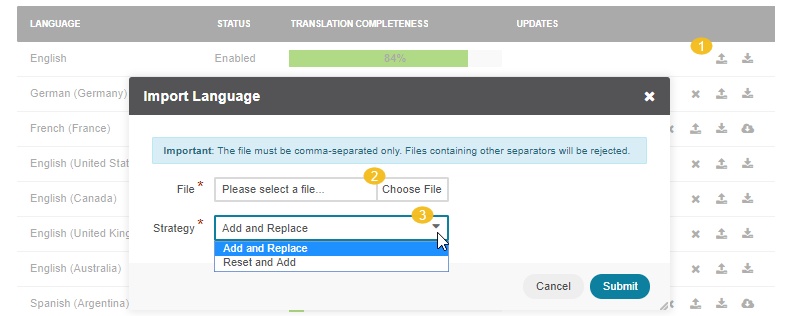
Click Submit to start the file import.
Click Cancel to decline the import.
Important
Interactive status messages inform about the import progress. Additionally, an email message with the import status is delivered to your mailbox. Once the import is complete, check out the changes in the Translations section.
Click to enable the language for the application.
Important
Some languages in the grid may have the update status and the button from Crowdin missing. This means that this language is disabled from management via Crowdin and that a developer manages data. You need to contact your administrator or developer to update data from the Crowdin for such a language.