Important
You are browsing upcoming documentation for version 7.1 of OroCommerce, scheduled for release in 2027. Read the documentation for the latest LTS version to get up-to-date information.
See our Release Process documentation for more information on the currently supported and upcoming releases.
Configure Settings for Product Promotions per Website
IThe Promotions configuration settings can be enabled globally, per organization, and per website.
Enable New Product Icons per Website
On the Product Promotions configuration page, you can enable New product icon to be displayed on the product details page.
Navigate to System > Website in the main menu.
For the necessary website, hover over the More Options menu to the right of the necessary website and click the Configuration icon to start editing the configuration.
Select Commerce > Product > Promotions in the menu to the left.
To customize the option configuration, clear the Use Organization checkbox to override the organization-wide configuration.
In the New Product Icons section, select Yes or No in the Show on Product View list to enable or disable new product icon on the product details page.
Configure New Arrivals per Website (Version 5.1 and Below)
Important
The configuration applies to OroCommerce version 5.1 and below and is retained in the current version only for legacy backward compatibility. For v6.0 and above, please configure this option via the product segment content widget under Marketing > Content Widgets following the new configuration logic.
Prerequisites
Before enabling the new product icons and new arrivals segment, make sure you have performed the following actions:
Mark the selected products as new arrivals in the General section of the Products > Products main menu by setting Is New Arrival to Yes.
Create a new arrivals segment under Reports & Segments > Manage Segments as described in the Create Segment topic.
Configuration
Navigate to System > Website in the main menu.
For the necessary website, hover over the More Options menu to the right of the necessary website and click the Configuration icon to start editing the configuration.
Select Commerce > Product > Promotions in the menu to the left.
Note
For faster navigation between the configuration menu sections, use Quick Search.
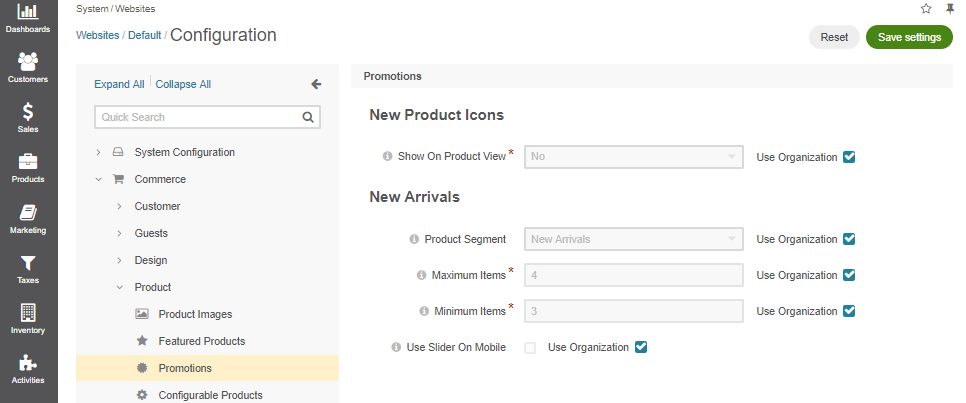
In the New Arrivals section provide the following information:
Product Segment – Select the segment that will include the items to be featured in the New Arrivals block.
Note
If Choose Segment is selected, the New Arrivals block disappears from the homepage.
Maximum Items – Set the maximum number of items that the block should contain. By default, the number is set to 4 items.
Minimum Items – Set the minimum number of items that the block should contain. By default, the number is set to 3 items.
Note
The block will be hidden if the number of items in the segment used for the block is less than the set value. For instance, if the set minimum number is 3 and the number of items in the segment is 2, you will not be able to see the block unless you add more items to the segment, or change the minimum value.
Use Slider On Mobile – When the slider is enabled, the block occupies less screen space, while showing larger product images.
Note
When enabled, Use Organization allows for system settings to be used. Clear this checkbox to enable manual change of settings.
Click Save.