Important
You are browsing upcoming documentation for version 7.0 of OroCommerce, scheduled for release in 2026. Read the documentation for version 6.1 (the latest LTS version) to get up-to-date information.
See our Release Process documentation for more information on the currently supported and upcoming releases.
Configure Global Email Settings
You can configure email settings on four levels – globally, per organization, per website, or per user with the system settings on the global level containing the highest number of options. Based on the level where configuration has taken place, settings can fall back to other levels.
Note
See a short demo on how to create and manage emails and how to synchronize your mailbox with an Oro application or keep reading the step-by-step guidance below.
Configure Email Settings
To configure email settings globally:
Navigate to System > Configuration in the main menu.
Click System Configuration > General Setup > Email Configuration in the panel to the left.
On the Email Configuration page, define options applied to all the emails generated within the instance. To change any of the default options, clear the Use Default checkbox first.
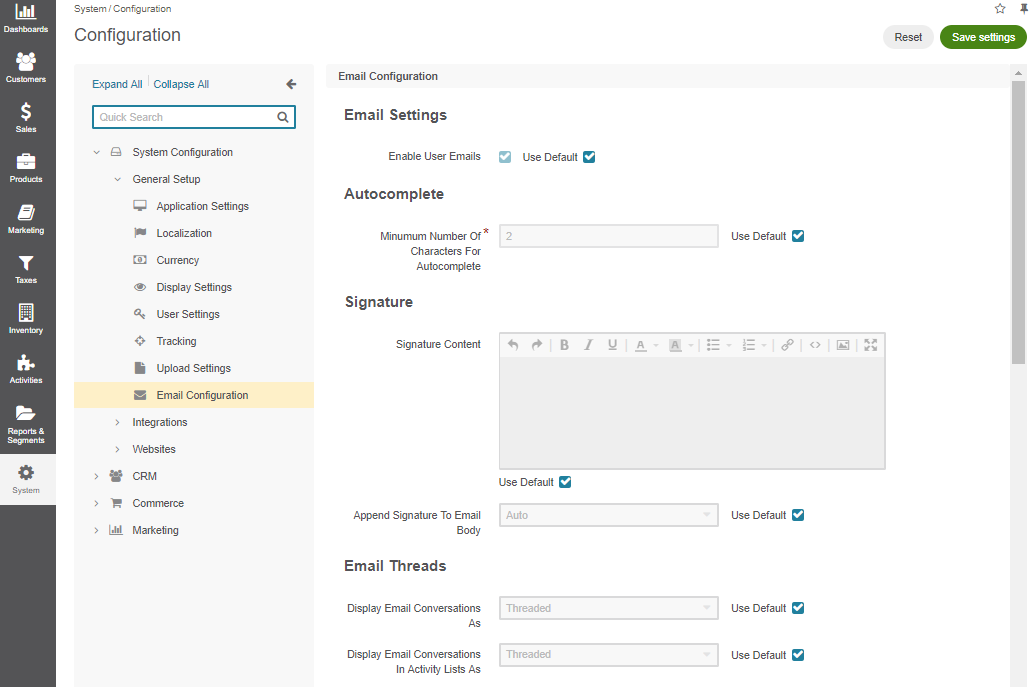
Email settings — User emails are enabled by default. To disable the option, clear the Use Default checkbox and clear the Enable User Emails option.
Autocomplete — Define the number of characters that are required to enable auto-complete for emails.
Signature — Add a signature to the emails.
Signature Content — Specify the text and formatting of your signature. By default, the email signature body is empty.
Append Signature to Email Body — Define whether a signature must be added automatically or manually.
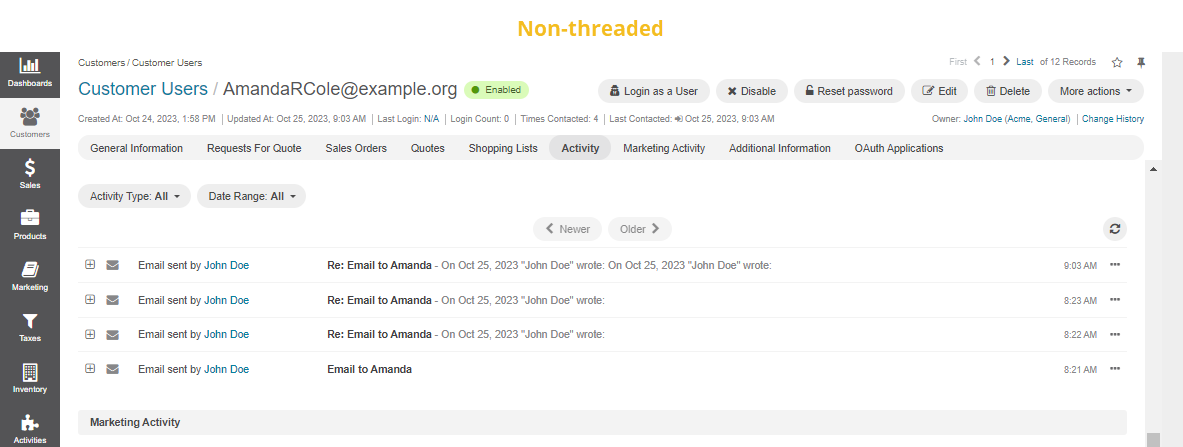
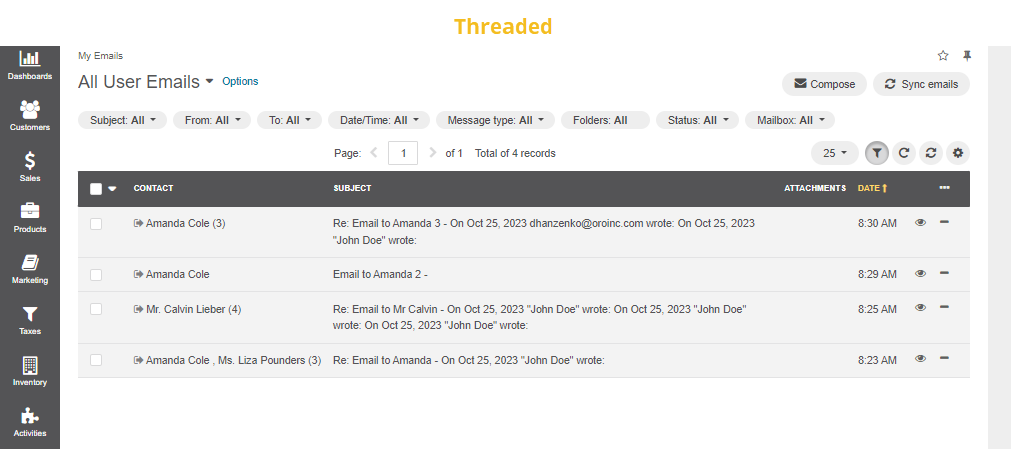
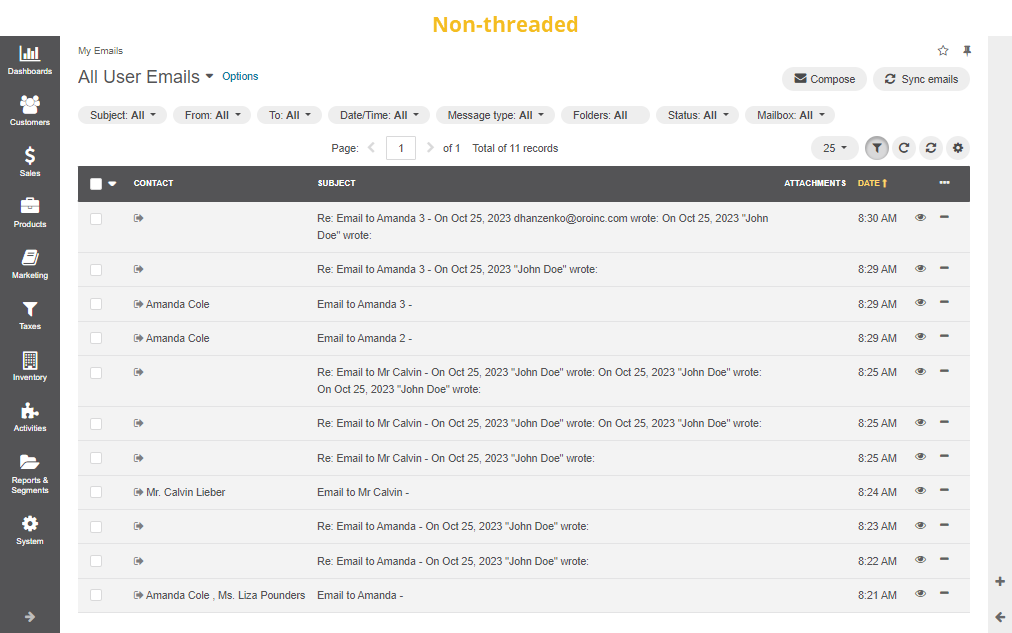
Under Email Threads, select how to display emails and replies to users, either as threads or separately.
Display Email Conversations As — Defines the user’s email representation under My Emails.
Under Reply, define which button will be displayed as the default one: Reply is available by default with the Forward and Reply all options in the dropdown. The settings can be changed to have Reply all displayed at the top.
Under Attachments, configure the following attachment options:
Maximum Attachment Size, Mb — Set the maximum attachment size in Mb. Attachments that exceed the defined size will not be uploaded. You can remove size limitations by setting the size to 0.
Enable Attachment Sync — Enable loading attachments on email sync.
Maximum Sync Attachment Size (Mb) — Set the maximum sync attachment size in Mb. Attachments that exceed the defined size will not be downloaded. You can remove size limitations by setting the size to 0.
Remove Large Attachments — Click the button to add a job to the queue to remove all attachments exceeding the defined size from the system.
Attachments Preview Limit — Set a limit to show a preview for attachments (a thumbnail for images and a big file icon for other files). Set the preview limit to 0 if you wish to see a list with file names only.
Under SMTP Settings, configure the SMTP protocol that allows to send email messages. Click Check SMTP Connection once you provide the following details:
Host — SMTP Host name, e.g. smtp.gmail.com
Port — SMTP Port number, e.g. 465
Encryption — Encryption type: None, SSL or TLS
Username — Your email address
Password — The password for your email address
Under HTML in templates, configure the following:
Enable HTML Purifier — Enable or disable HTML Purifier. Disabling HTML Purifier allows you to paste any HTML code into a template or an email body editor without tag stripping.
Enable WYSIWYG For Email Templates — Enable or disable the WYSIWYG editor for email templates. Remember that the WYSIWYG editor does not support variables provided by the default base email template. Enabling the WYSIWYG editor may break existing email templates.
Under Notification Rules, define the rules that will be applied by default to a notification generated in the application. You can define the Sender Email and Sender Name to be used.
Under Maintenance Notifications, provide the following details to set up maintenance notifications:
Email Template — Select the default template for maintenance notifications from the list.
Recipients — Leave this field empty to send maintenance notification emails to all active users. To send notifications only to selected users, add their email addresses separated by semicolon (;).
Under Campaign, define the rules that will be applied by default to emails generated as part of marketing campaigns in the application. You can define the Sender Email and Sender Name.
Under System Mailboxes, configure your system mailbox that allows people who do not have access to the company mailbox addresses to write to the company. To add a new system mailbox, click Add Mailbox.
Click Save Settings.
Configure a System Mailbox
System mailbox allows people who do not have access to the company mailbox addresses to write to the company.
You can create several system mailboxes. For example, this can be a mailbox for support requests, business proposals, or order requests.
You can define and modify the list of Oro users who have access to each of these mailboxes, automatically turn letters into cases or leads, and set up auto-responses.
You can create a system mailbox on two levels, globally and per organization.
Note
See a short demo on how to create and configure system mailboxes in your Oro application, or continue reading the step-by-step guidance below.
To configure a system mailbox globally:
Navigate to System > System Configuration in the main menu.
Click System Configuration > General Setup > Email Configuration in the panel to the left.
In the System Mailboxes section, click Add Mailbox.
In the General section, define the basic settings of the mailbox:
Mailbox Label — Provide a name for the system mailbox.
Email — Provide the email address.
In the Synchronization Settings, configure your IMAP/SMTP connection or a Microsoft 365 account:
Note
Please be aware that if the Account Type value has changed, a new mailbox will be registered, and all data from the currently configured mailbox will be lost. However, if the Account Type value has changed from or to the Other type, a new mailbox will not be registered, and all data from the currently configured mailbox will stay. This helps migrate existing mailboxes from the basic IMAP configuration to Microsoft or Gmail.
Account Type: Gmail (is available when the application is integrated with Google and OAuth 2.0 for email sync is enabled.)
Connected Account — The account connected to Gmail. Click Retrieve Folders to load folders from the connected account.
Account Type: Office 365 (is available when the application is integrated with Microsoft 365 OAuth)
Connected Account — The account connected to Microsoft 365. Click Retrieve Folders to load folders from the connected account.
Account Type: Other:
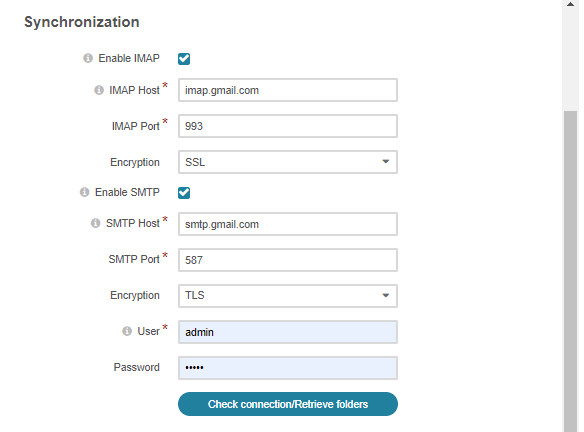
Enable IMAP — Select the checkbox to enable retrieving email messages
IMAP Host — Provide the IMAP Host, e.g. imap.gmail.com
IMAP Port — Provide the IMAP Port, e.g. 993
Encryption — Select the encryption type, SSL or TLS.
Enable SMTP — Select the checkbox to enable sending messages
SMTP Host — Provide the SMTP host, e.g. smtp.gmail.com
SMTP Port — Provide the SMTP port, e.g. 587
Encryption — Select the encryption type, SSL or TLS.
User — Provide your email address
Password — Provide your password
Click Check Connection/Retrieve Folders. After a successful connection, a list of available folders is displayed. Select the checkboxes next to the folders you wish to synchronize. In the example below, synchronization has been done for a Gmail mailbox. The INBOX folder will be synchronized.
Hint
Detailed instructions on the way to set up IMAP and SMTP connection in Gmail are provided on the Google support page.
Hint
To enable connection, select the checkbox next to Allow Access for Less Secure Apps Box.
In the Email Processing section, choose what happens to all the emails received in the mailbox.
Do Nothing — No actions are performed. Letters are saved in the mailbox.
Convert To Lead — Letters will be saved in the mailbox. Based on the first letter in the thread, a new Lead record will be created in the Oro application.
Convert To Case — Letters will be saved in the mailbox. Based on the first letter in the thread, a new Case record will be created in the Oro application.
Convert To Draft Order — When AI Smart Order is configured in an OroCommerce Enterprise application, the system will scan the email box for any incoming POs and create a draft order using the information it captures from the email and or its attachment automatically. The purchase orders must be attached to the email in JPG, PNG, or PDF format. Please contact our support team to help with implementation.
As an example, we have selected the Convert To Lead option. Once the action has been selected, define which user will own the records and choose the source of your leads in the Source field.

Note
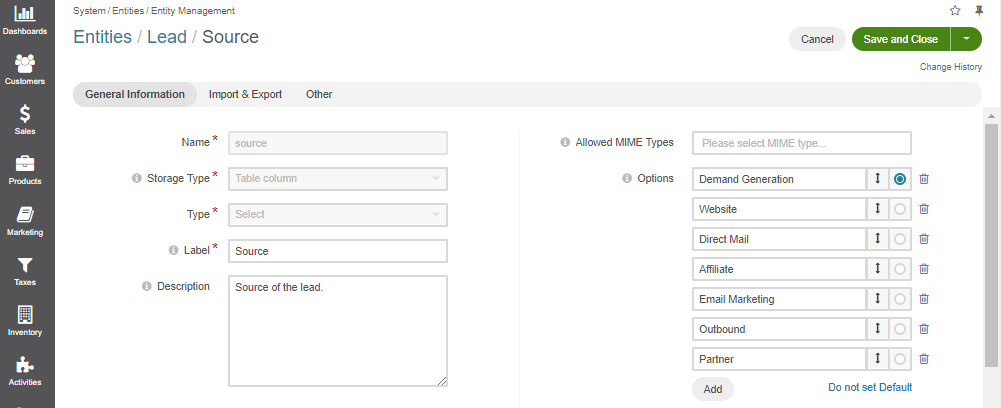
Options in the Source field should be defined in advance. This can be done through the entity manager in System > Entities > Entity Management > Lead > Source.
In the Access Management section, define which users will have access to the system mailbox. You can select roles and/or specific users. All the users with defined roles and all the specifically defined users will have access to this mailbox.
In the Autoresponse Rules section, generate one or several auto-response rules. These rules determine which template is sent to the sender of the email.
Click Add Rule to add a new auto-response rule and complete the following details in the dialog:
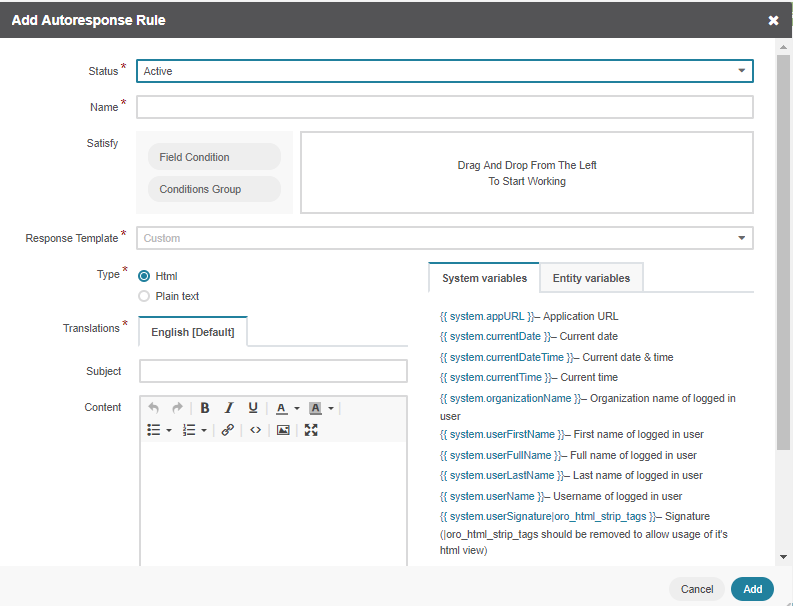
Status (Active/Inactive) — Only rules with active statuses are applied.
Name — Select the name for the rule to be used within the system.
Conditions — Define the rules according to which the rule will be applied. In the first selector, choose the field for which the condition is to be set: Body, From, Cc, Bcc. In the second selector, choose the conditions (e.g. contains, does not contain, is equal to, starts with, etc.). In the field besides the selectors, define the values where required. Click the + or +Add button to add another condition for the rule. Click the x button to remove the condition. All conditions are summed up (AND operator).
Response Template — Choose an email template for auto-response.
Type — Choose if you want to use html or plain text for the email.
Translations — If you have more than one language configured in the system, select the necessary translation.
Email Template — Enter the subject and content of your email.
Save Response As Email Template — Checking the box automatically saves the current email as a template.
Click Add on the bottom to save the rule.
Click Save Settings.
Business Tip
A lot of industries are getting a digital makeover. Take a look at how eCommerce fits into the manufacturing digital transformation landscape.

