Important
You are browsing upcoming documentation for version 7.0 of OroCommerce, scheduled for release in 2026. Read the documentation for version 6.1 (the latest LTS version) to get up-to-date information.
See our Release Process documentation for more information on the currently supported and upcoming releases.
Configure Filters and Sorters Settings per Website
Hint
Configuration for this option is available on three levels, globally, per organization, and per website.
To configure filters and sorting options per website:
Navigate to System > Websites in the main menu.
For the necessary website, hover over the More Options menu to the right of the necessary website and click to start editing the configuration.
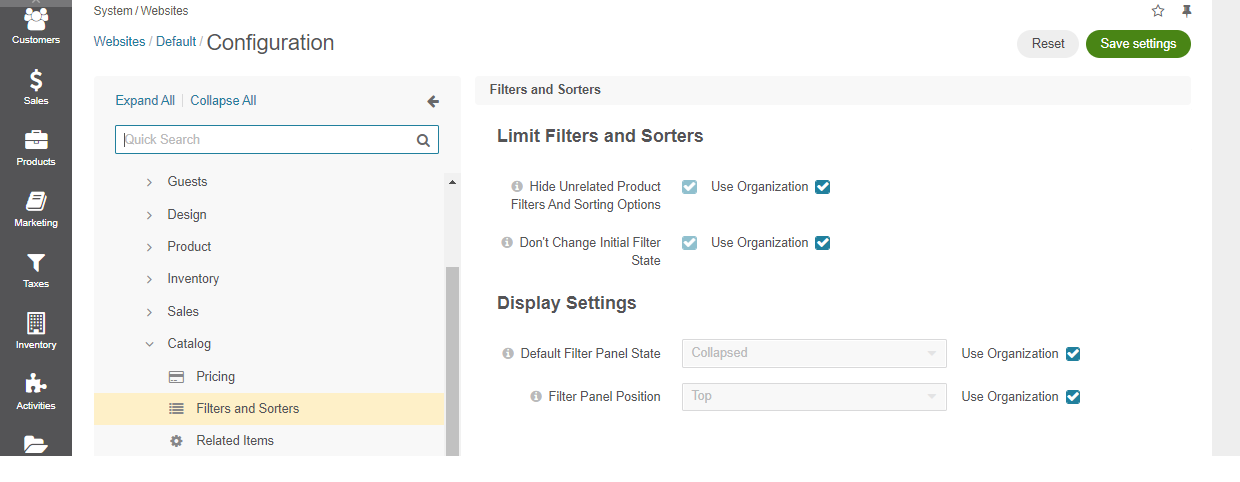
Select Commerce > Catalog > Filters and Sorters in the menu to the left.
Note
For faster navigation between the configuration menu sections, use Quick Search.
To change any of the options set on the organization level:
Clear the Use Organization checkbox next to the option.
Select the necessary checkbox or a value.
The following configuration options are available:
Hide Unrelated Product Filters and Sorting Options - removes unrelated filters and sorting options from the product collection page to display only those attributes that belong to the current product family. When a user adjusts the search to target the product with the desired attribute, but the attribute is no longer applicable, it gets removed from the filter.
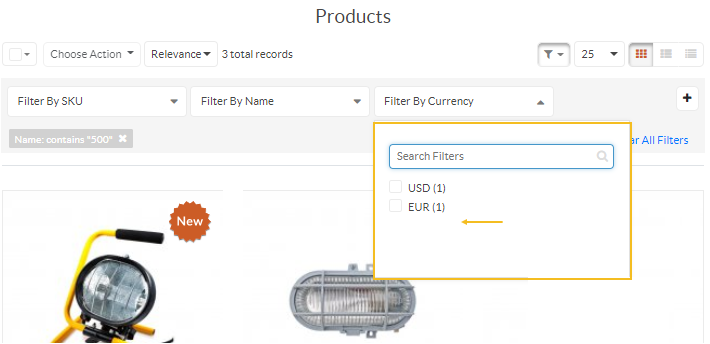
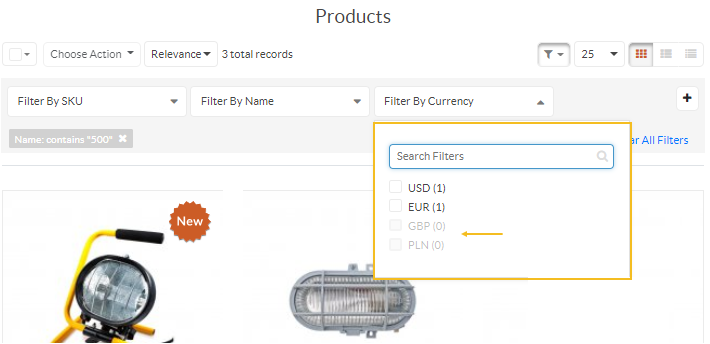
Don’t Change Initial Filter State - disables unrelated attributes within a filter. When applying a filter to the initial product data set in the storefront, all unrelated attributes remain visible but become disabled in the filter dropdown.
Note
This option affects filters in the storefront only when Hide Unrelated Product Filters and Sorting Options is enabled. Please ensure to enable both options for this configuration.
Default Filter Panel State - controls the visibility of the filters applied to the product grids in the storefront. The filter panel can be either expanded to show all filter bars or collapsed to reduce the screen space. In this case, the collapsed filters are substituted with the text representation of all applied filters.
Filter Panel Position — specifies where the filter panel should be represented in the storefront, at the top or in the sidebar.
Important
The Filter Panel Position configuration applies to OroCommerce version 5.1 and below and is retained in the current version only for legacy backward compatibility. For v6.0 and above, please configure this option under System > Theme Configuration.
Hint
To specify how to display the multi-select filter options, refer to the theme-related settings.
In the Product Sorting section, configure the options that enable you to override the default product sorting behavior in the storefront, which is typically based on a product sort order (if specified) and by relevance score.
Note
The product sorting feature is only available in the Enterprise edition.
Hint
Before enabling the options, ensure to:
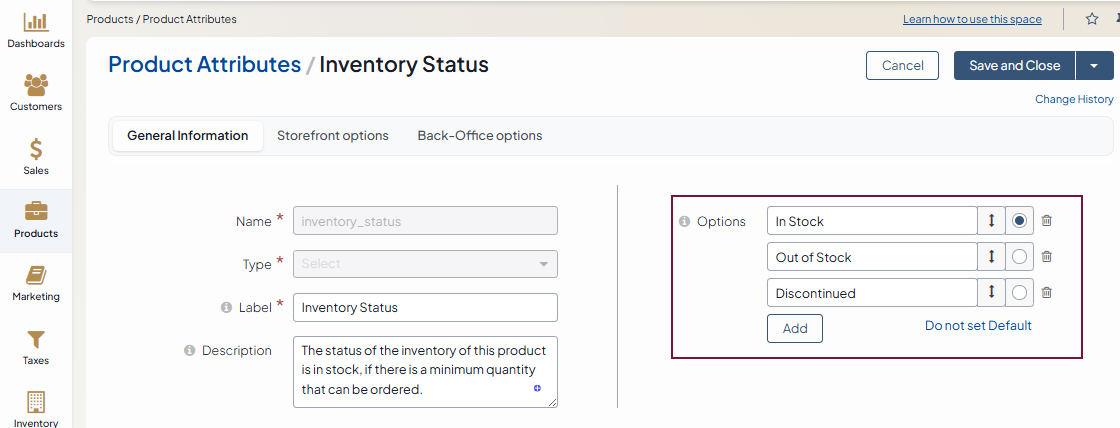
Define the options for the inventory_status product attribute under the Products > Product Attributes back-office menu. Drag and drop statuses to arrange them by priority (e.g., In Stock, Out Of Stock, Discontinued). Products with higher-priority statuses will be displayed first. Please note that the inventory_status attribute is a system product attribute, so only a system administrator of the global organization can edit it.
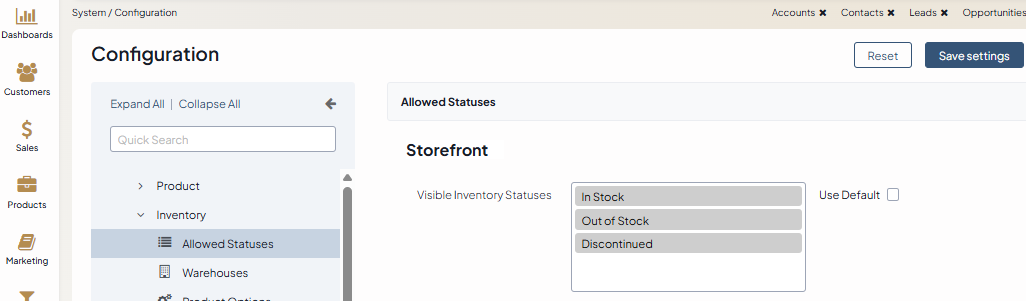
Check the visibility of the inventory statuses under System > Configuration > Commerce > Inventory > Allowed Statuses to ensure that products with the specified status can be visible in the storefront.
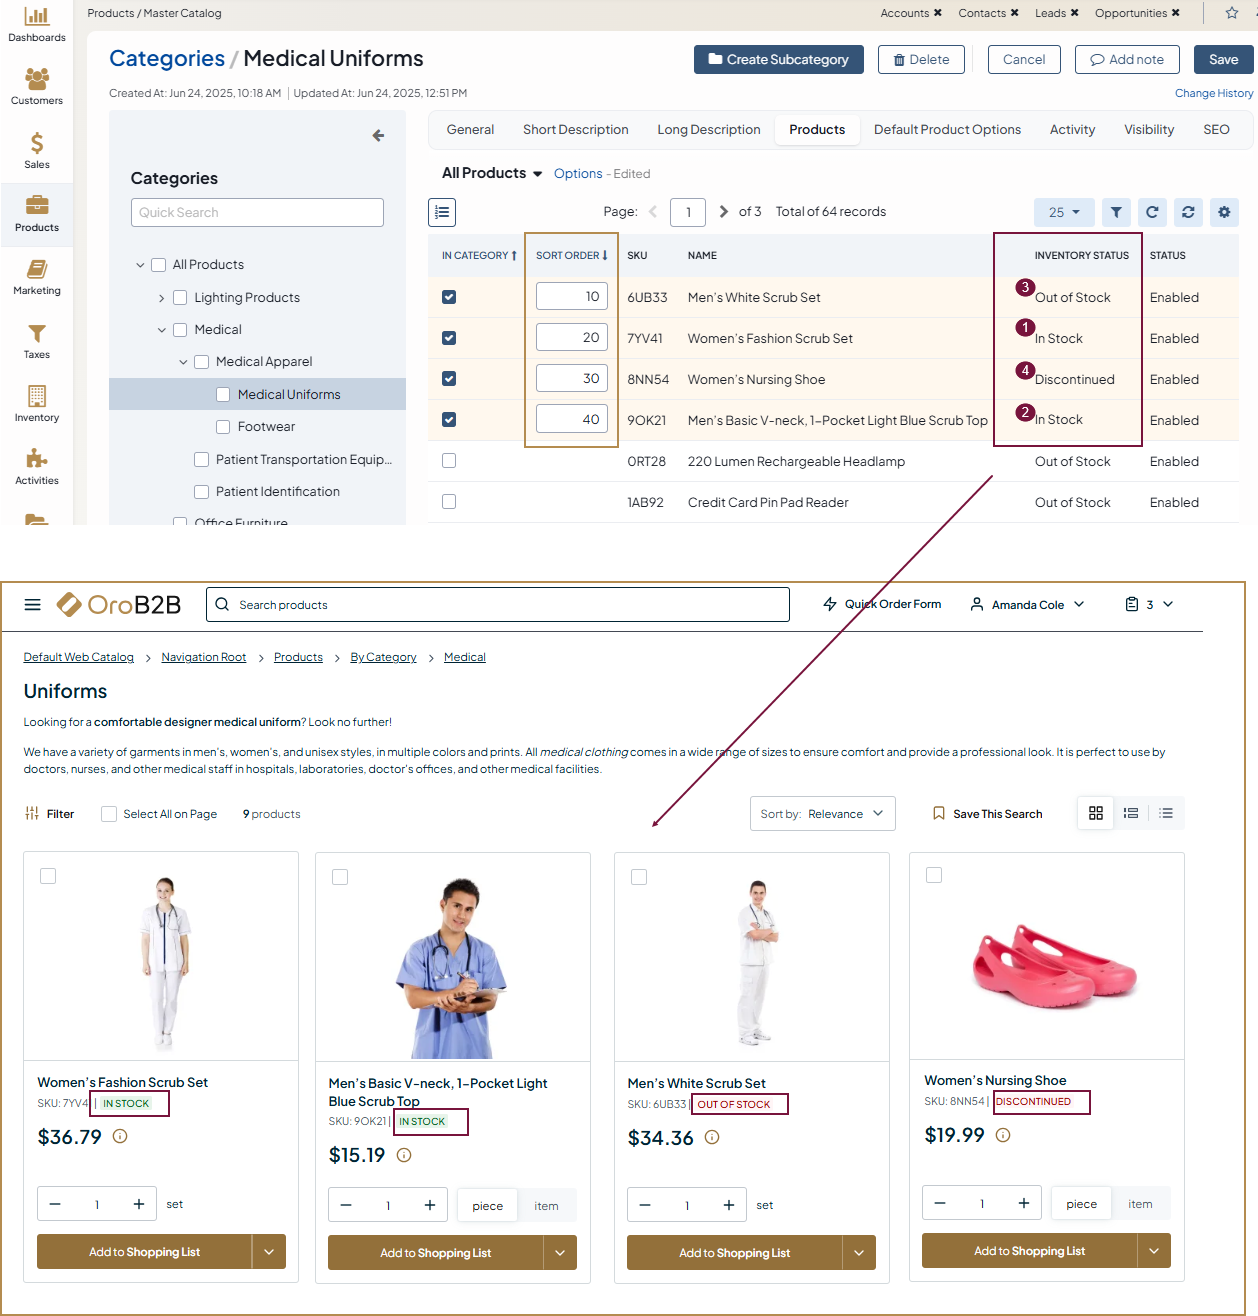
Sort Category Products by Inventory Status — When enabled, the items on product listing (master catalog category) pages in the storefront will be sorted by their inventory status, as configured under the Products > Product Attributes back-office menu. Products with higher-priority statuses (e.g., In Stock) will appear first, followed by others in the defined order. Within the same inventory status group, products are further sorted by the sort order number assigned to them in the category.
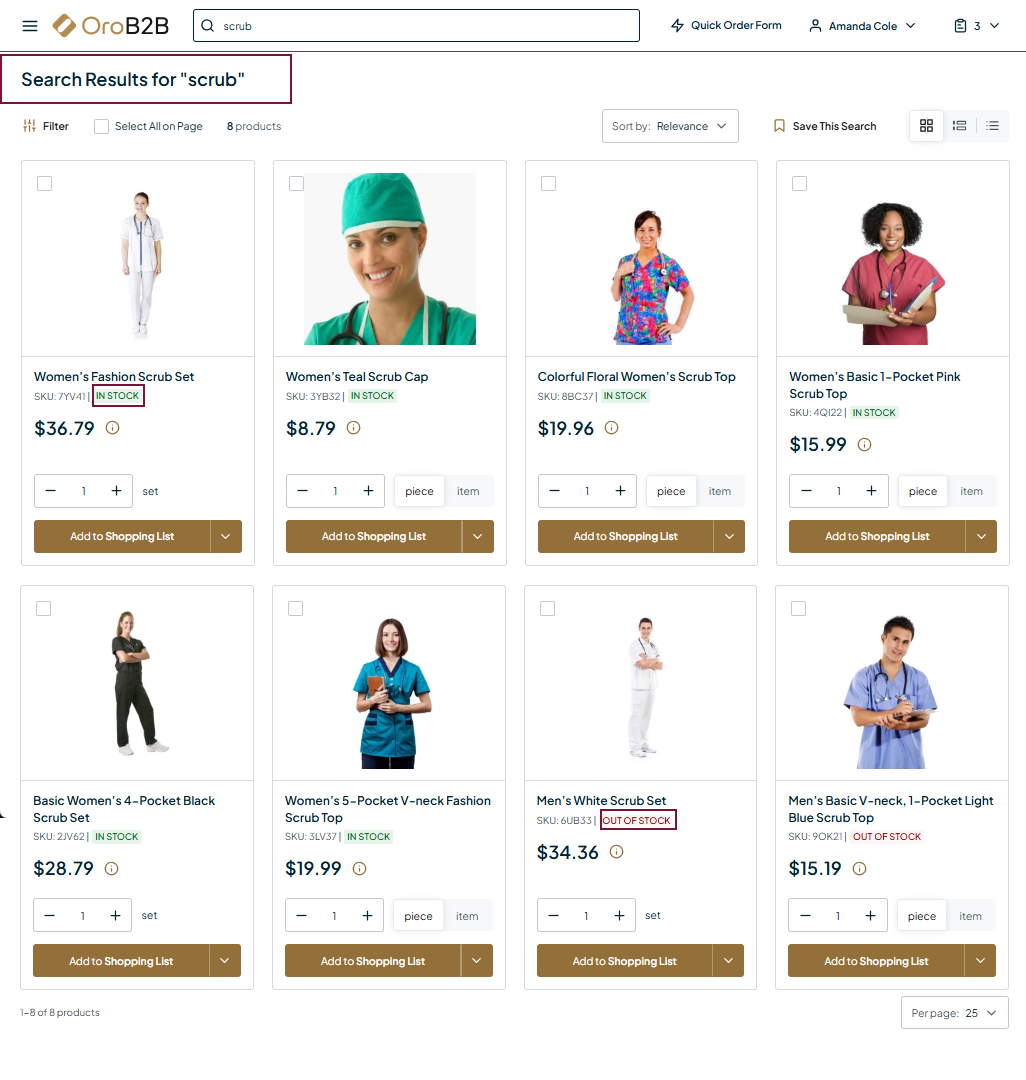
Sort Search Results by Inventory Status — When enabled, the items on the search results page in the storefront will be sorted by their inventory status, as configured under the Products > Product Attributes back-office menu. Products with higher-priority statuses (e.g., In Stock) will appear first, followed by others in the defined order.
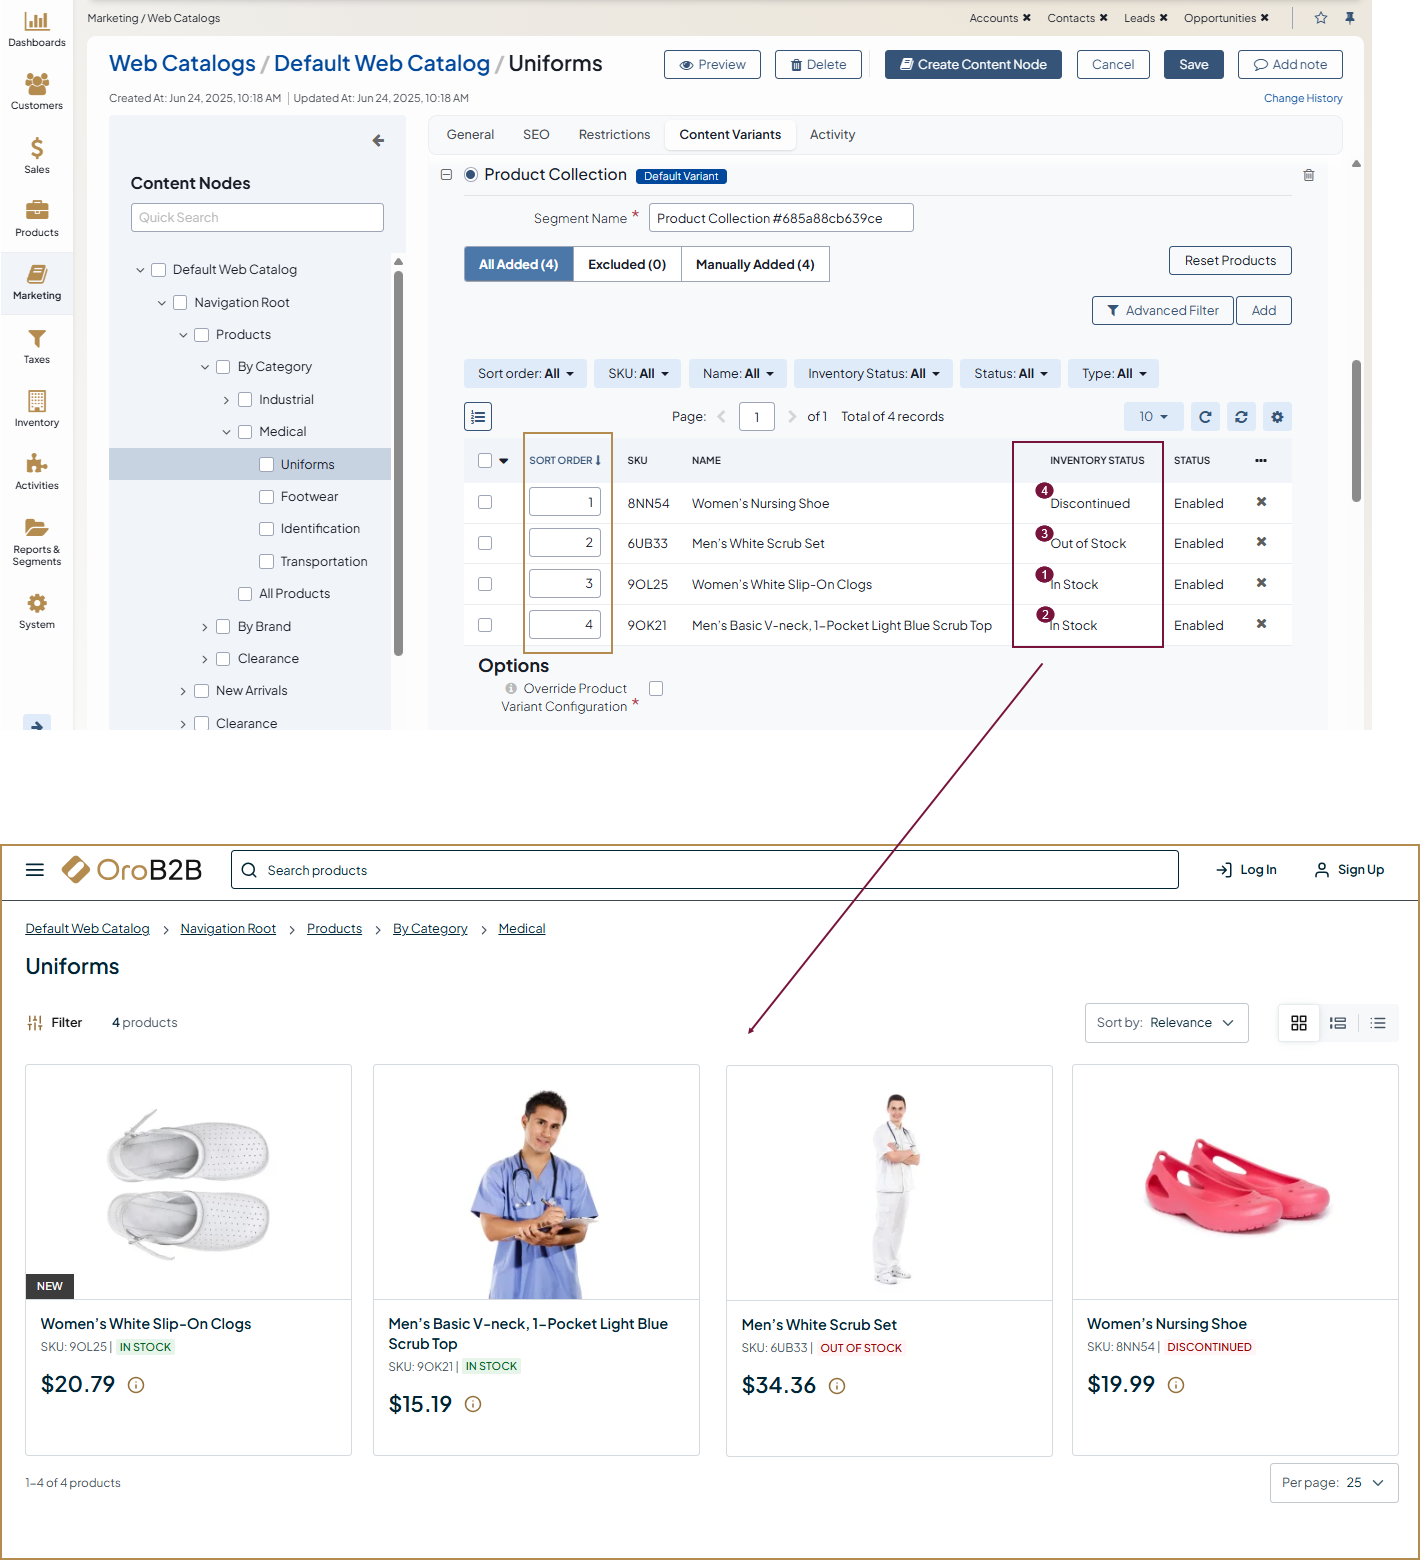
Sort Product Collection by Inventory Status — When enabled, the items in product collections in the storefront will be sorted by their inventory status, as configured under the Products > Product Attributes back-office menu. Products with higher-priority statuses (e.g., In Stock) will appear first, followed by others in the defined order. Within the same inventory status group, products are further sorted by the sort order number assigned to them in the product collection.
Click Save Settings.