Configure Payment Rules in the Back-Office
Hint
This section is part of the Payment Configuration topic that provides a general understanding of the payment concept in OroCommerce.
You can configure one or more payment rules that enable the payment methods for the provided destinations.
Note
See a short demo on how to create payment rules or keep reading the step-by-step guidance below.
Create a Payment Rule
To create a payment rule:
Ensure that the integrations for the payment methods that you plan to use (PayPal Payflow Gateway, PayPal Payments Pro, etc.) are already configured.
Navigate to System > Payment Rules in the main menu. The list of payment rules opens.
Click Create Payment Rule. The corresponding page opens.
In the General Information section:
Select the Enabled checkbox to activate the payment rule. You may keep it clear while you are drafting and testing the conditions.
Specify the payment rule name and sort order to set the priority compared to other payment rules.
Select the payment currency.
Important
When setting a payment rule for the PayPal integration, make sure to select the currency that PayPal supports, otherwise, the payment will not be processed. For the list of currencies supported by PayPal, refer to the Currency and Currency Codes section.
Select Stop Further Rule Processing if you would like to prevent applying other payment rules with lower priority.
In the Destinations section, add one or more destinations to apply this payment rule for. The payment rule applies when the billing address matches the provided destination(s). To add a destination:
Click + Add. The following section appears:
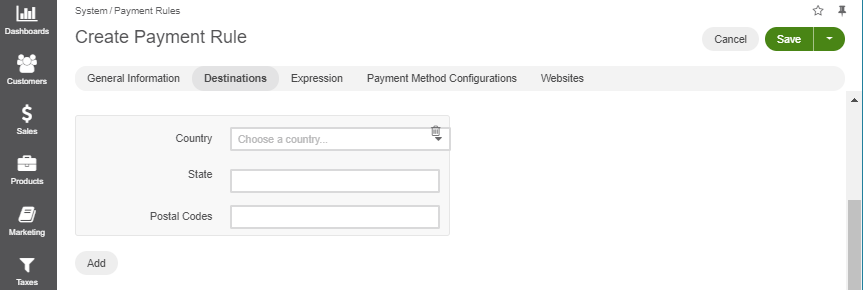
Specify the destination (e.g. select a Country, or select a country and state; for the most granularity you may provide a distinct list of postal codes to apply the payment rule for.
In the Expression section, specify the expression that describes the conditions when this payment rule should be applied. For example, account = 1.
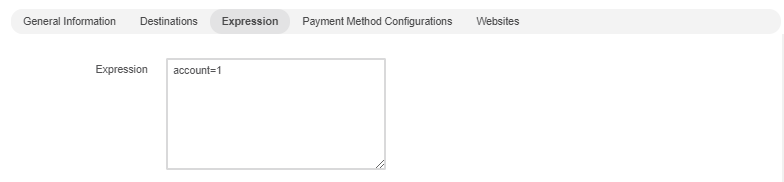
For detailed information about the expression language used in the shipping and payment rules, please see the Expression Language for Shipping and Payment Rules guide.
Important
Please be aware that PayPal Payflow Gateway cannot be used if the order total at checkout exceeds 99,999.99. To ensure thatPayPal Gateway payment method is hidden at Payment Step of the checkout when the order total exceeds the stated amount, please add the following expression to the payment rule linked to your active PayPal Payflow Gateway method:
total < 99999.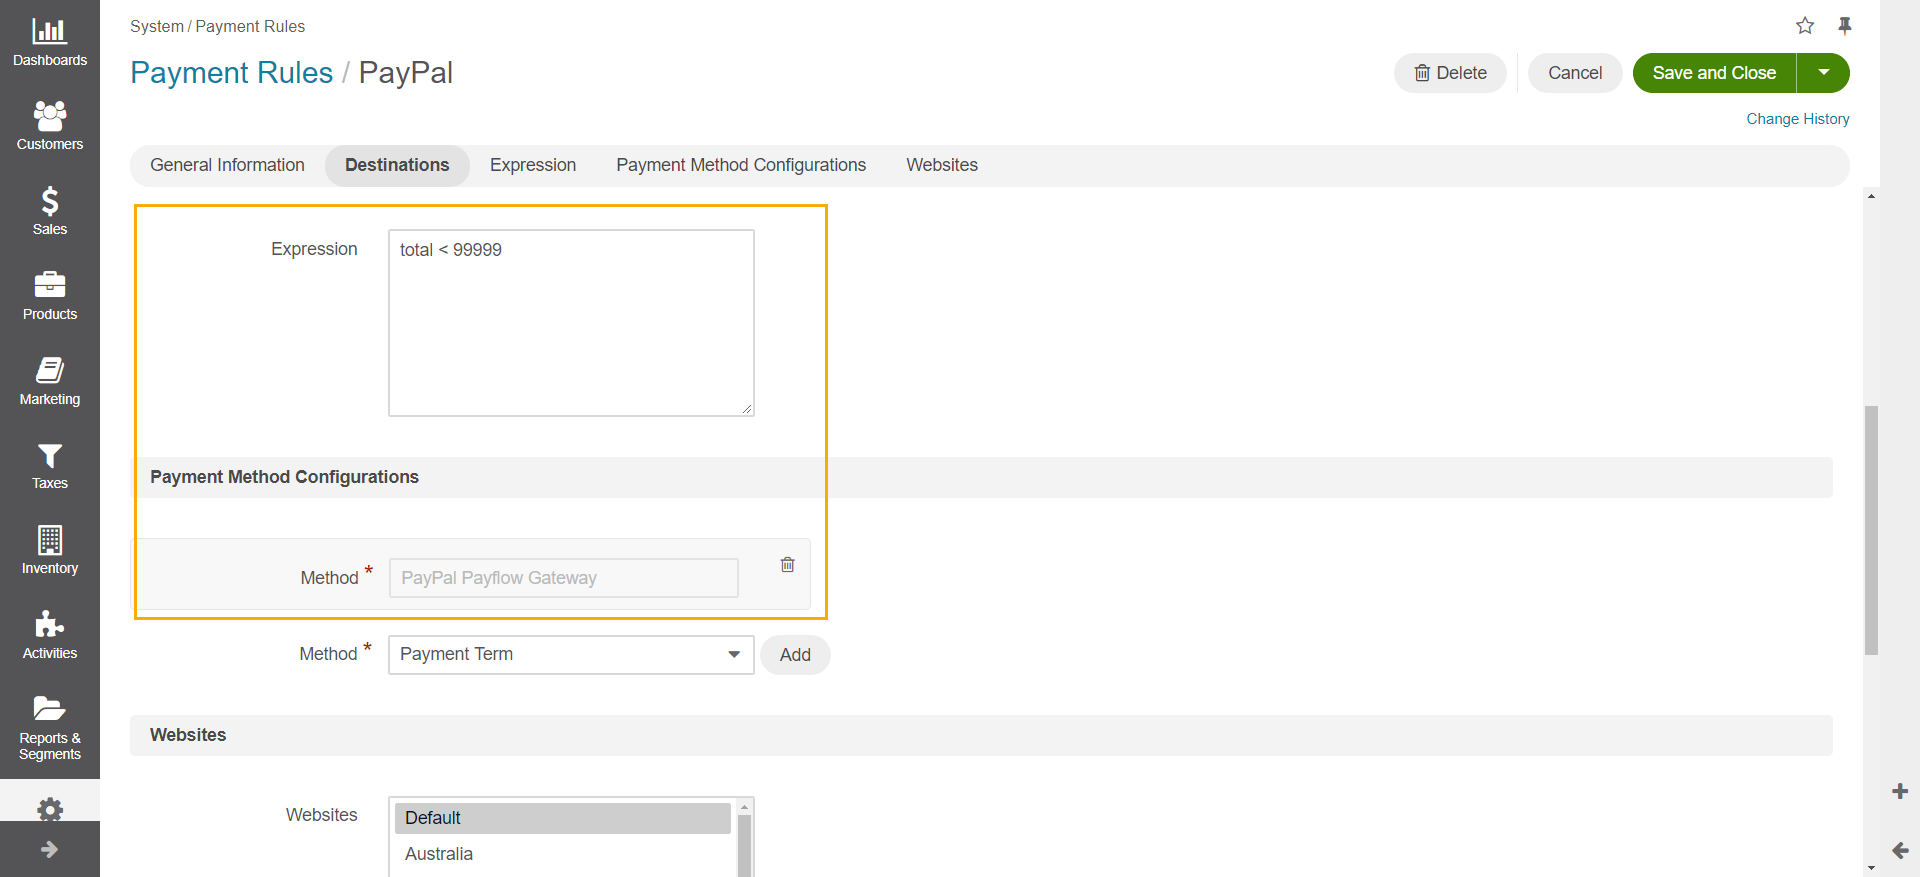
In the Payment Method Configurations section, you may enable one or more payment methods with this payment rule. To add a payment method, select it from the list and click + Add.
Warning
Only one unique payment method per integration may be selected in the payment rule.
PayPal:
To enable several PayPal Payflow Gateway/ PayPal Express options with different payment settings, create a separate payment rule for every unique option and for each specific currency. Find the list of currencies supported by PayPal in the PayPal Currency and Currency Codes topic. You still can use one copy of PayPal Payflow Gateway and one copy of PayPal Payflow Gateway Express Checkout in the same payment rule, as these are different payment methods.
In the Websites section, specify the website(s) that the payment rule should apply to, if you have more than one website. This field is optional and may be left empty. Hold the Ctrl key to choose several websites, if necessary.
Note
Please note that application of payment rules to websites is only available for the Enterprise customers.
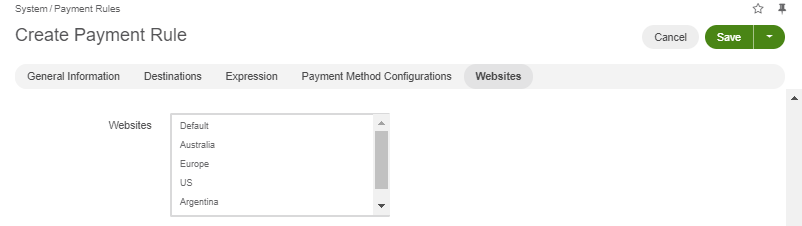
When no website is selected, the payment rule is always applied by default.
When at least one website is selected, the payment rule will apply to the orders created in the storefront of the specified website.
Click Save.
Manage a Payment Rule
Enable a Payment Rule
To enable a payment rule:
Navigate to System > Payment Rules in the main menu. The list of shipping rules opens.
Hover over the More Options menu at the end of the row with the necessary payment rule.
Click the Activate icon.
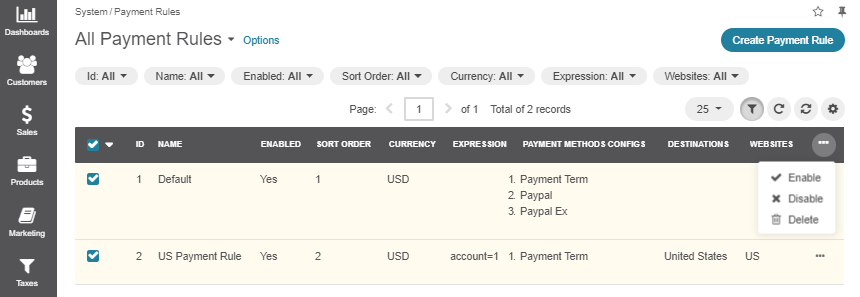
To enable several shipping rules at the same time:
Select the checkboxes on the left of the corresponding rows. The selected payment rules will be highlighted in yellow.
Click on the far right of table header.
Click Enable.
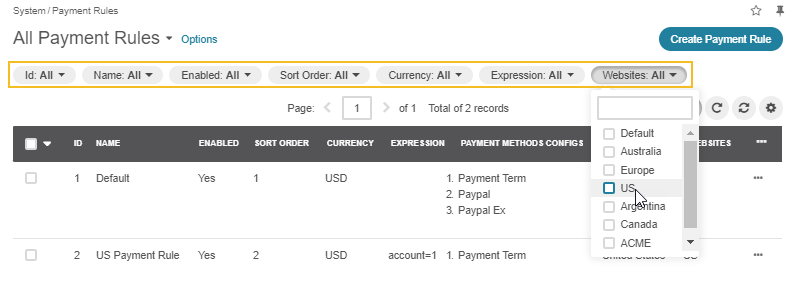
Filter a Payment Rule List
You can use filters on the payment rules list page to find the required records quicker:
To show filters, click above the table on the far right.
Filters are hidden by default.
To apply a filter, click on its button in the bar, and specify your query in the control that appears.
Note
Filter controls might look different depending on the type of data you are going to filter, e.g. textual, numeric, a date or an option set.
Organize a Payment Rule List
To define which columns to show in the table, click above the table on the far right:
To choose the columns to be displayed in the table, select the checkbox next to the required column under Show. Clear the checkbox to make the column disappear from the table.
To change the order of the columns, click next to the name of the column you wish to move, hold the mouse button and drag the column to the required position.
Related Topics