Manage Landing Pages in the Back-Office
Hint
This section is part of the Content Management Concept Guide topic that provides a general understanding of the tools that help manage the content of your website, such as web catalog, landing page, content blocks, widgets, and WYSIWYG editor.
Landing Page is a marketing tool that generates interest and leads for your sales pipeline and has a distinct call to action with a single focused objective.

While there are a number of default editable landing pages out-of-the-box (e.g., homepage, accessibility, about, etc.), you can also create your own from scratch.
Create a Landing Page
To create a new landing page:
Navigate to Marketing > Landing Pages in the main menu.
Click Create Landing Page.
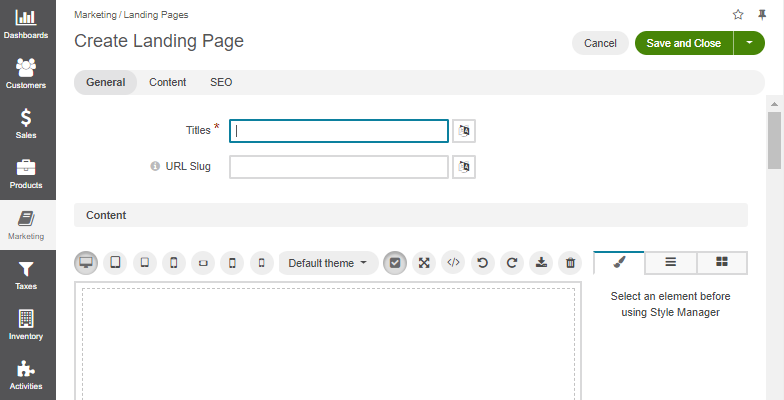
Fill in the landing page title (Titles) and translate it into the languages supported in your Oro configuration.
To manage title translations, click next to the Titles box and follow the guidance here.
You have the option to hide the title of a landing page in the storefront when it is accessed directly (not via the web catalog) by enabling the Do Not Render Title option. However, if you add the landing page as a content variant in the web catalog, the Do Not Render Title option in the web catalog will take precedence.
When creating a landing page, you have the option to add a URL slug. If you plan to use this landing page as a content variant in a web catalog, it is recommended that you disable the Create a URL Slug option. This will prevent the creation of two URLs for the same page. However, if you choose to enable this option, a URL slug will be automatically generated. You can modify this autogenerated value in the URL Slug field.
To ensure that slug prototype translation is localization-friendly, click next to the URL Slug box and follow the guidance here.
Enter the landing page content in the WYSIWYG text editor.
Drag the selected element (a text, an image, a content block, a widget, or a source code) from the Blocks menu and drop it to the required location. Rearrange the content or modify the style of the elements by navigating from tab to tab in the WYSIWYG editor’s manager bar. For more details on WYSIWYG management, see the WYSIWYG Editor topic.
In the SEO section, manage the meta description and meta keywords that will be encapsulated on the landing page.
Meta information helps search engines index and display the landing page in the search results when it becomes relevant.
Meta description would summarize the page contents in one or several sentences (~160 characters).
Meta keywords are comma-separated words and phrases that describe the content in the most precise and relevant way that helps find the page via the search engines (e.g., Google, Yahoo, Bing, etc.)
Once you have completed editing the new landing page details, click Save on the top right of the page.
The new landing page is created and is available by the following URL:
<OroCommerce application URL>/<slug prototype>/
For example, http://acme.orocommerce.com/online-webinar-jan2017/
Note
You can also create a landing page from the web catalog configuration page following the guidelines described in the Add a Landing Page topic.
Next steps
Use the landing page URL in your marketing activities (email campaigns, advertisements, etc.).
Manage Landing Pages
To manage landing pages, navigate to Marketing > Landing Pages in the main menu.

Here, you can perform the following actions:
Create a new landing page by clicking Create Landing Page on the top right.
Bulk delete landing pages: In a bulk select to the top left, select one of the following options: All, All Visible, None. On the top right of the list (grid), click bulk More Options menu and click the
to remove all selected landing pages.
View a landing page by clicking on the item to open its details page.
Hover over the More Options menu to the right of the item and select either to view, edit , or
Filter landing pages by ID or Title.
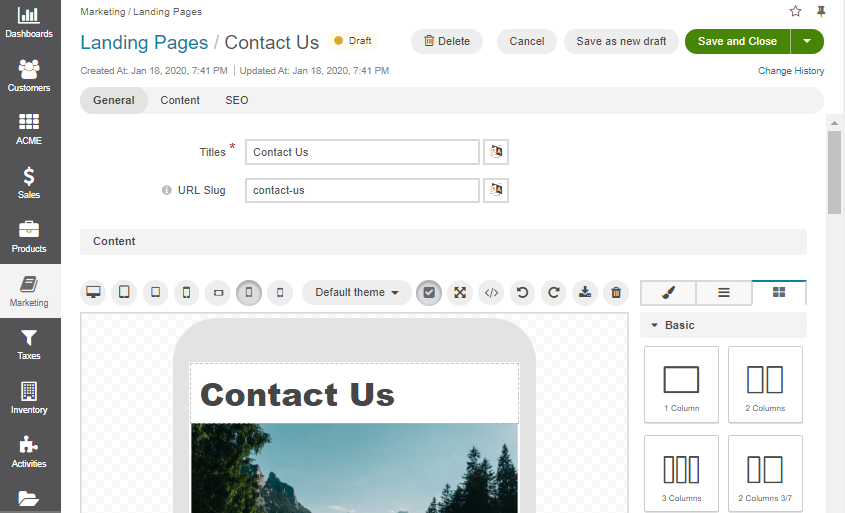
View and Edit a Landing Page
To view the landing page details:
Navigate to Marketing > Landing Pages in the main menu.
Find the line with the necessary landing page and click on it. You can preview the landing page’s detailed information.
Click Edit on the top right of the page to update the landing page title and content, edit meta information, and change slug prototypes and their translation.
Click Save on the top right of the page.
Click Save as draft to save the landing page as a draft. Find all the related drafts under the Drafts section of the landing page.
Manage Landing Page Drafts
The landing page functionality enables you to create drafts, save them, and publish selected drafts when you are ready.
Note
The ability to manage drafts depends on the permissions and access levels defined for a user of the selected role.
To create a draft of the required landing page:
Navigate to Marketing > Landing Pages and click on the selected landing page.
Click Create draft on the top right.
An action confirmation popup displays the fields to be copied from the selected landing page to its draft (e.g., content, titles, metaTitles, metaDescriptions, metaKeywords). Click Yes to proceed and edit the draft.
Edit the information as required and select one of the further actions:
Save and Close – saves the current draft. You can find it under the Drafts section of the selected landing page.
Save as new draft – saves the draft as a new one without affecting the current draft. For example, you are editing Draft 2, and instead of applying the changes to Draft 2, you want to save your draft as a new one and call it Draft 3. When saved, Draft 2 remains unchanged, and Draft 3 is added to the list of the landing page drafts.
Cancel – cancels the draft creation.
Delete – deletes the draft.
To view the saved drafts, navigate to the Drafts section of the required landing page. Click the desired draft to get to its details page. Alternatively, hover over the More Actions menu to edit,
delete, duplicate, or publish the draft.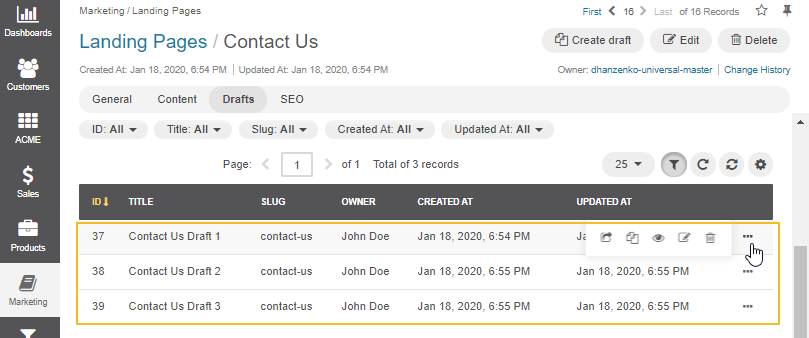
To publish the draft, click Publish draft on the top right of the draft’s details page. Once the action is confirmed, the draft is published, substituting the original landing page. The drafts previously created for this landing page remain unchanged under the Drafts section.