Important
We are updating the images for OroCommerce version 6.1 to align with the latest changes in the back-office design. During this transition, some images may still show older versions. Thank you for your patience as we work to update all visuals to reflect these changes.
Manage Requests for Quote in the Storefront
To negotiate with the sales person (e.g. on a better price, more convenient quantities and additional services), you can request a quote. Both registered and guest users can create RFQs in the Oro storefront.
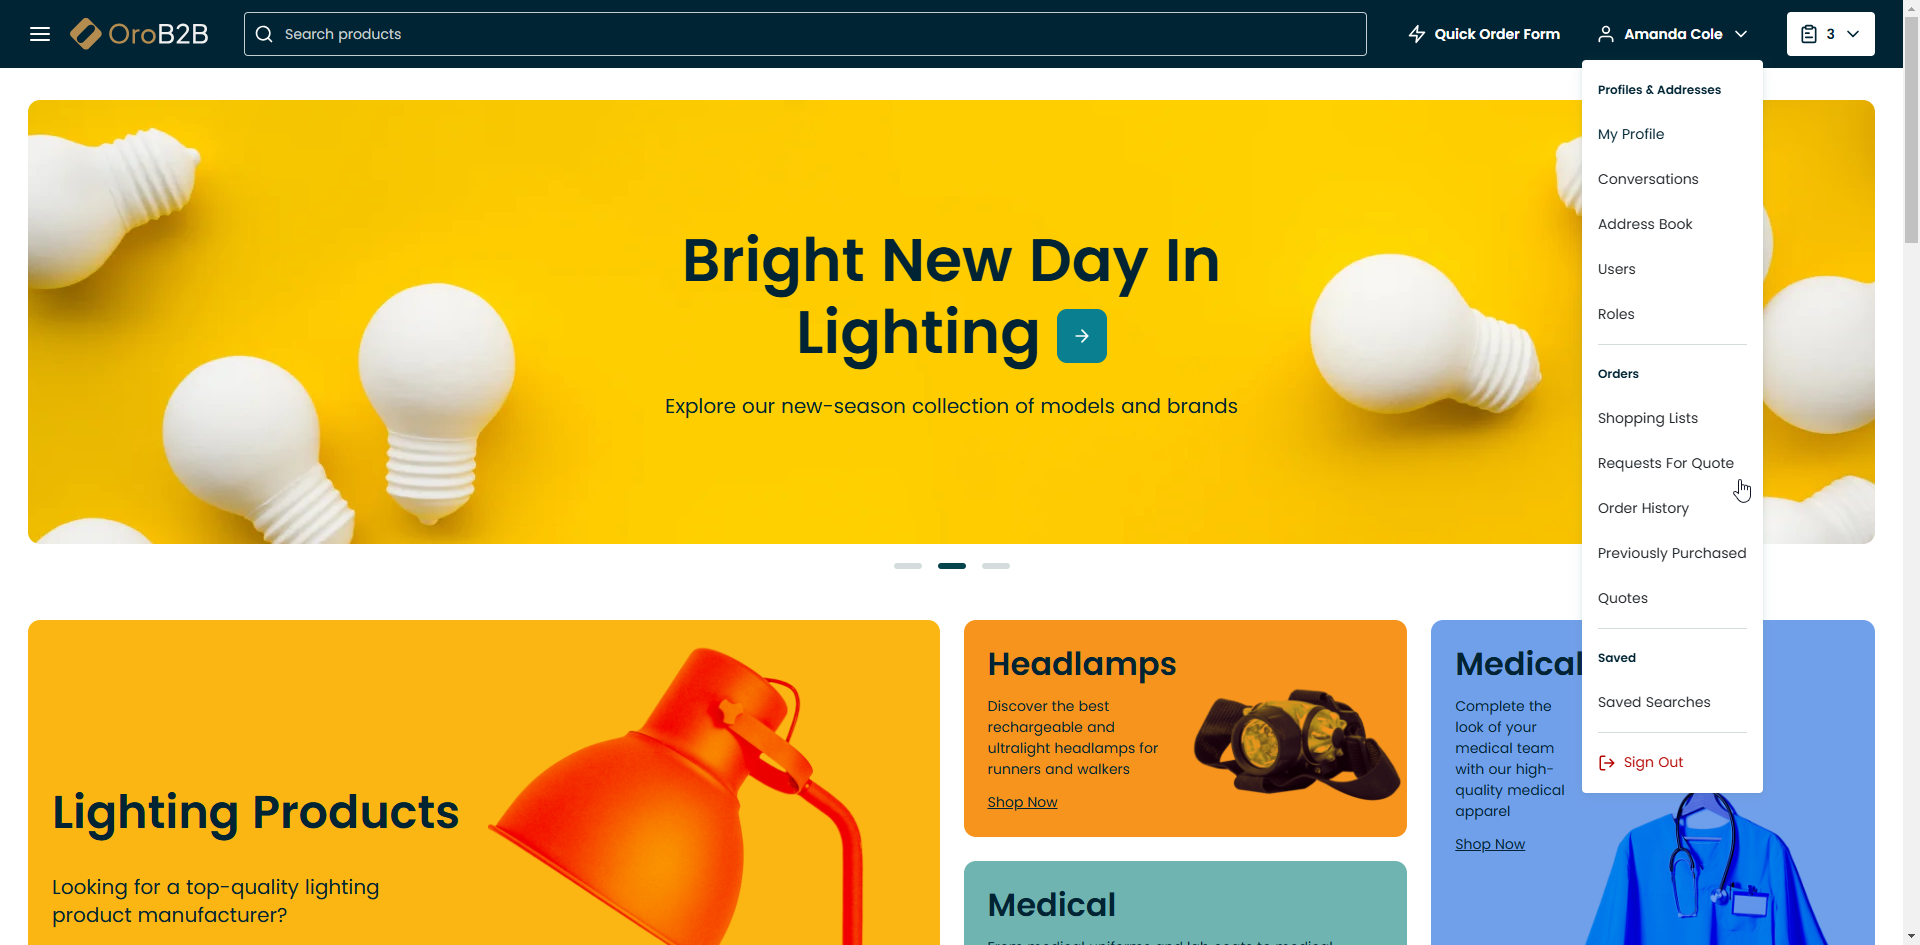
Registered users can view all existing Requests for Quote or create new ones in their storefront account by clicking Requests for Quote in the user menu in the top navigation bar.
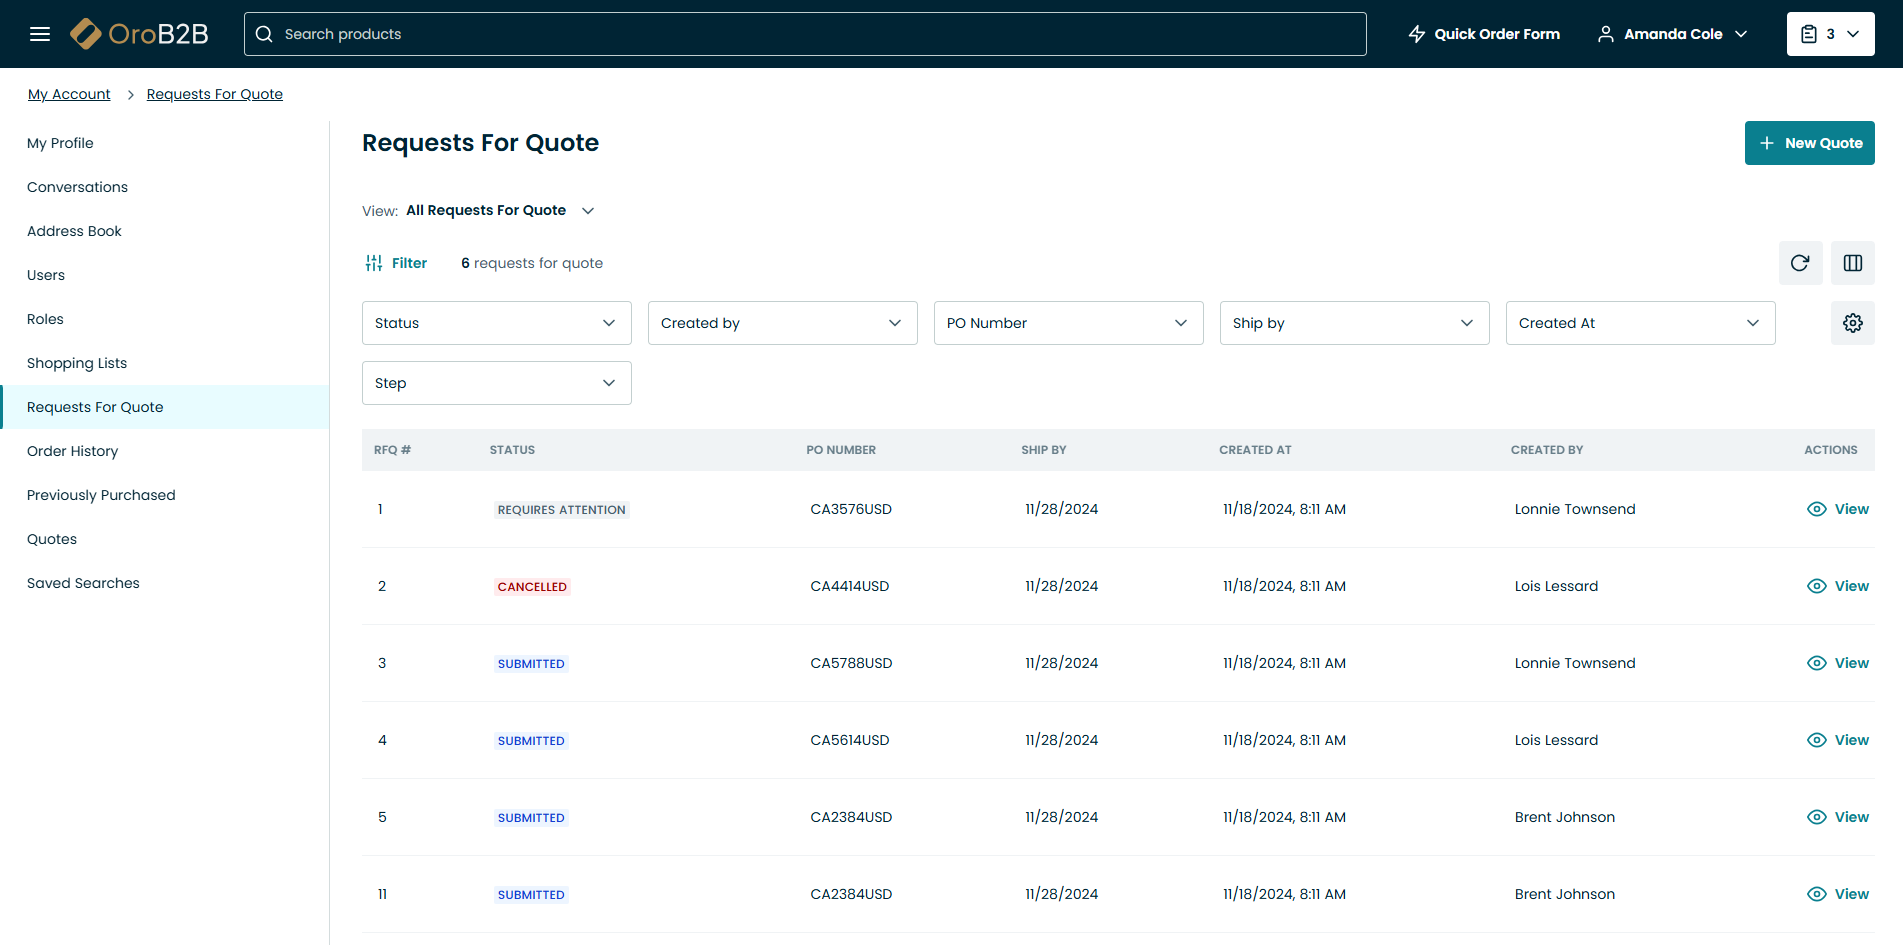
RFQ Grid
The RFQ grid shows the following data:
RFQ#
Status
PO Number
Ship by
Create At
Owner
Step
More Actions (View)
Within the table you have the following action buttons available:
Reset
the view table to clear view table customization and return to default settings. Reset applies to all filters, records per page and sorting changes that you have made.
Manage
table settings to define which columns to show in the table.
Manage filters
.
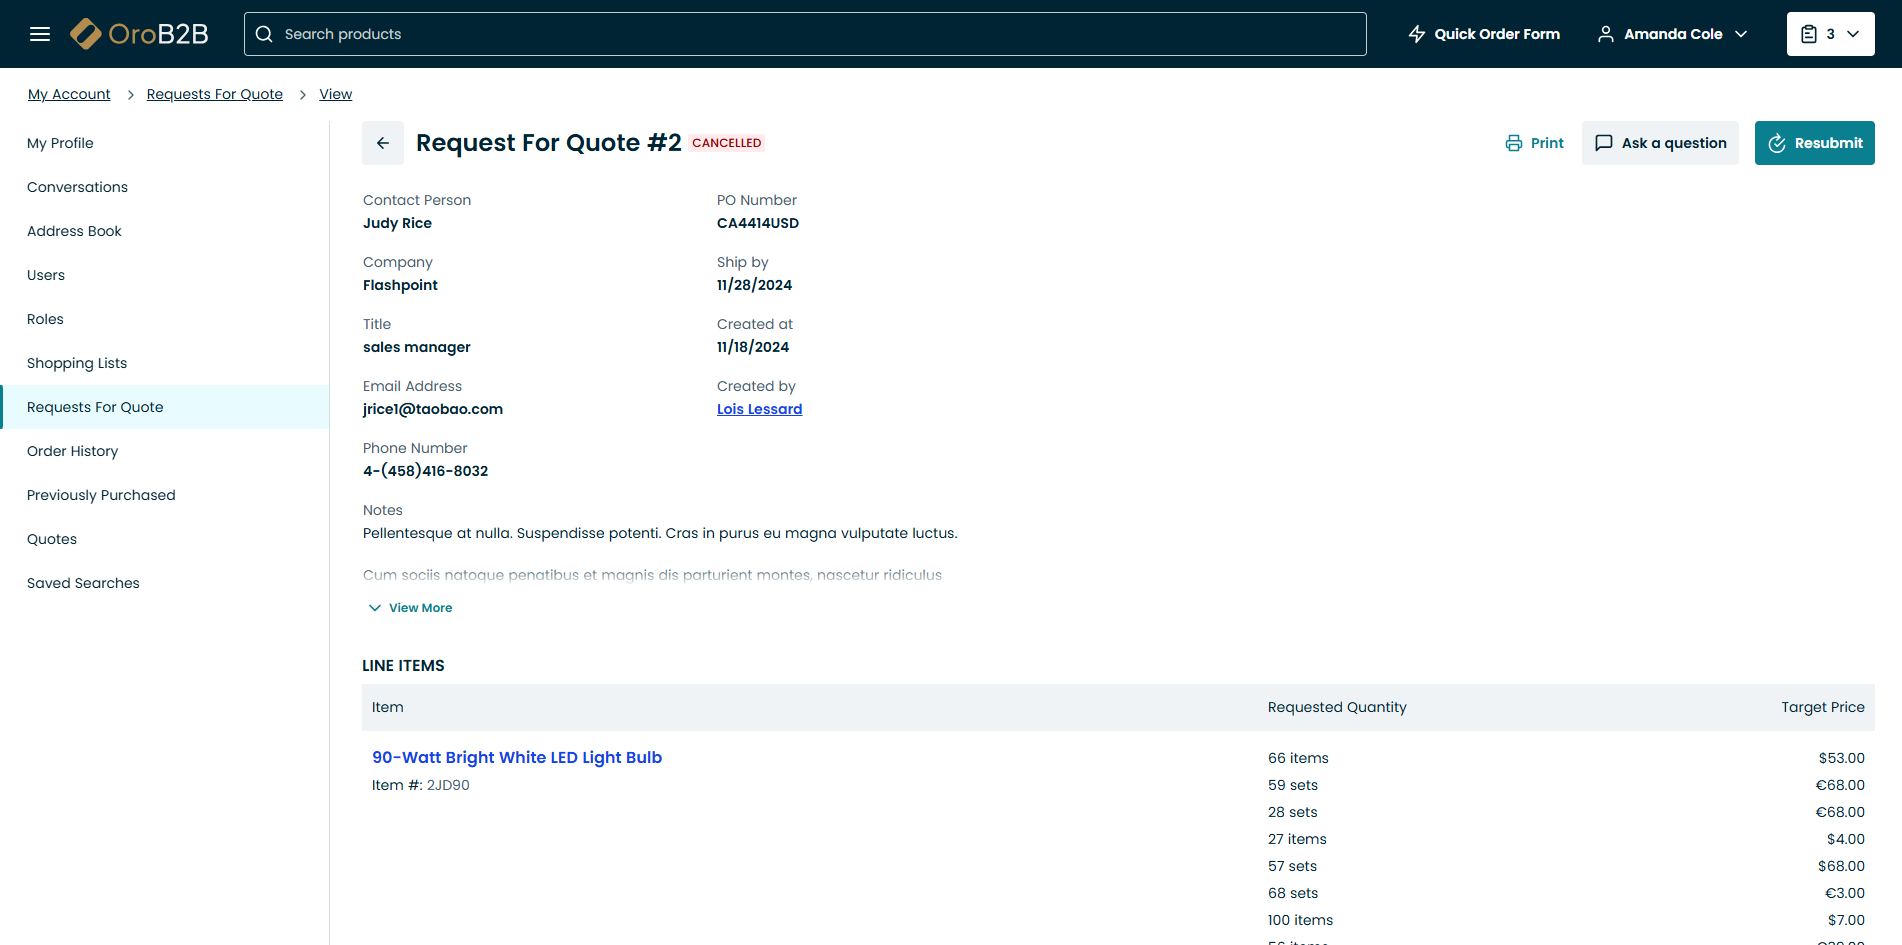
RFQ View Page
To view a specific RFQ, click View on it in the grid.
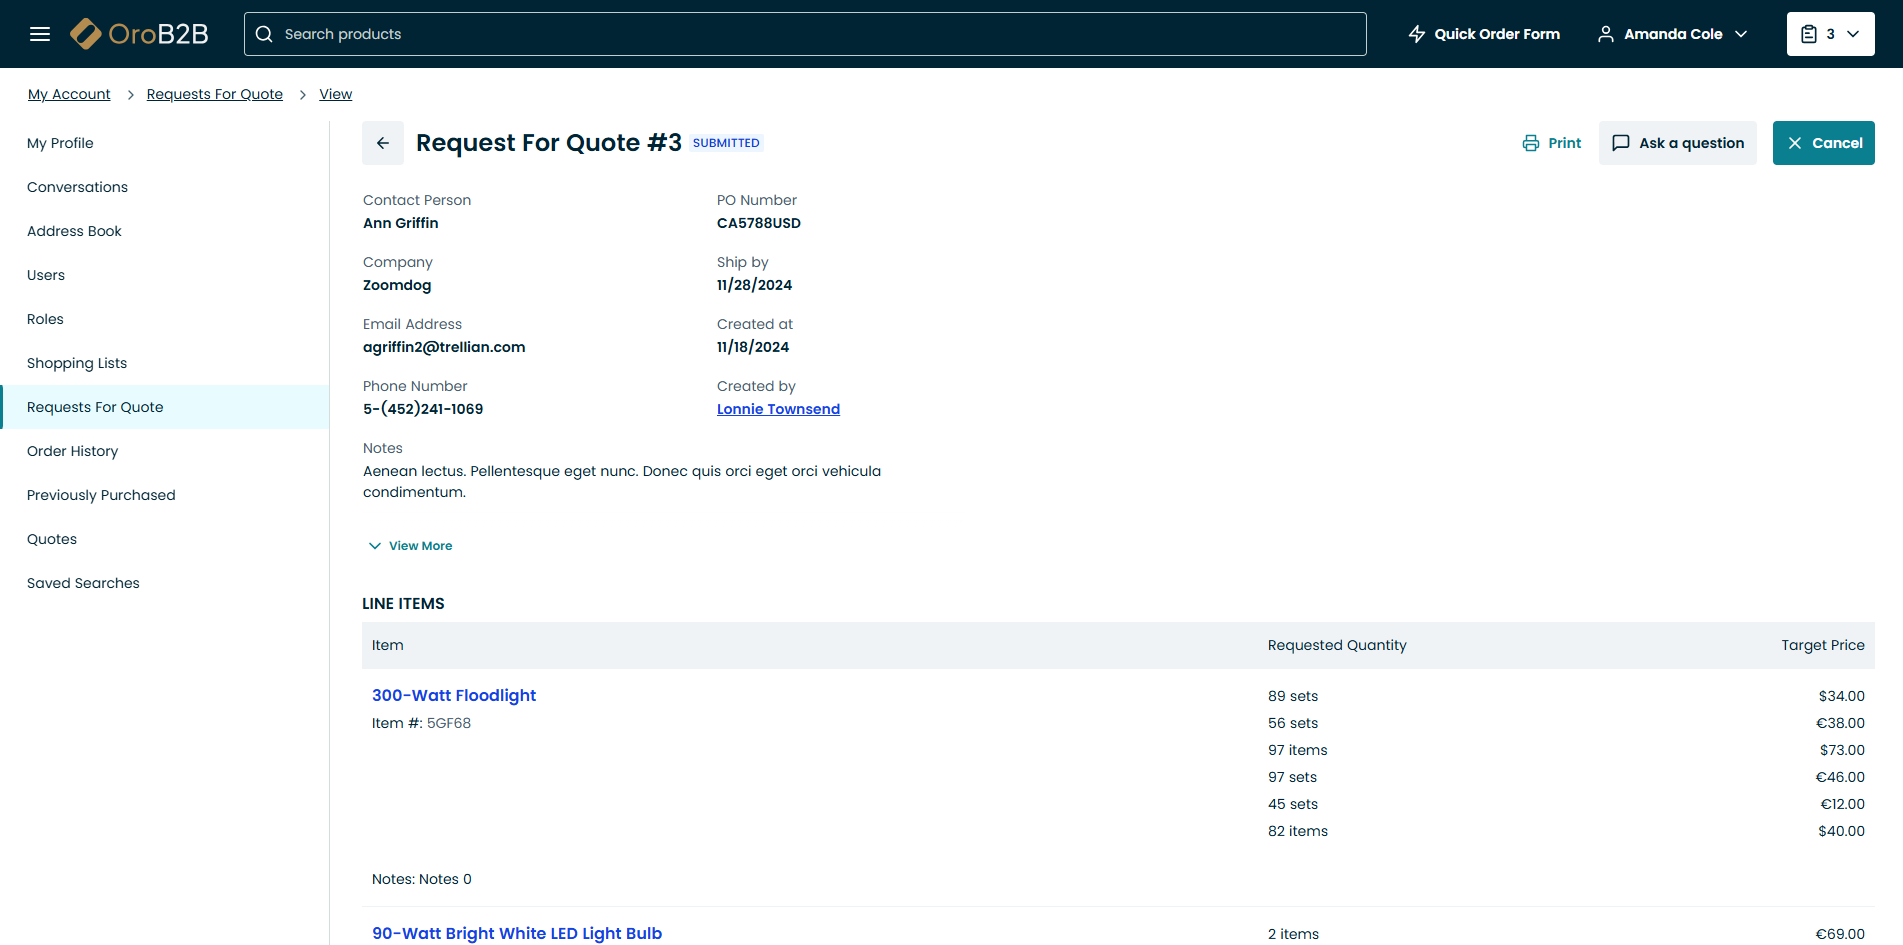
The Customer User View Page has the number of the selected RFQ in the page header (e.g. #2), as well as the following information:
First Name
Last Name
Email Address
Phone Number
Company
Role
PO Number
Do Not Ship Later Than
Owner
Notes
Line Items (item name, requested quantity, target price).
You can print the selected RFQ by clicking Print RFQ on the top right of the view page, or ask a question, as part of the conversations feature.
If an RFQ was previously cancelled, you can resubmit the RFQ by clicking Resubmit on the top right of the view page.
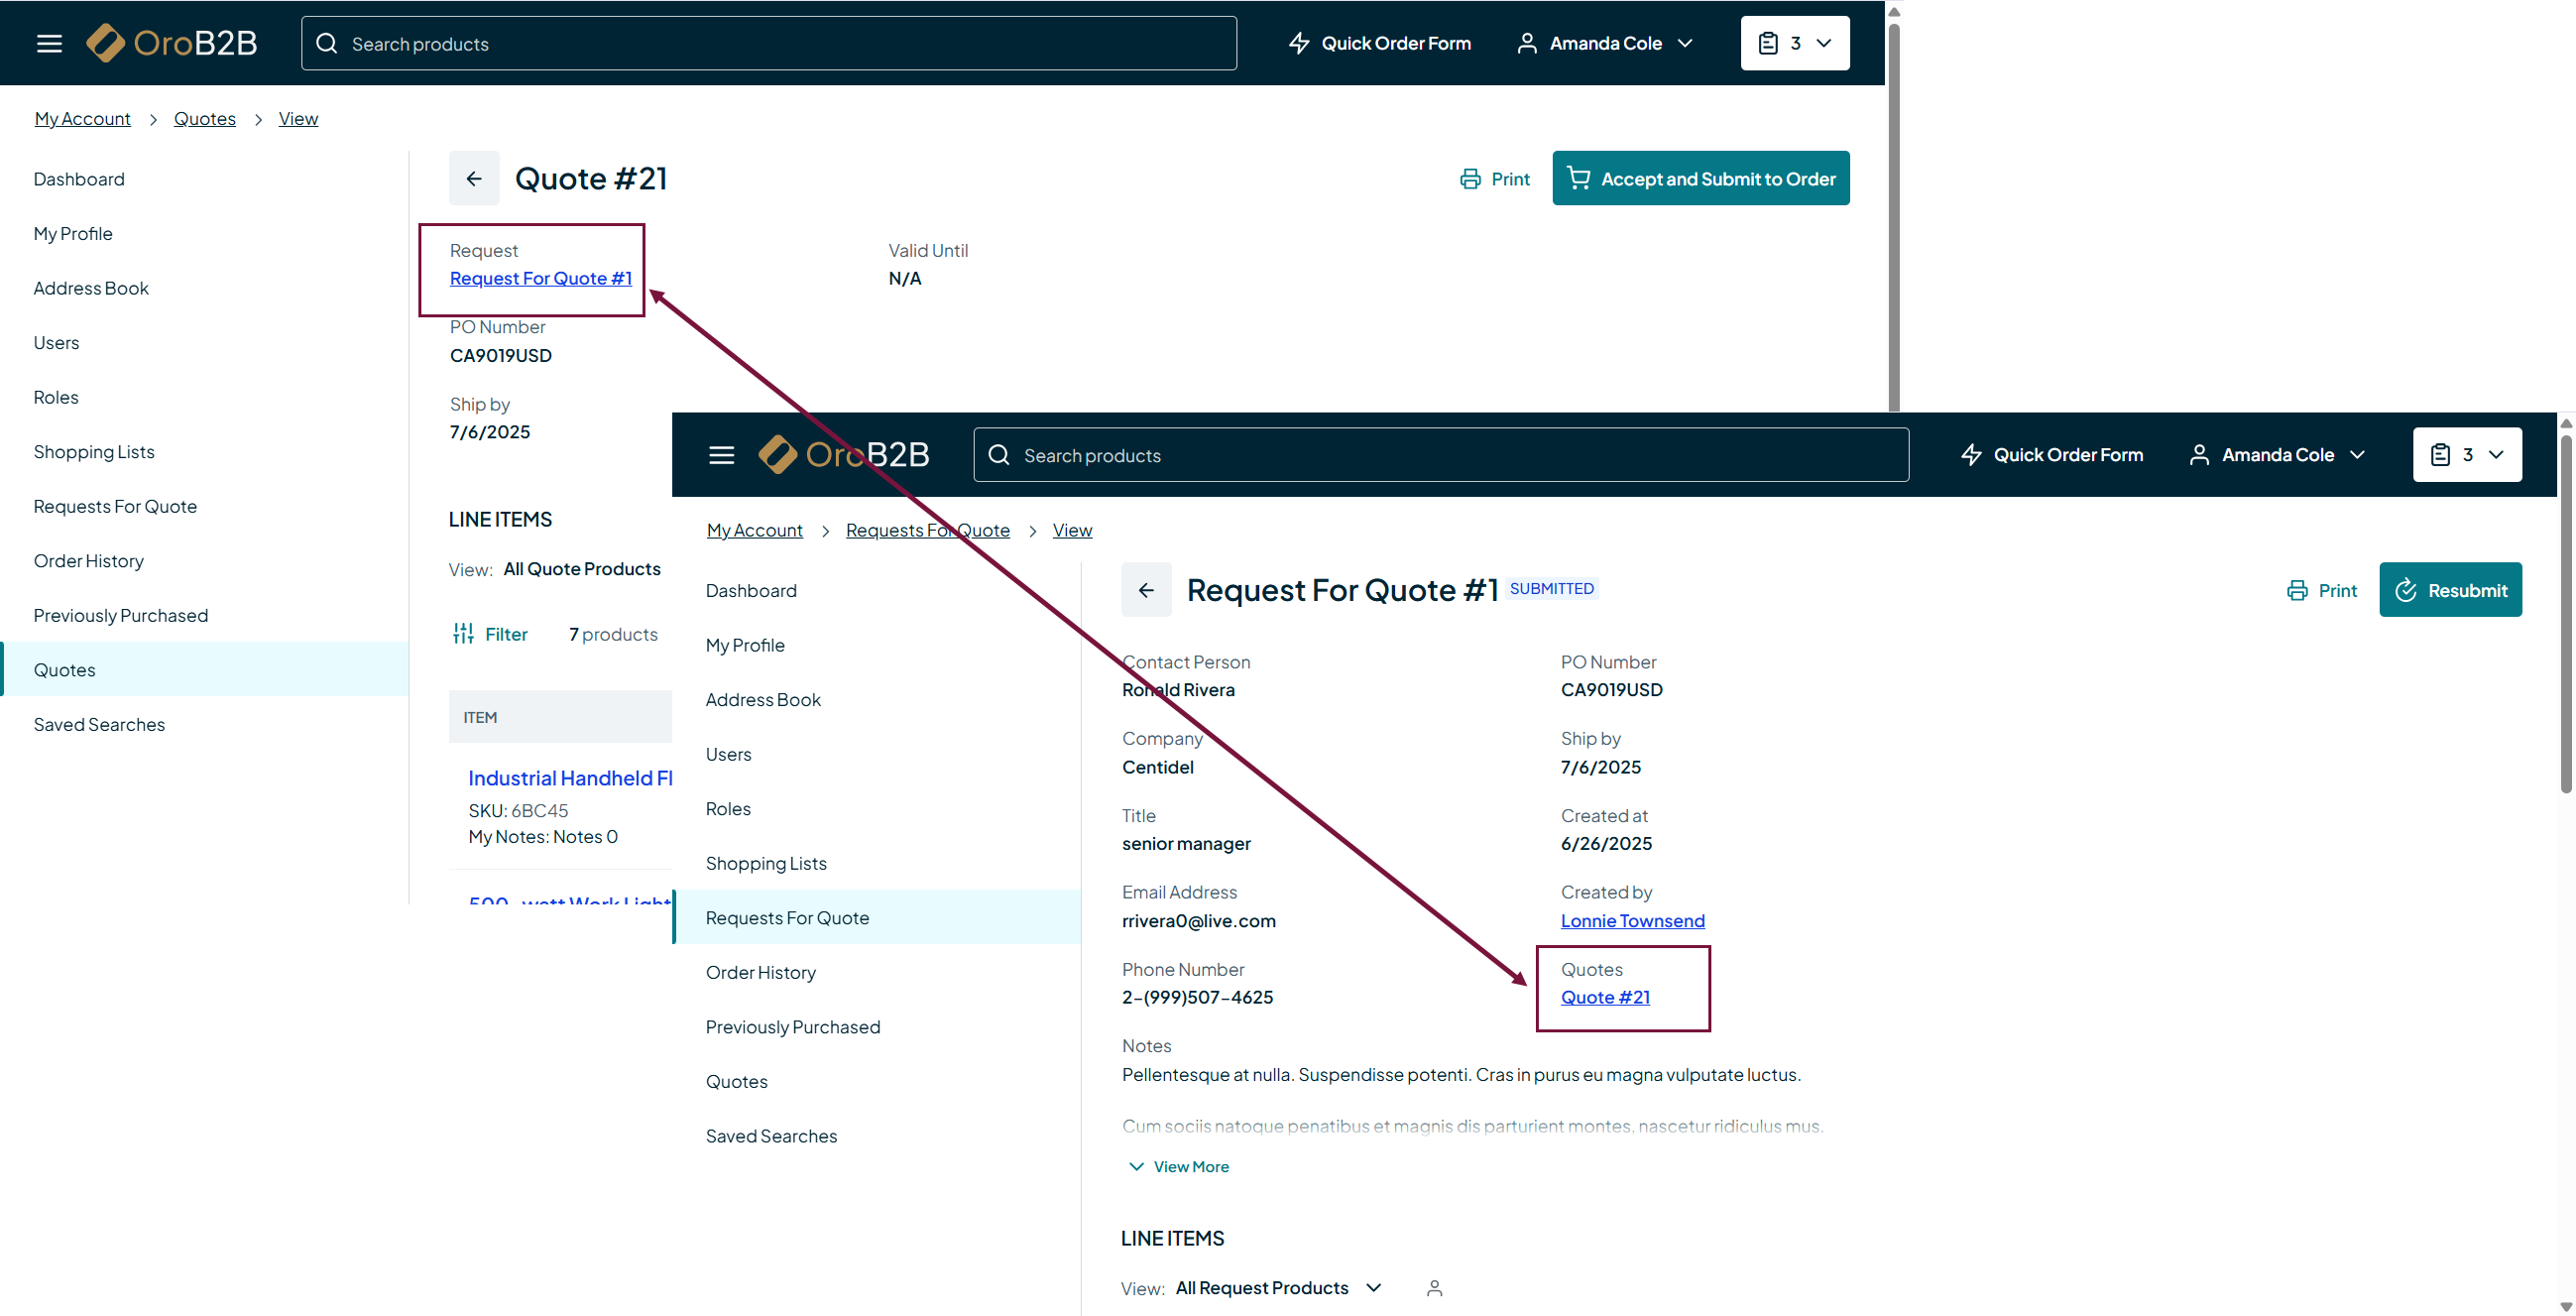
If an RFQ is related to quote, you can navigate to its page via a dedicated link on the RFQ page.
