Create a Website in the Back-Office
Important
Multi-website management is only available in the Enterprise edition.
To create a new website in OroCommerce:
Navigate to System > Websites using the main menu.
Click Create Website.
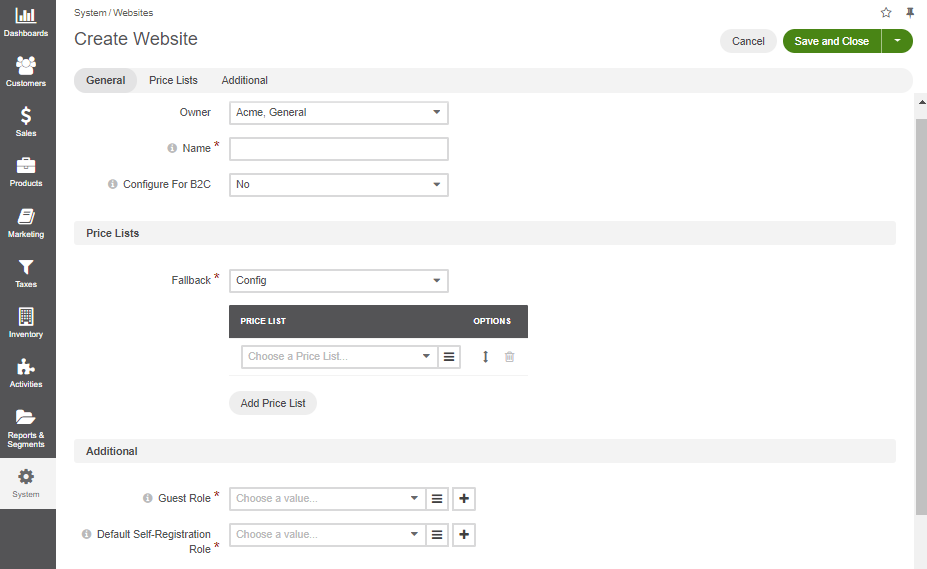
In the General section, provide the following information:
Owner — the field is prepopulated with the organization to which the user who creating a website belongs. You can change this value, if necessary.
Name — the website name.
Configure For B2C — if set to Yes, some website configuration settings are modified to match the standard B2C setup. The changes affect the following options:
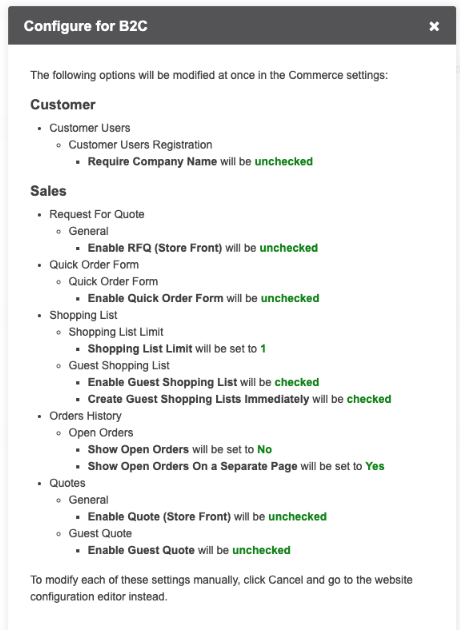
You can always modify any of these options manually in the system configuration.
If set to No, the settings that you have configured for your website remain intact.
In the Price Lists section, configure the following options:
Fallback — specify whether the website prices should reuse the global price list defined in the system configuration whenever the product price is not available in the price list specified for the website.
Price Lists — select the price list to use for this website. You may add multiple price lists using the + Add Price List option and specify the priority that controls the way the price is looked up.
Priority defines the order in which OroCommerce walks through the price lists to find a product price. Whenever the price is not found in the higher priority price list, OroCommerce switches to the next one.
In the Additional section, define the default customer user roles to be assigned to both guests and authenticated users.
Guest Role — select the customer user role that will be applied to all guest visitors of the current website by default. A set of permissions and access levels defined for the selected role affects the way guest users manage their data in the storefront.
Default Self-Registration Role — select the default customer user role that will be applied to the users once they register an account on the website automatically. To enable this option, set the corresponding registration permission in the website configuration under Commerce > Customer > Customer Users.
Click Save and Close.
Next steps
After creating the website in OroCommerce, ensure that the customer users will navigate to the website in your planned scenarios. Perform the necessary configuration on the web server or cookie preparation in order to make the website identifiable. For more details on the necessary configuration outside OroCommerce, please refer to the src/Oro/Bundle/MultiWebsiteBundle/Resources/doc/website_matchers.md document in the OroCommerce Enterprise GitHub repository.
Make the necessary adjustments if you plan to host several websites on the same domain, in the sub-folders (e.g., http://store.com/uk and http://store.com/us).
Related Topics