Build a Custom Web Catalog From Scratch (Example)
For illustration purposes, a sample web catalog setup is provided below.
Create First Level Menu
A website that distributes beauty and skincare products to shops worldwide is to have the following sections in its main menu:
Health and Pharmacy
Beauty and Skincare
Fragrance
Baby and Child
These sections will serve as the first level of the storefront’s main menu. In the back-office, they will be called the root nodes.
To set up root content nodes in the back-office, we:
Navigate to Marketing > Web Catalogs.
Click Create Web Catalog
Name the catalog Skincare Web Catalog and save it.
Click Edit Content Tree.
Name the first node Skincare Web Catalog. Root nodes will be linked to it.
Fill in the SEO section.
Set the necessary restrictions.
Add a landing page in the content variants section that would be linked to the menu.
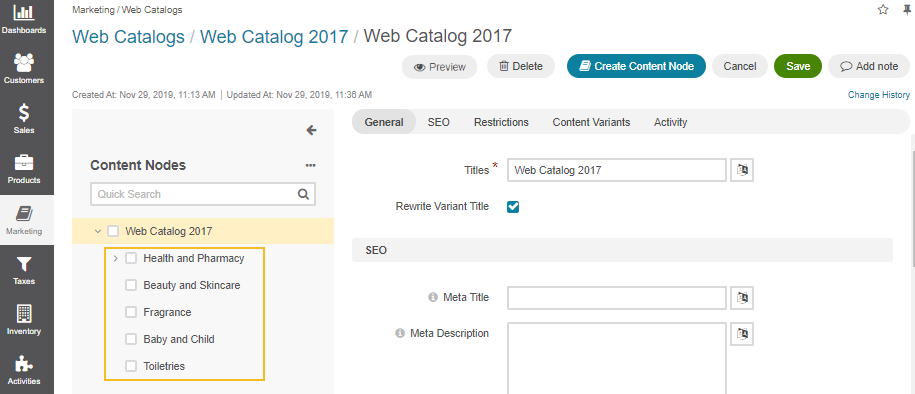
From this node, create the first level menu by clicking Create Content Node.
Name it Health and Pharmacy.
Fill in the SEO section.
Set the necessary restrictions (or inherit parent restrictions).
Add a landing page linked to Health and Pharmacy.
Click Save.
This way, we create all the required first-level menus.
Note
Make sure you create first-level nodes from Skincare Web Catalog in the nodes section on the left of the page.
Create Sub-level Menu
Once all first-level nodes have been created, we can create the sub-menu nodes (second-level menus) that would populate root nodes.
Each of the main menu sections will have the following second-level menus:
Health and Pharmacy: Vitamins and Supplements, Lifestyle and Wellbeing, Baby and Child Health.
Beauty and Skincare: Makeup, Nails, Facial Skincare, Body Skincare, Hair, Fashion Accessories.
Fragrance: Perfume, Aftershave.
Baby and Child: Pregnancy and Maternity, Feeding, Bathing, and Changing.
To set up content nodes in the back-office:
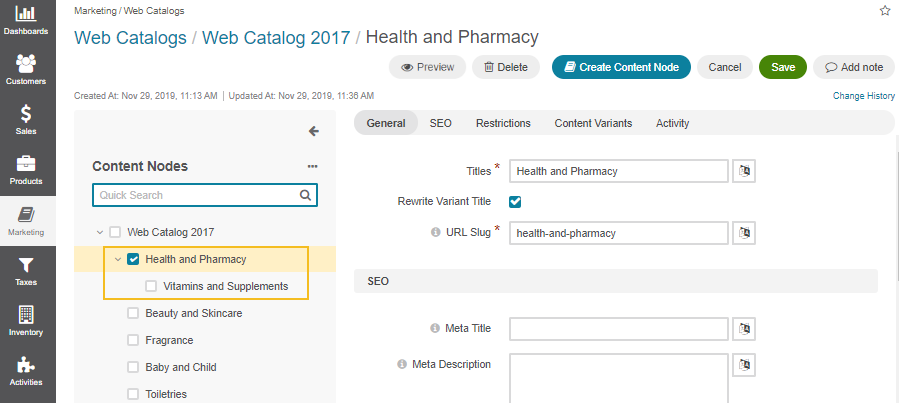
Select the root node you are creating the sub-node for. In our case, it is Health and Pharmacy.
Click Create Content Node.
Name the second level menu Vitamins and Supplements. This will be linked to the root node.
Fill in the SEO section.
Set the necessary restrictions (or inherit parent restrictions).
Add a product collection to Vitamins and Supplements.
This way, we create all the required second-level menus.
Each of such levels can be populated with more levels, or nodes, if necessary, and each node can have a page (system, landing, product), a product collection, or a category mapped into it.
Once the catalog is enabled (globally or per website), you will be able to see it in the storefront.
Note
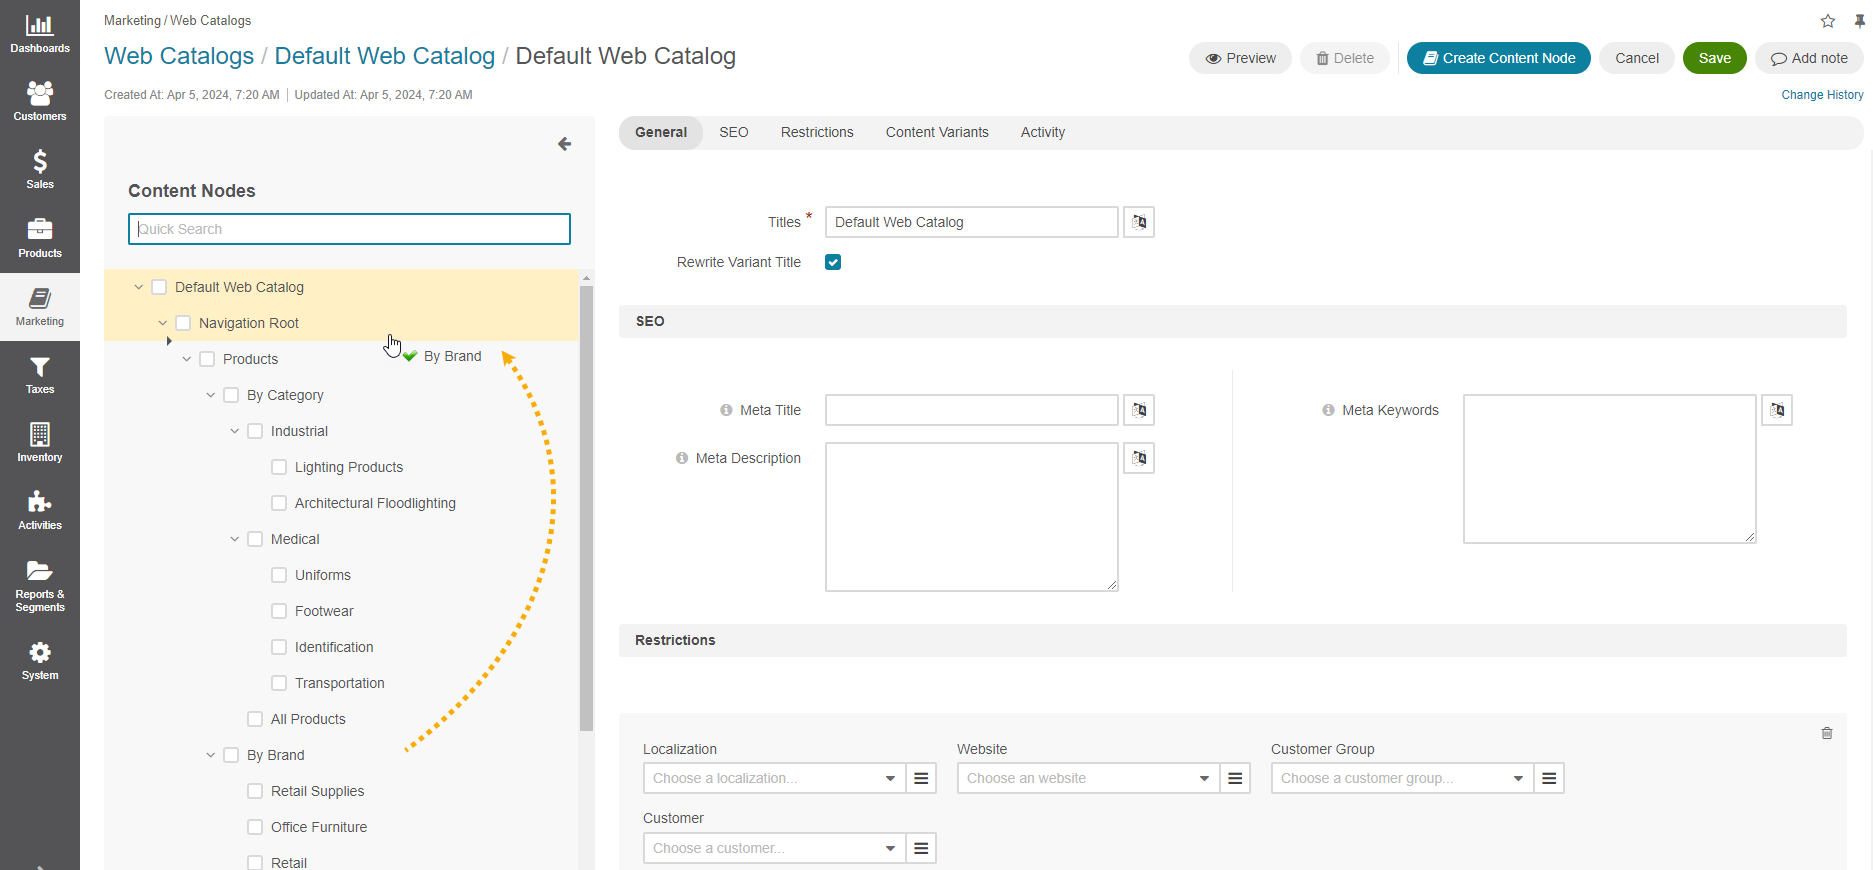
You can drag the existing content nodes to a different position within the content tree on the left of the page, as illustrated below:
Related Articles