Manage Sales Territories in the Back-Office
Note
Sales Territories are only available in the Enterprise edition.
A sales territory is the customer group or geographical area for which an individual salesperson or a sales team holds responsibility. Territories can be based on various factors such as geography, industry, product line, expected revenue, etc. Territory Management is a system by which customer accounts are grouped based on a defined set of criteria. This simplifies sharing of customer accounts among sales teams in your company. In the simplest scenario, you can assign tasks based on geographical territory relation, where a sales rep A can be responsible for country A, and a sales rep B can be responsible for country B.
The sales territory management is available for leads, opportunities, and customers.
With sales territories, you can:
Define territories for leads, opportunities, and any customer type
Organize and balance the workload of salespeople
Automatically assign records to different territories
Prioritize specific territories making sure they do not overlap
Filter data by territory via the dashboard widget
Enable Territories
Sales Territories are disabled by default. Before starting work with territory management, ensure that it is enabled in your Oro application instance. For configuration instructions, see the relevant guide.
Create a Territory
Territories menu becomes available under Sales in the main menu when the sales territories feature is enabled in the system configuration.
To create a new territory:
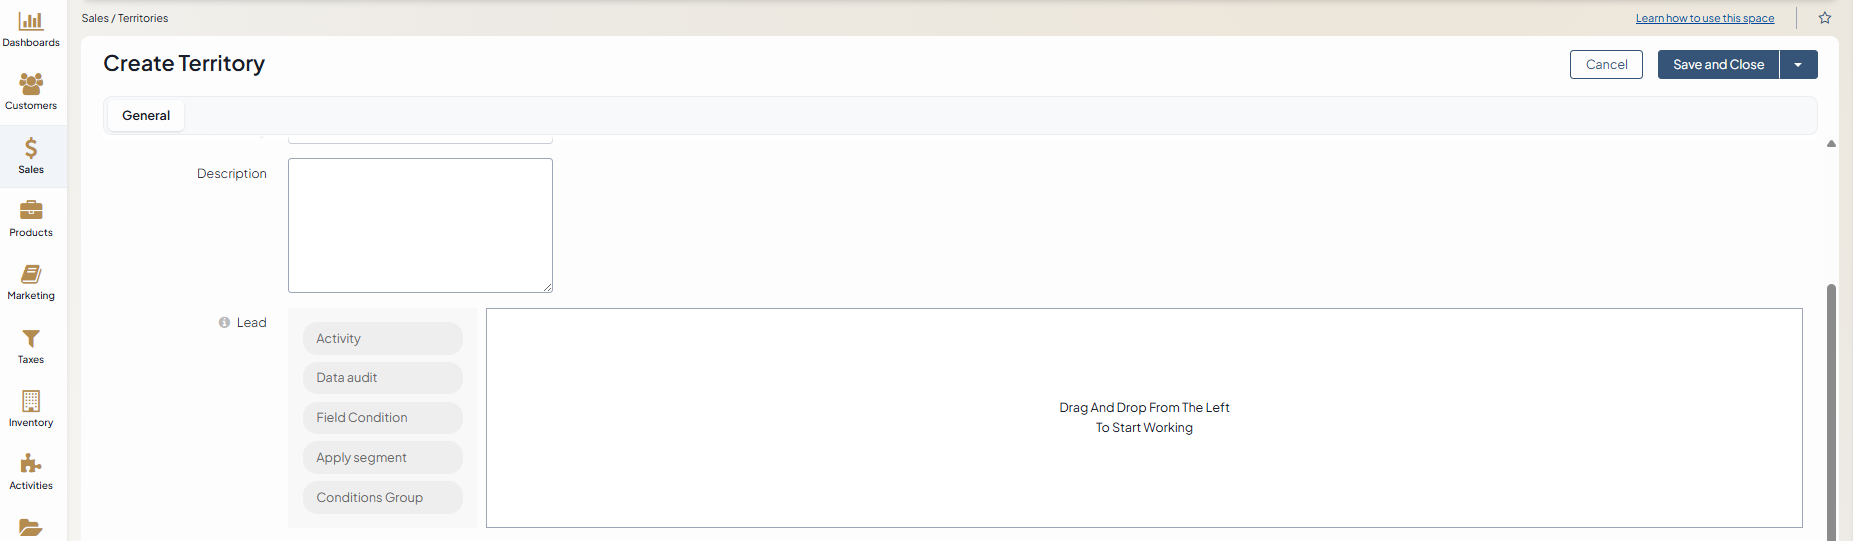
Navigate to Sales > Territories and click Create Territory.
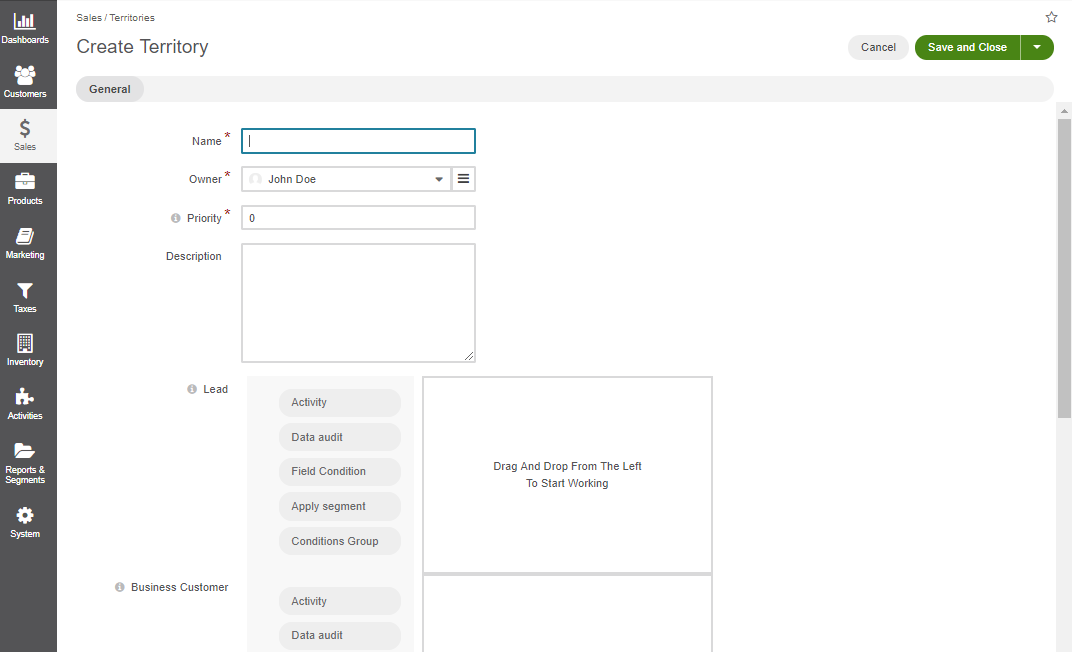
Provide the following information in the General section:
Field
Description
Name
The name specified for your territory.
Owner
Limits the list of users who can manage the territory.
Priority
A territory with the highest priority (e.g., 1) will be assigned to the record in case of overlapping definitions. The lower the number, the higher the priority. For more details on priorities, see the next section of the guide.
Description
If necessary, enter a short but meaningful description related to the territory you are creating.
Set a Priority
Setting a priority determines what records a territory should display or which territory should display what data.
Note
Always use positive numbers.
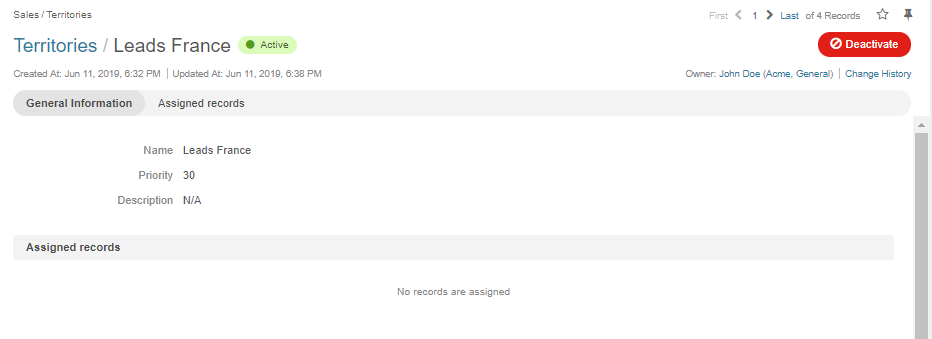
As an illustration, two overlapping territories (filtered by country > France) have been created - Leads France and Leads Paris. These two territories will overlap if some of the leads’ addresses have France specified for the country and Paris for the city in the same address record.
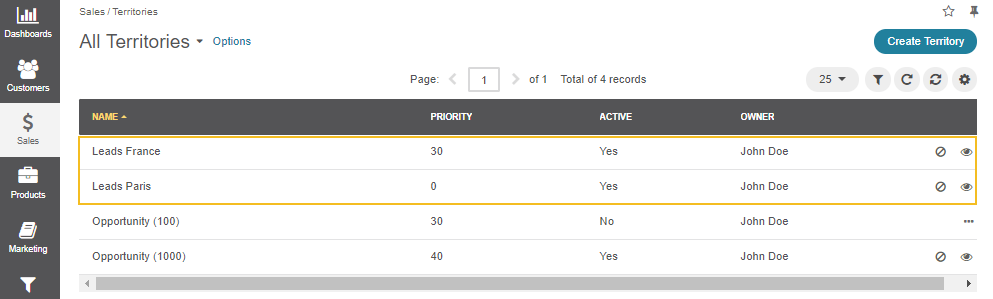
The priority of 30 has been set for Leads France, and the priority of zero was left for Leads Paris. As priority 0 is higher than 30, Leads Paris has priority over Leads France. When the territories are activated, Leads Paris will display leads that fall into Leads France as well as Leads Paris category.
So, in this scenario, Leads France will have no assigned leads as Leads Paris will take them over.
Use Filters
A number of filters is displayed on the Create Territory page. Each filter corresponds to the entity for which the territory has been enabled. Setting conditions to the filter of a specific entity adds a territory to its records. For instance, if you enable territories for leads, a Lead filter will become available in the Create Territory form. When you set conditions to the Lead filter, a territory will be added to the records of leads.
Note
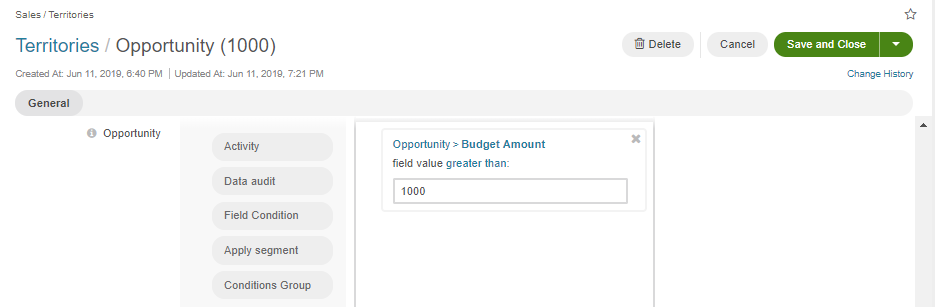
When conditions are not set for a specific entity, a territory is not added to its records.
For example, we have set a condition to the Opportunity filter, looking only for those with a budget higher than $1000.
Once the territory is saved, it will need to be activated to be able to function (see the section below).
Activate a Territory
Once the details have been saved, a new territory with matching records should become available in the Matching Records section. Matching records are records filtered according to the conditions determined for a specific territory. By default, the territory is inactive. To activate the territory and assign it to the opportunity records, click Activate.
Note
Note that if the territory has not been activated, the Territory column of the Matching records grid will not contain any values yet.
Note that you can edit the territory only when it is inactive. If you wish to edit an active territory, click Deactivate and then Edit.
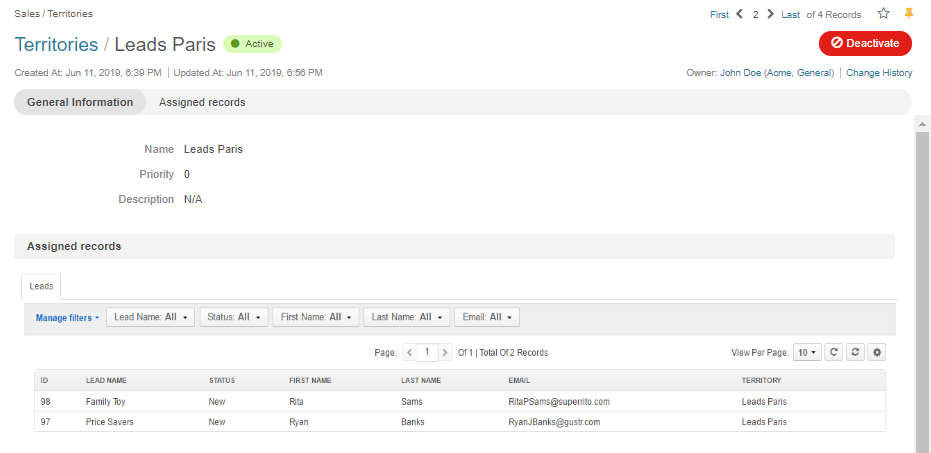
Once the territory has been activated, Matching Records section will become available on the territory view page. Matching records are records that have been assigned a specific territory as the result of the filter conditions determined when creating a territory.
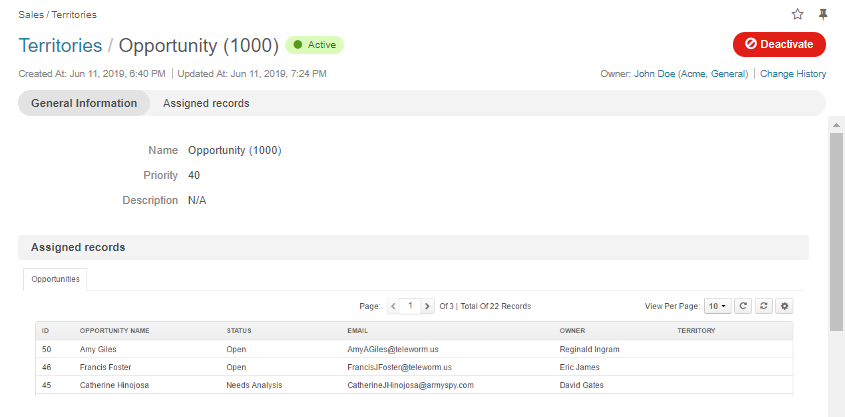
When entities have been assigned a territory, each is displayed on the view page of the territory they have been assigned.
Note
When a territory is activated, it is automatically assigned to all existing records that fall under its definition and to all new records when they are created.
Manage Territories from the Territories Grid
Once the territory has been created and records assigned, you can view and manage it within the Territories grid.
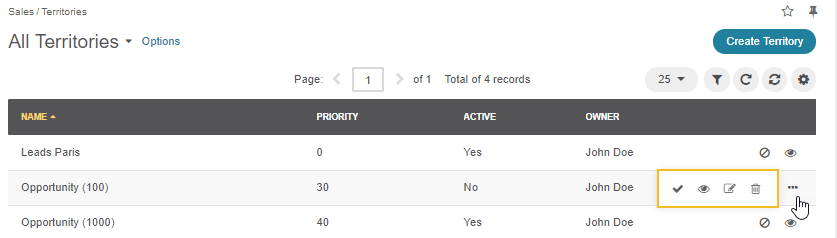
You can perform the following actions for an inactive territory from the grid:
Activate:
View:
Edit:
Delete:

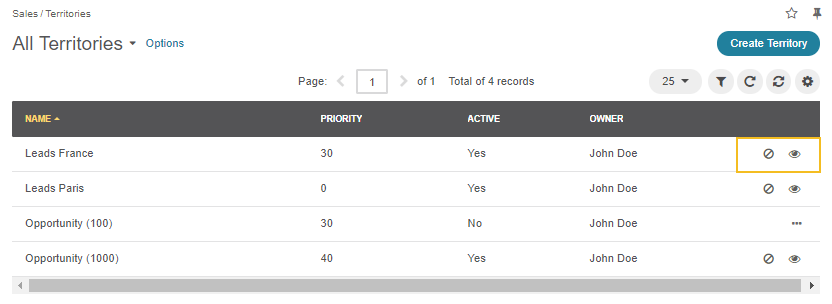
You can perform the following actions for an active territory from the grid:
Deactivate:
View:
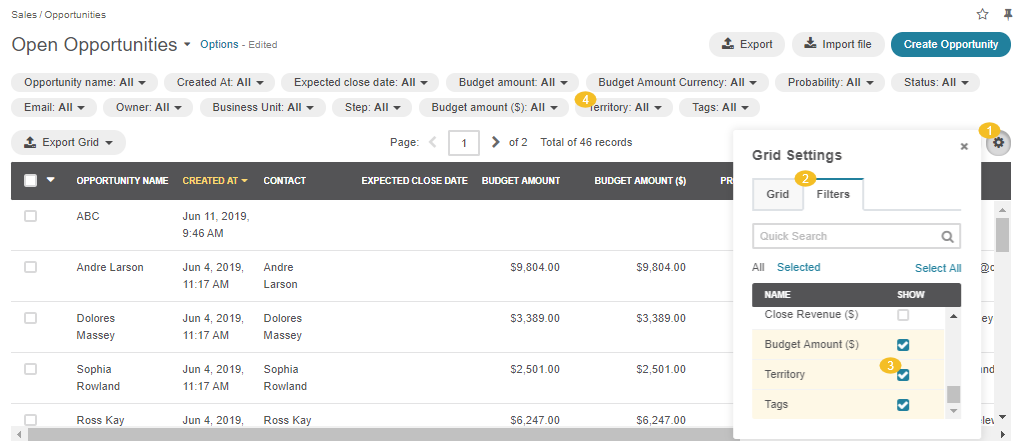
It is possible to filter records by territories. To enable the territory filter, click Grid Settings and, in the Filter tab, select Territory from the list.

View Territories
From the Grid of an Assigned Record
To view territory assignment from the grid of the related entity, make sure that Territory is enabled in the Grid Settings.
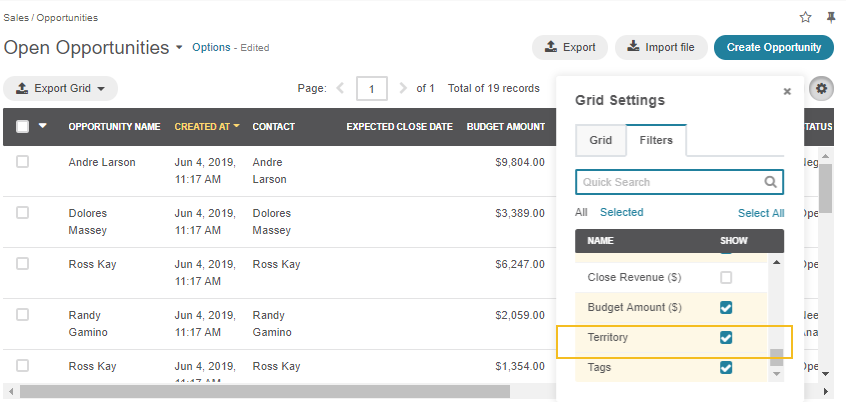
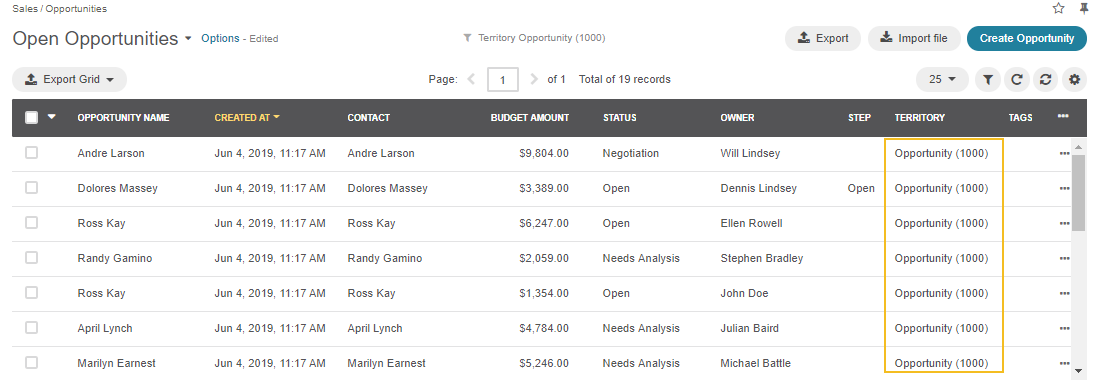
When enabled, the Territory column will appear in the grid showing the territory to which a particular record is assigned.
From the View Page of an Assigned Record
When a record is assigned a territory, it is displayed in the Territory field on the view page of that record.

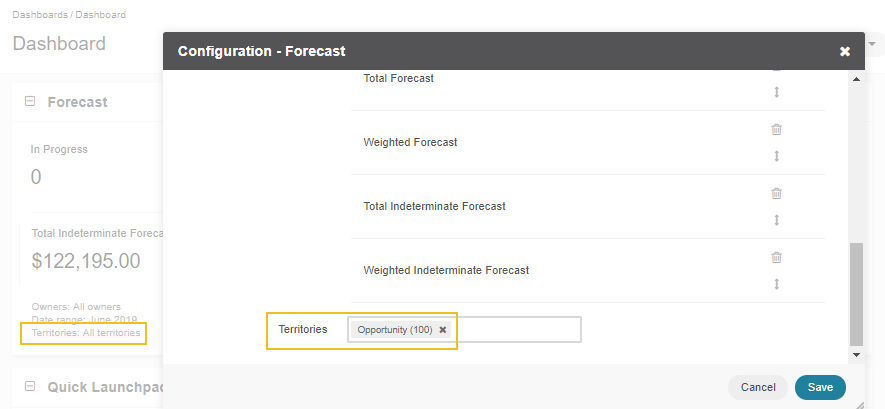
Territories in Widgets
Sales Territories can also be used in the following widgets:
Forecast
Leads Statistics
Opportunities Statistics
Opportunities by Status