Manage a Website in the Back-Office
Hint
This section is part of the Multi-Website Configuration concept guide topic that provides a general understanding of multiple website configuration concept in Oro applications.
Important
Multi-website management is only available in the Enterprise edition.
With OroCommerce, you can determine the way a particular website is operated by customizing it according to your business requirements.
Once a website is created and properly configured, you can now:
set the website as default
configure the website settings for the B2C market sector
customize the website storefront navigation and menus
add variable web catalog pages for different websites
limit price lists and content blocks to particular websites
customize product inventory, create and manage multiple warehouses on different websites
manage product visibility on the website
enable certain shipping and payment methods on the website
limit a promotion campaign to a website
set up and use website tracking with your OroCommerce website
Set a Website as Default
OroCommerce redirects anonymous users to the default website. Logged in customers users may also be redirected in case their current website is not identified.
To set a website as default:
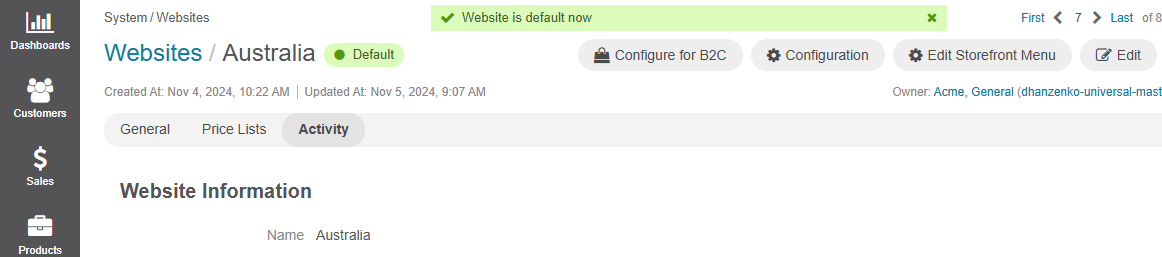
Navigate to System > Websites using the main menu of the global organization.
Click on the website you would like to use as default (e.g., Australia).

On the website details page, click Set Default.
Now the website is marked as default and will be used for the anonymous access.
Configure a Website for B2C
OroCommerce enables you to customize the application for the B2C business type, modifying the default configuration to match the typical B2C setup. You can then change these settings manually in the system configuration, if necessary.
A B2C website can be configured in two ways, either during creation or from the website’s view page.
Navigate to System > Websites using the main menu.
Click the website you would like to configure for B2C (e.g., Australia).

On the website details page, click Configure for B2C.
The popup confirmation dialog displays the list of options that will be modified by this configuration.
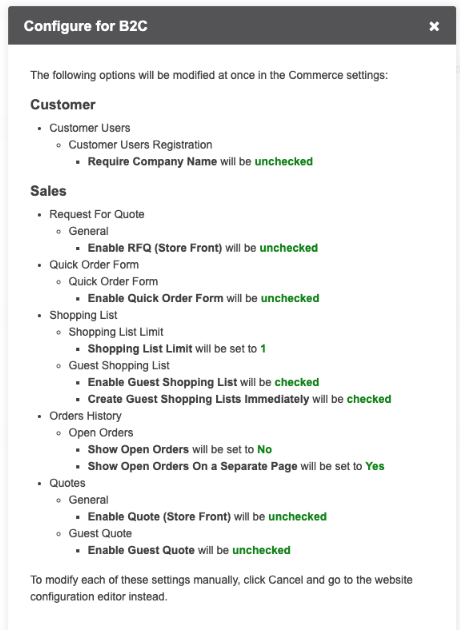
Click Yes to confirm.
The changes apply automatically. You can view them in the system configuration and update if required.
Edit a Storefront Menu
OroCommerce storefront has a number of menus that may be rearranged and customized. You can enable or disable menu items for a particular customer, website, or a mobile device by setting related conditions.
To customize a storefront menu for the website:
Navigate to System > Websites using the main menu.
Click the website you would like to edit a menu for (e.g., Australia).
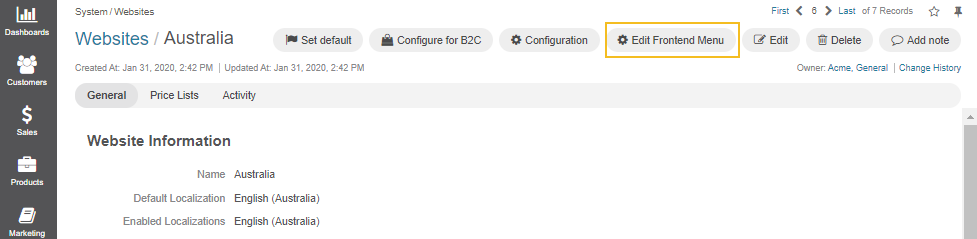
On the website details page, click Edit Storefront Menu.
Now you are redirected to the list of OroCommerce storefront menus:
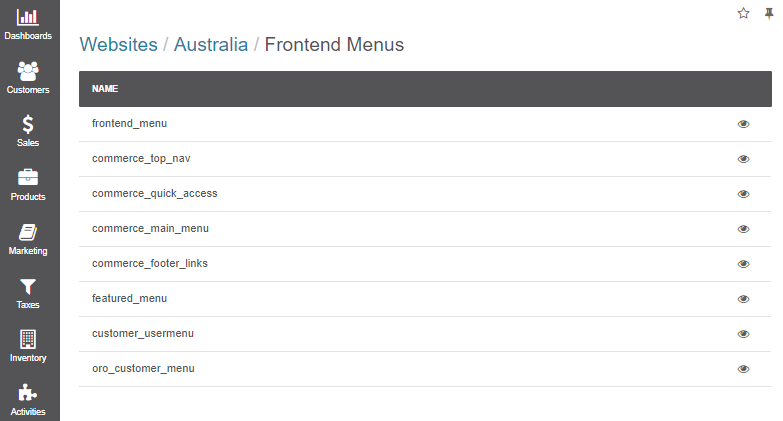
Click on the menu to start customizing it:
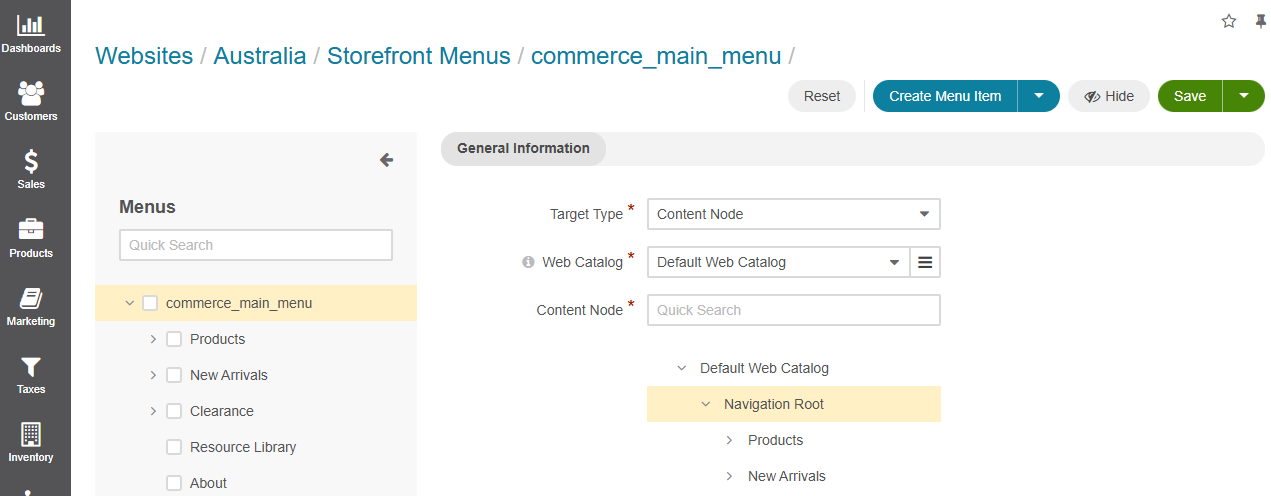
Drag-and-drop menu items to rearrange them.
Create new items and dividers if necessary by clicking Create Menu Item or Create Divider (in the button group on the top right of the page).
Click on the menu item to edit its details.
Find more information on how to edit and customize the storefront menu in the Storefront Menu Management section.
Once you are happy with the menu contents, click Save.
Customize Web Catalogs per Website
OroCommerce enables you to create a web catalog with different product collections and customize it for a certain website in a way you prefer to make shopping easy and efficient. You can also organize a specific content tree by building additional content nodes and customizing menu items per each website individually.
To create a new web catalog, personalize the catalog content for a specific website, set up particular visibility restrictions to a website, localization, or a customer, and enable the web catalog for the selected website, refer to the following sections:
Customize Content Blocks per Website
When you prepare web catalogs for you storefront, you can create and enable a custom web catalog for the website or set up a custom node content for the website in the default web catalog.
Customize Price Lists per Website
With OroCommerce you can create and set up flexible product prices for different websites, link the price lists to a particular website, a customer, or a customer group, and schedule price changes.
For more details on how to create a price list and enable it for a particular website, refer to the following sections:
Customize Product Inventory per Website
You can also create and manage multiple warehouses (EE feature), track your inventory status and the availability of your products, as well as their quantities, in each warehouse assigned to a particular website.
The Warehouses and Inventory section covers the details on how to configure inventory-related settings globally and per a website.
Customize Product Visibility per Website
Additionally to configuration set for product categories and price lists, you can determine which customers, customer groups, or websites are to view specific products by customizing a related product visibility per each product individually.
Follow the Manage Product Visibility section for the details on how to set certain visibility restrictions for selected products.
Customize Promotion Visibility per Website
Similarly to a visibility restriction procedure set to a product, promotion visibility can also be limited to a particular website, a customer. or a customer group.
Follow the Promotions section for the details on how to create and manage promotions.
Customize a Payment Method per Website
OroCommerce provides sellers with effective payment solutions that help enhance customers’ buying experience. Integration with the most popular payment services as PayPal, Authorize.Net, and InfinitePay into OroCommerce enables various payment transactions to be made in a particular localization and on a certain website.
Learn more about how to assign a payment method to the required website in the Payment Rules Configuration section.
Also refer to the payment configuration for the detailed instruction on how to set a merchant location and configure integration with third-party payment providers.
Customize a Shipping Method per Website
Similarly to configuring payment methods in OroCommerce, you can create an integration with a shipping provider, such as UPS, FedEx, and Flat Rate and customize its settings per a particular website by adding a shipping rule.
Also, refer to the shipping configuration on the system level to set the default shipping address, enable or disable shipping units of length and weight, and specify the tax code to be applied to the shipping cost.
Related Topics