Important
We are updating the images for OroCommerce version 6.1 to align with the latest changes in the back-office design. During this transition, some images may still show older versions. Thank you for your patience as we work to update all visuals to reflect these changes.
Create an Address
For customers, customer users, and contacts in the Oro application, the address book allows to enter and view account/customer address details.
To add an address to the address book:
Click Add Address in the right corner.

A popup form appears with the following fields to fill in:
Field
Description
Types
Defines the type of the address to be entered:
Billing
Shipping
Default Billing
Default Shipping
Note: More than one type can be selected for one address.
Primary
Checking the Primary box marks the address primary. Note that only one primary address is possible. Marking a different address primary will by default delete this mark from the address that has previously been marked Primary.
Label
Identify the address by adding a label. This can help distinguish addresses if there is more than one address in the address book for one account.
Name prefix
If applicable, add a prefix to the name, e.g., Dr., Mrs., etc.
First name
Enter the first name of the account representative.
Middle name
Enter the middle name of the account representative.
Last name
Enter the last name of the account representative.
Name suffix
If applicable, add a suffix name, e.g., IV, Jr., etc.
Organization
Specify the organization represented by the account.
Country*
This field is mandatory. Select the country from the list. Selecting a country prompts additional fields to appear (Street, City, State, Zip/postal code, Phone). Street, City, and Zip are mandatory fields.
Note
Either the Organization or the First and Last Name fields are mandatory.
Click Save once you have filled all the fields.
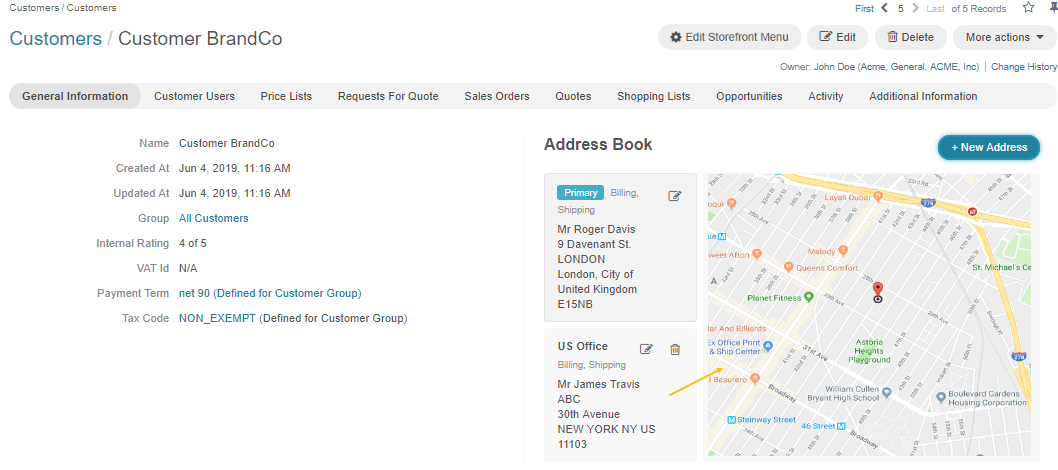
The address and the map showing the address location is displayed on the right of the address.

View an Address on the Map
It is possible to add more addresses to the same account. If you have more than one address on the Address Book page, clicking on one or the other will prompt a map to appear that corresponds to the selected address.

Please be aware that a valid Google API key is required to display maps in the storefront. Please see the back-office settings for more information.
Manage an Address
Mark address as primary - To mark the address as primary, click on the right top of the address background, check the Primary box and click Save. The primary label will move to the updated address.
Note
Delete is disabled for the primary address. To delete the address marked as primary, you must first move the primary label to a different address.