Configure Microsoft 365 OAuth Integration (Azure Active Directory Application)
Integration with Microsoft 365 via OAuth 2 API enables users to log in with their Microsoft 365 account and connect their mailbox to the Oro application using OAuth authentication. To achieve this, you need to register a custom Azure application and connect it with your Oro application.
Register an Application in Azure
Create a New Azure Active Directory Application
The first step is to create a new Azure Active Directory application on the Microsoft side:
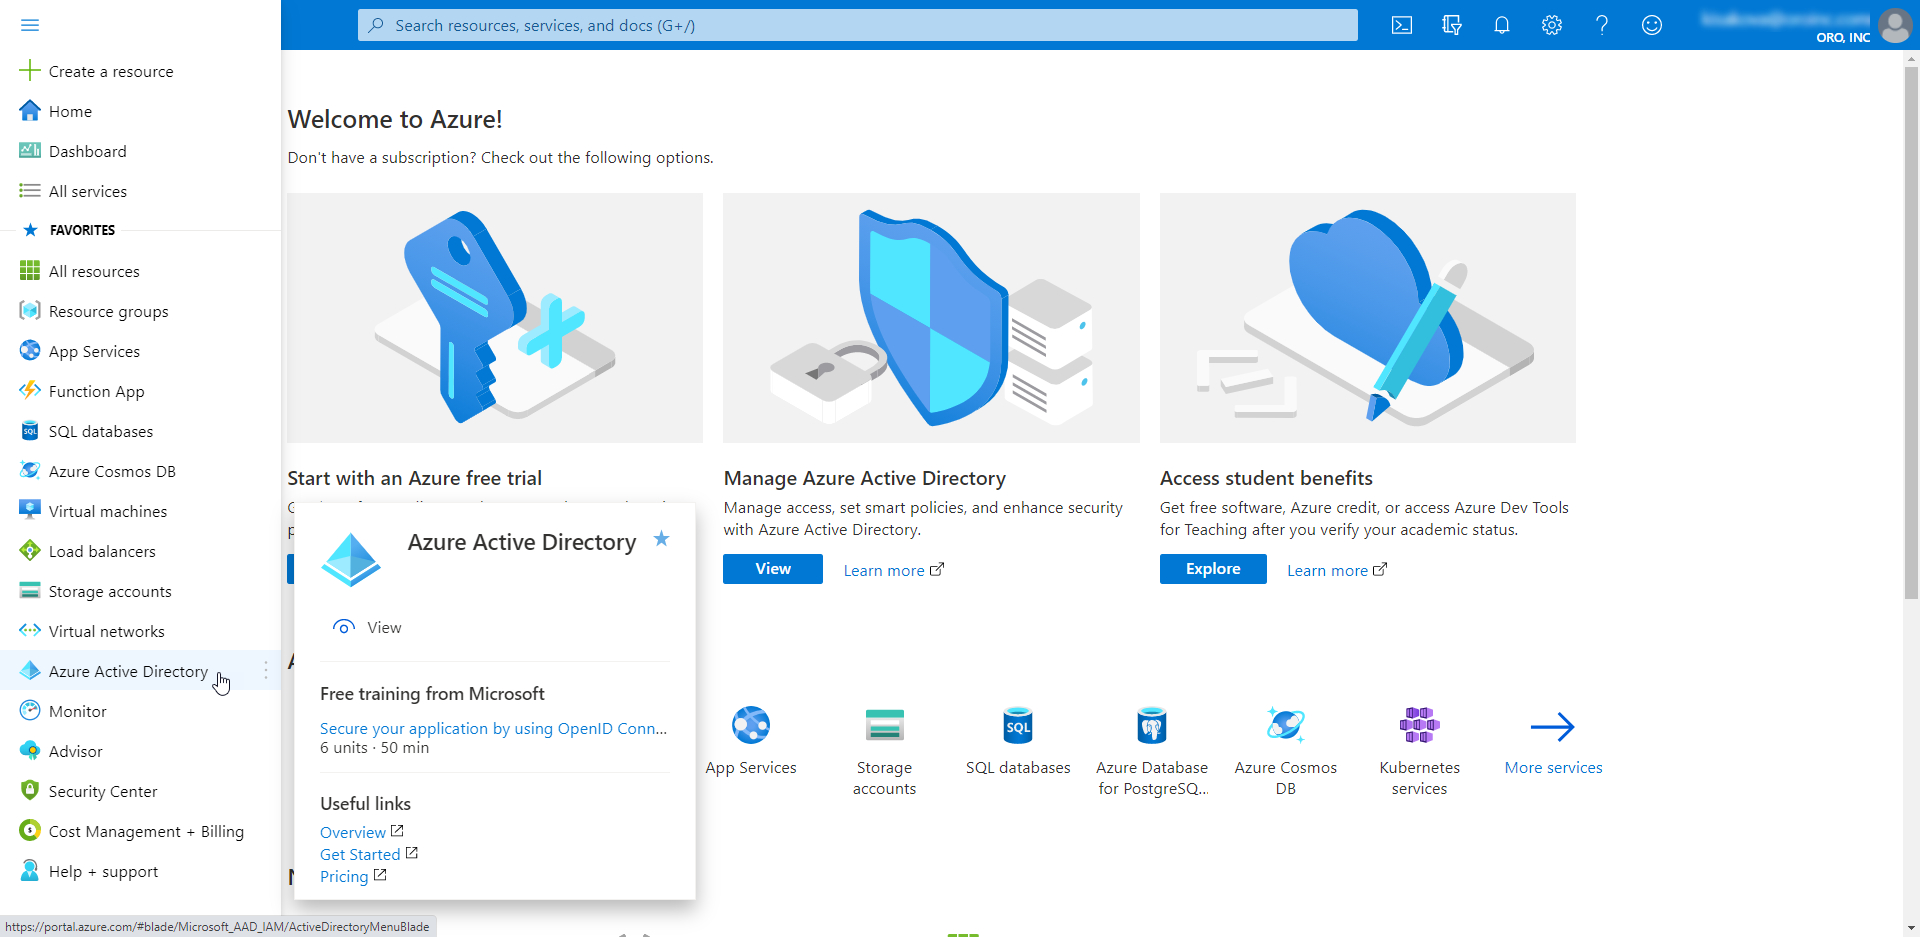
Navigate to the Azure portal.
Ensure that you are logged into your microsoft account and access to the Azure platform is granted.
Open the menu on your left and click Azure Active Directory.
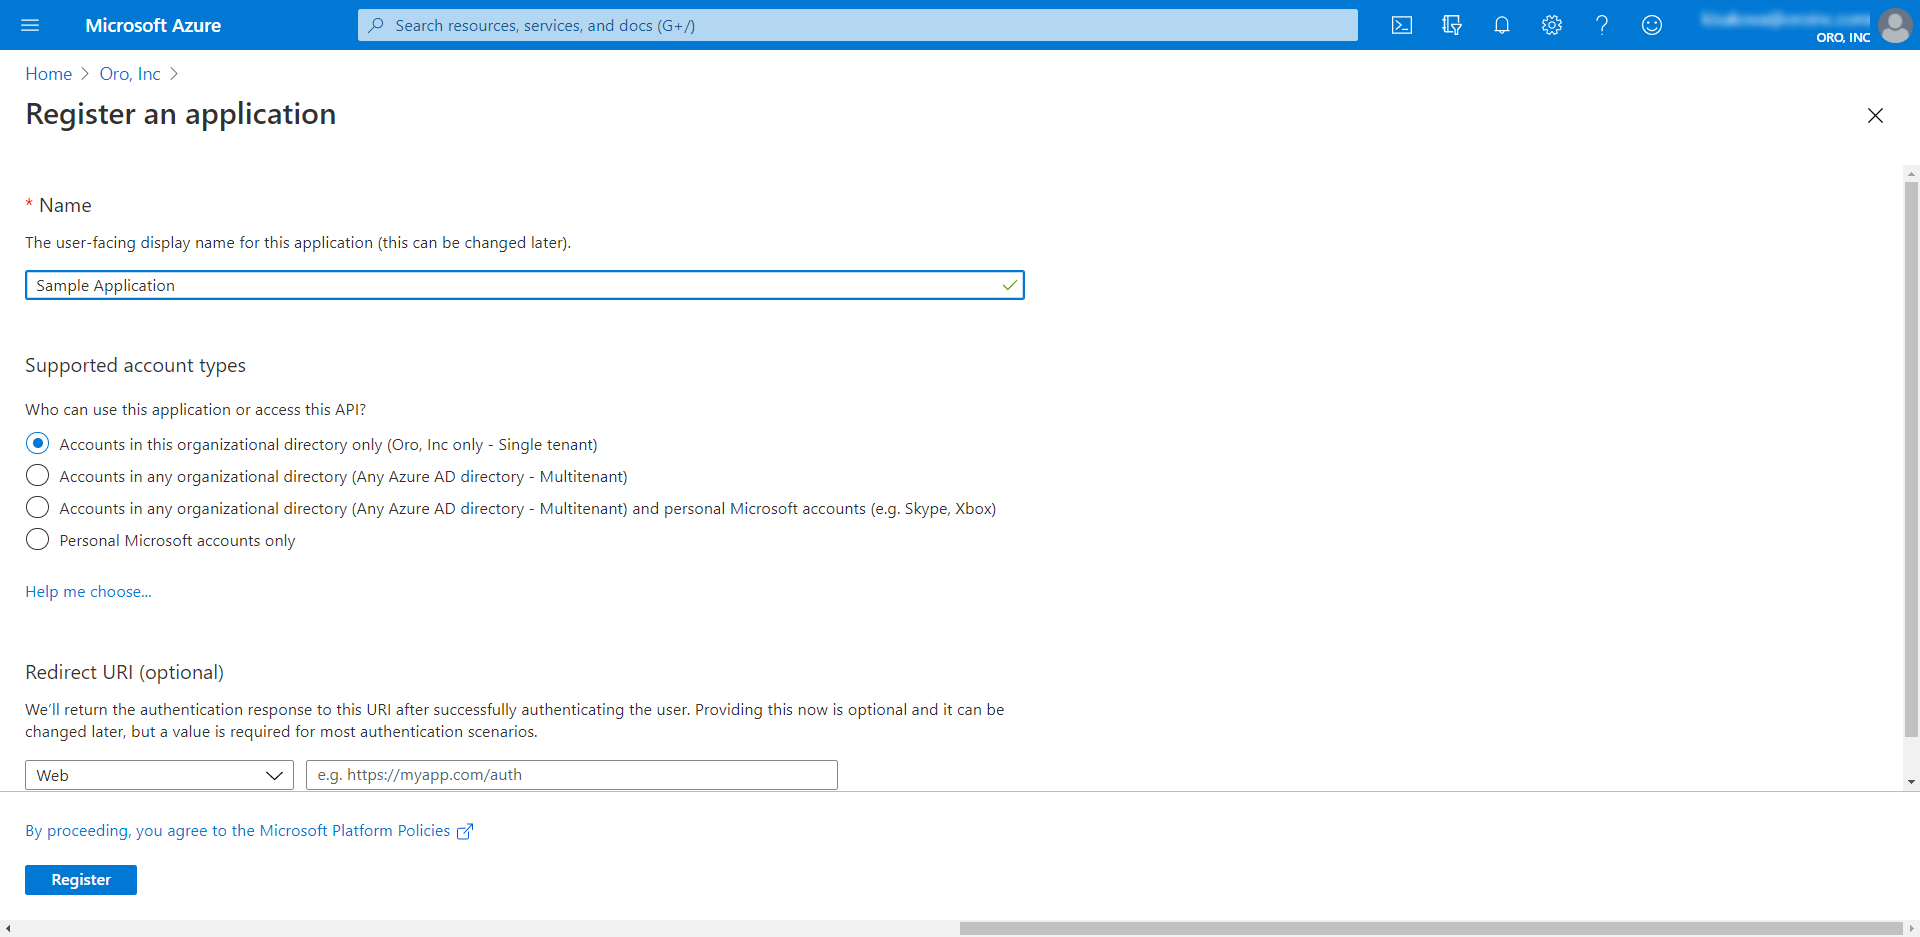
Navigate to App Registration and click New Registration.

Provide application information and click Register.
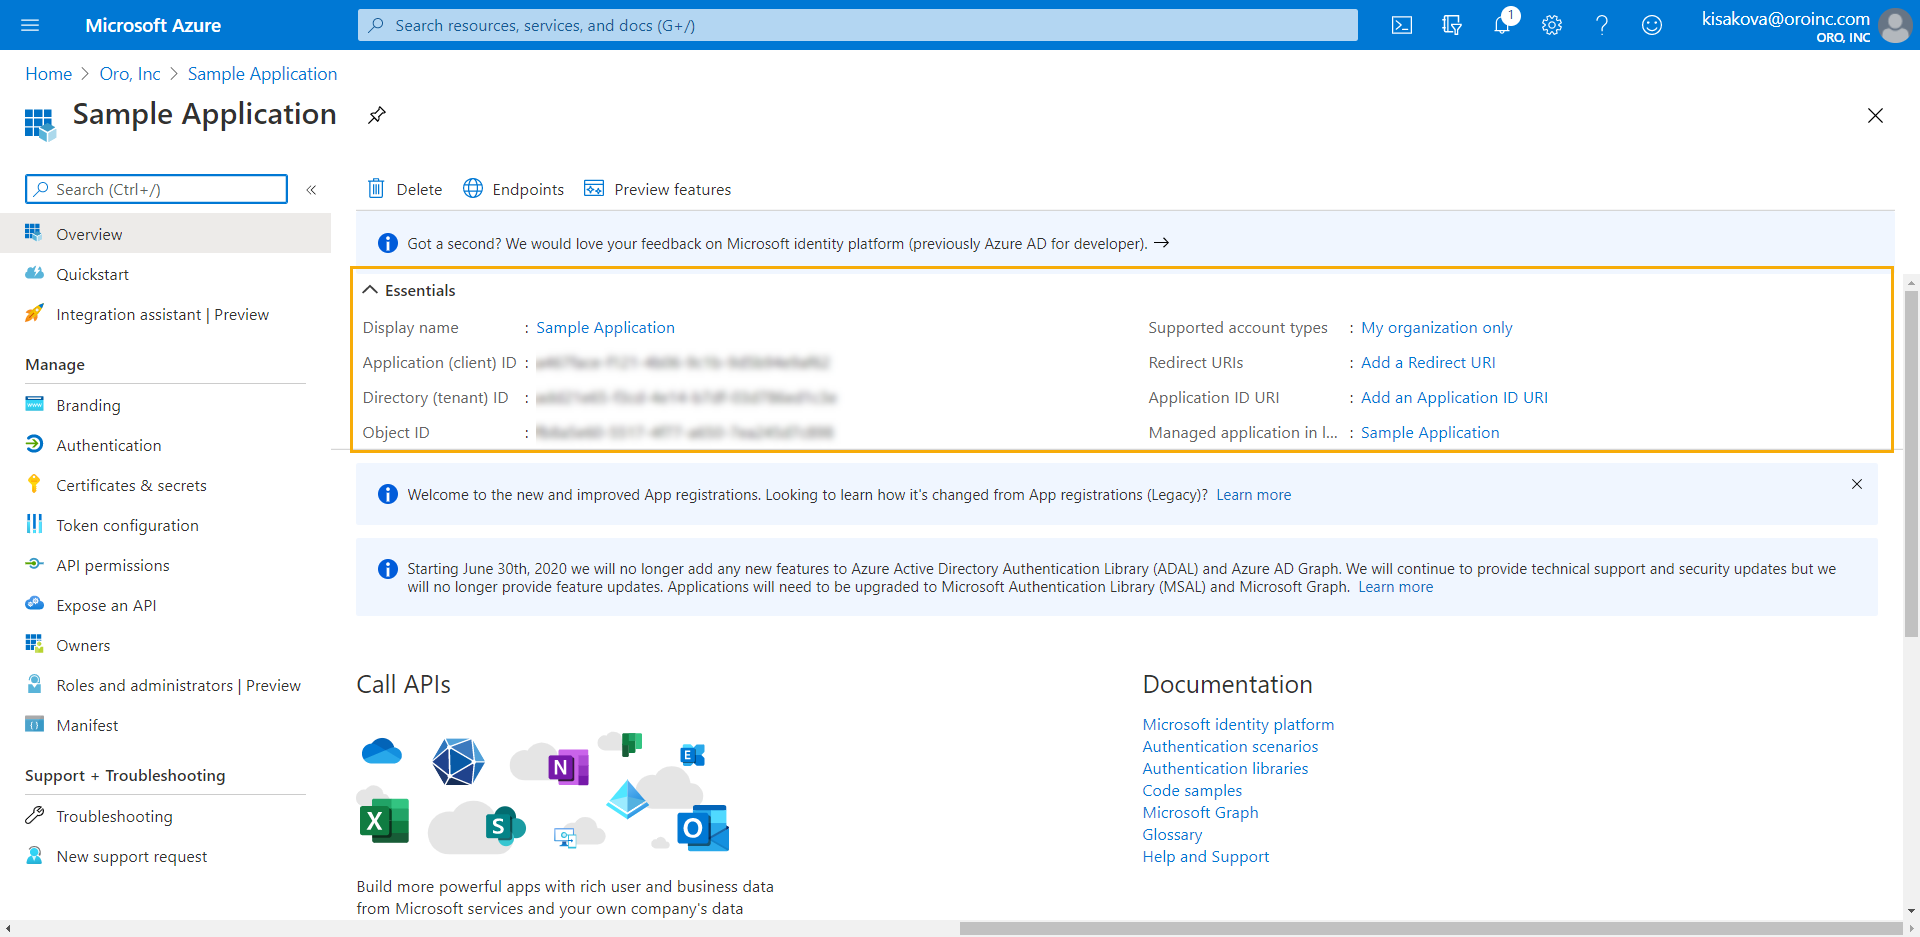
Once you create the application, its basic information, such as Application (client) ID and Directory (tenant) ID, is displayed on the app’s main page section in the Essentials section.
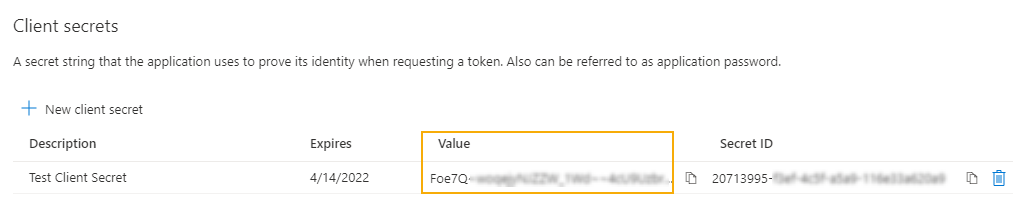
Create a Client Secret
To create a password/client secret, navigate to Manage > Certificates and Secrets.
Click New Client Secret and fill in the form.
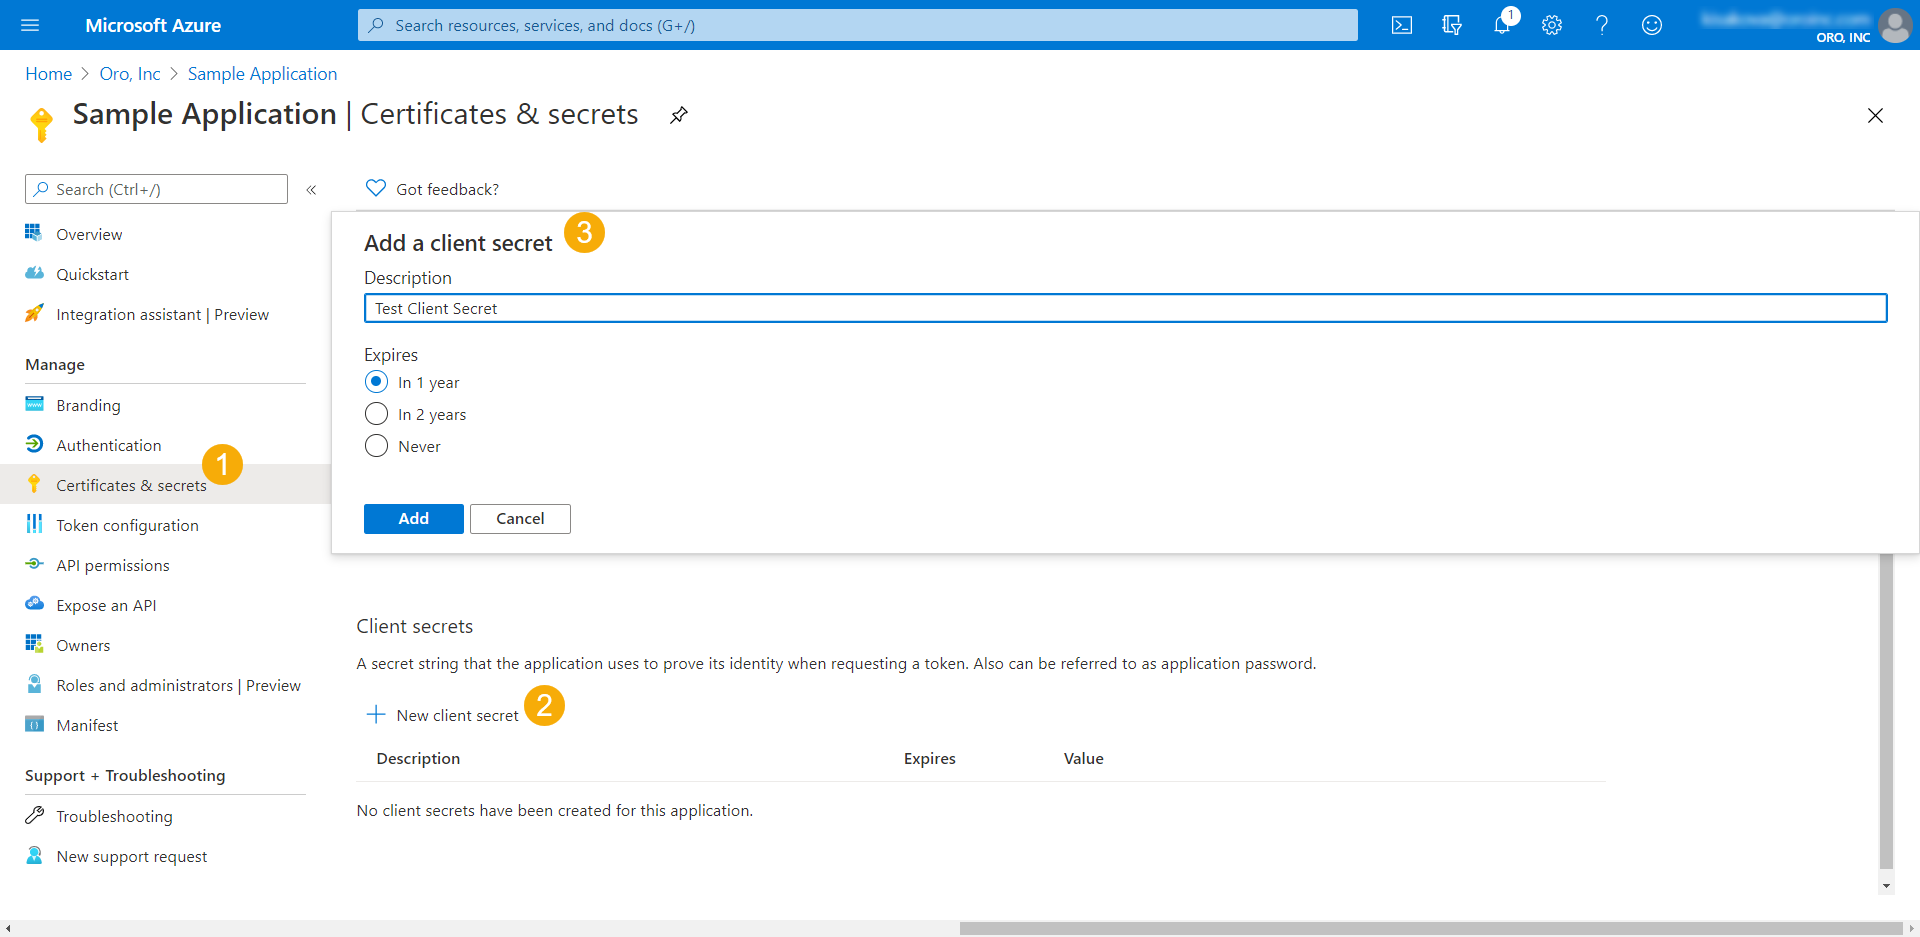
Remember to copy the client secret as soon as you create it. You will not be able to retrieve it after you perform another operation or leave the page.
Important
To integrate with the Oro application, make sure to use the client secret value, not the secret ID.
Grant API Permissions
Next, define the rights that the application will be able to grant.
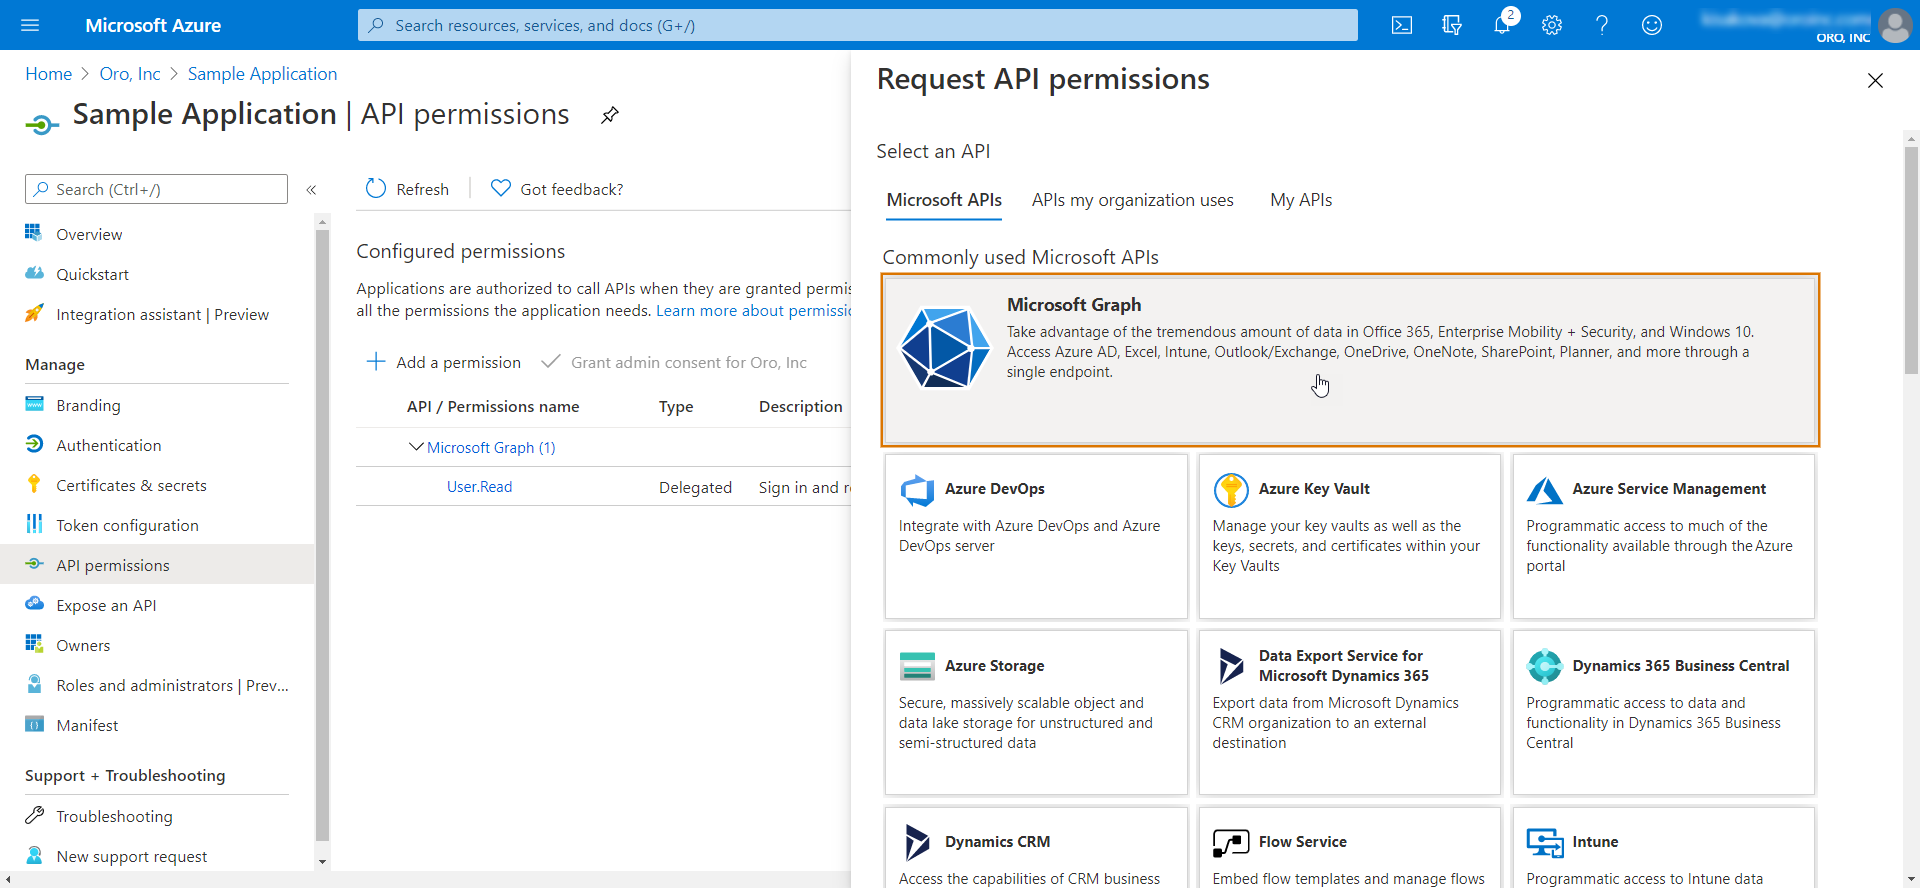
In the panel to the left, click API permissions.
Select the permissions that your application needs access for. Try narrowing down the access to the smallest possible/required set.

The screenshot below illustrates a set of permissions for User profile + Email access to Microsoft 365 services provided by Microsoft.You can use this set to authorize IMAP/POP/SMTP access (receiving, synchronizing and sending email messages and email account information):
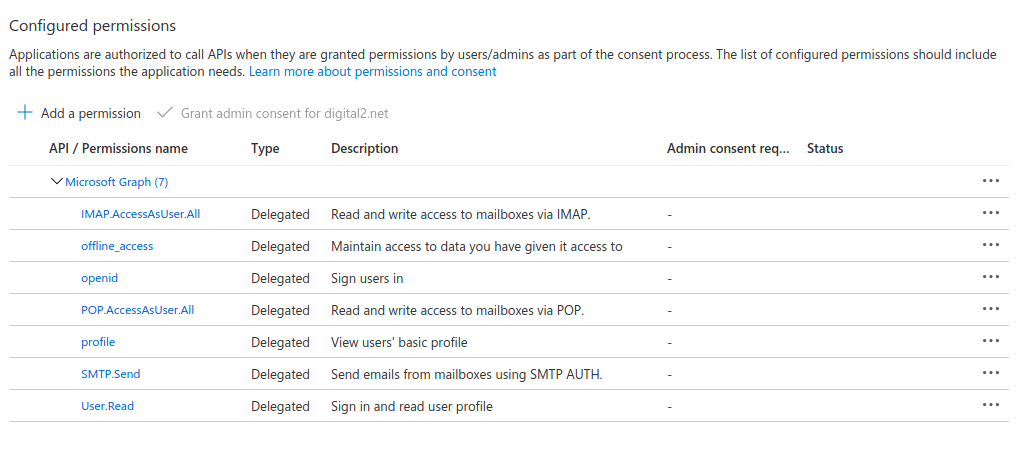
Click Add a permission and then Microsoft Graph.
Click Delegated Permissions and select the ones that you need. You can also use Search.
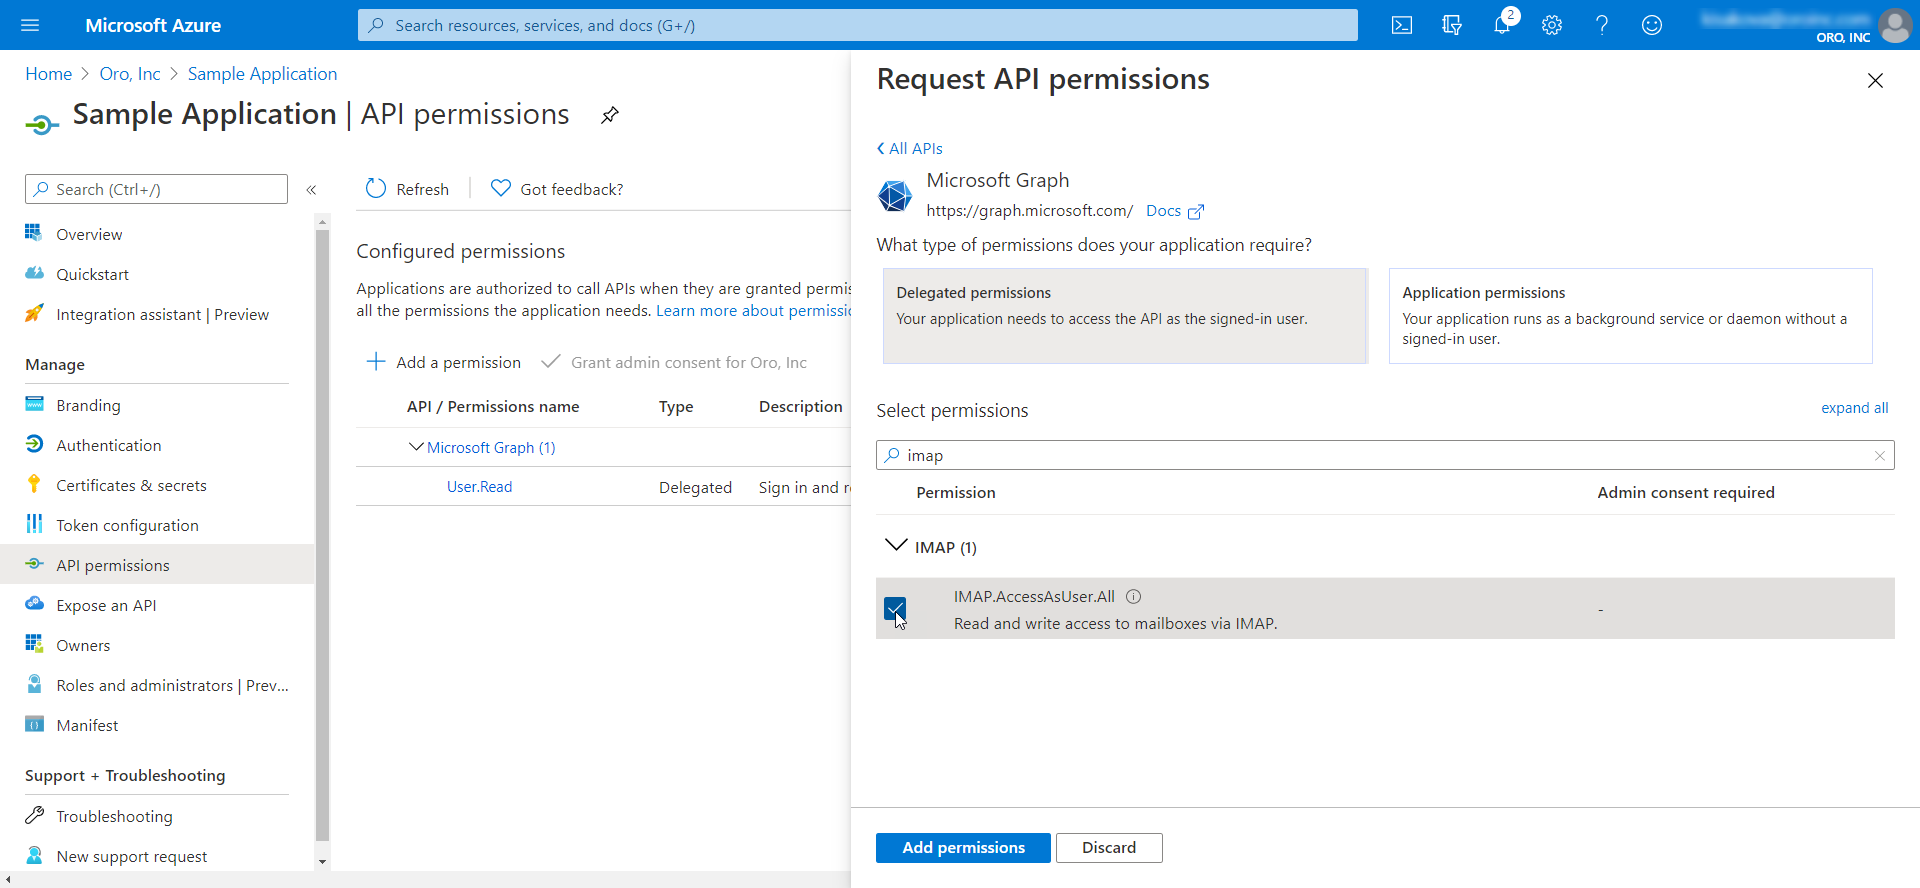
Note
Some access rights may require Administrator Consent. It is an administrative task and can be only performed by an organization admin user.
Click Add permissions.
Important
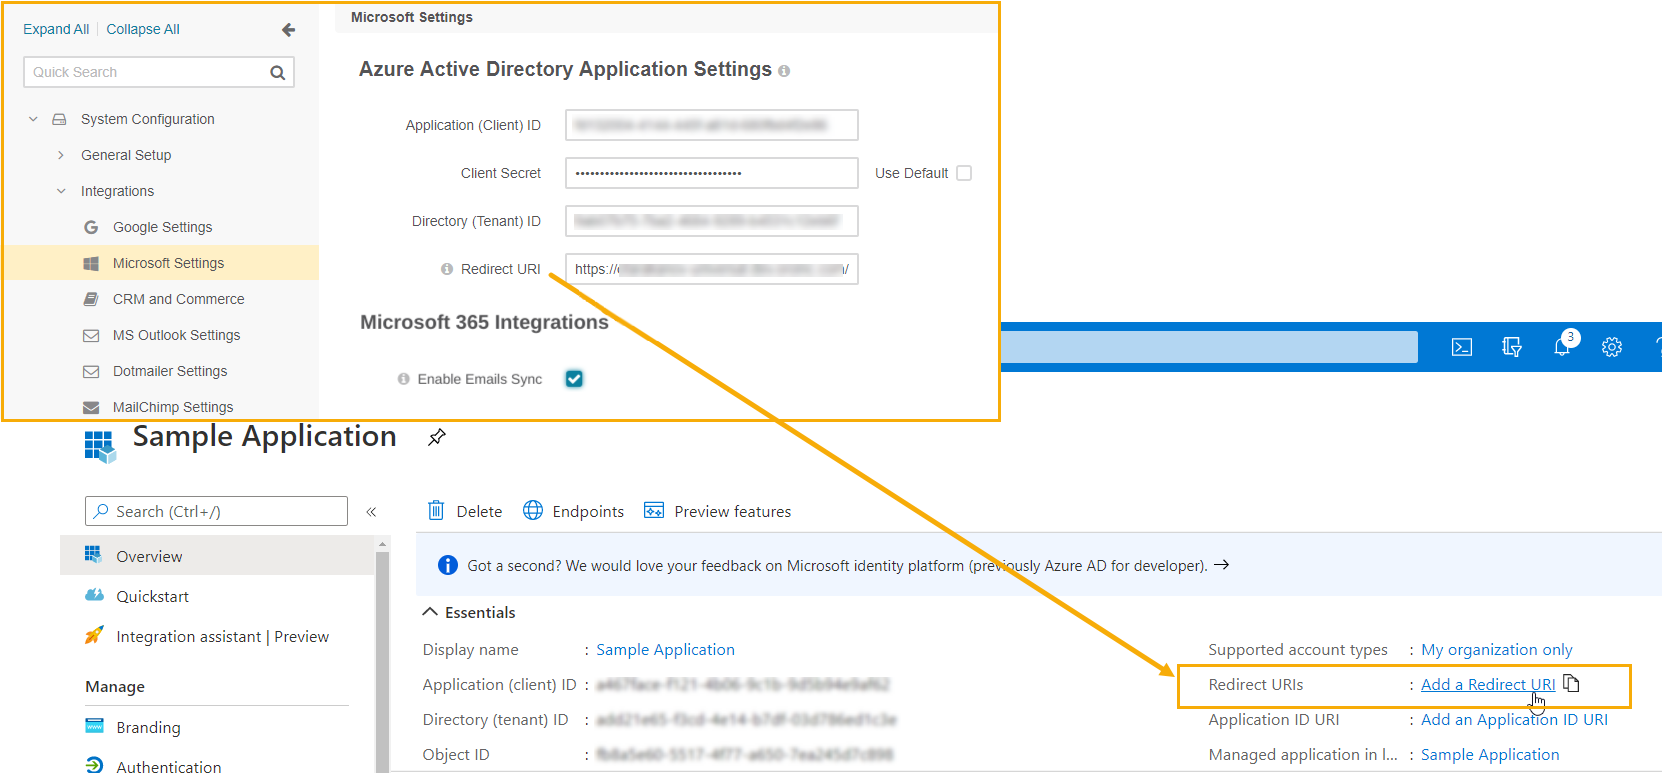
Please be aware that in order to complete the active directory application configuration, you will need to copy the value of the Redirect URI from the Microsoft System Configuration Settings of your Oro application and paste it into the Azure application settings:
Configure Integration in the Oro Back-Office
Once your Azure Active Directory application is configured, you can connect it to your Oro application.
For that:
Navigate to System > Configuration > Integrations > Microsoft Settings.
Provide the following details under Azure Active Directory Application Settings:
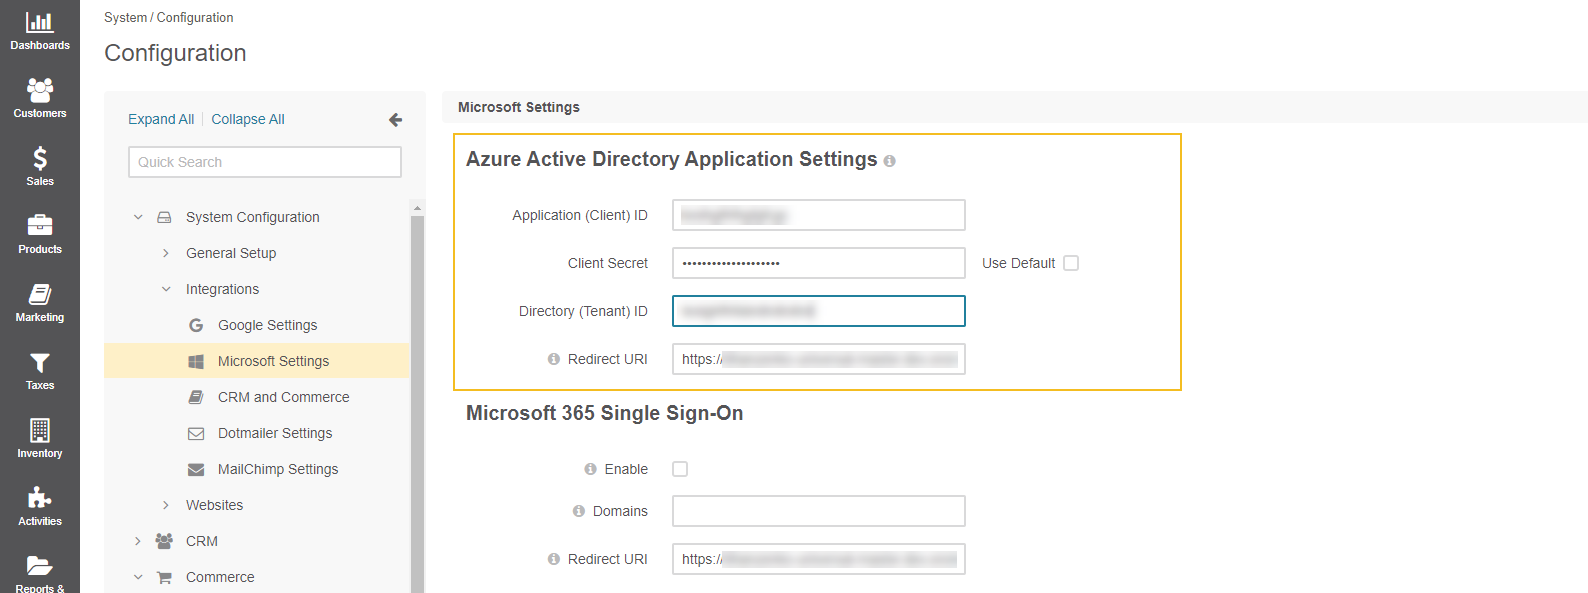
Application (Client) ID - The client id generated on the Azure side when creating an active directory application. It is located on the main application page under Essentials. Selecting the Use Default checkbox resets the value.
Client Secret - Provide the client secret value generated on the Azure side. To integrate with the Oro application, make sure to use the client secret value, not the secret ID.
Directory (Tenant) ID - The directory id generated on the Azure side when creating an active directory application. It is located on the main application page under Essentials.
Redirect URI - Copy this value and add it to your Azure Application trusted redirect URIs in order to complete the connection.
Click Save Settings.
Note
To enable and configure email synchronization on the system level, please see the Global Email Synchronization Settings and Global System Mailbox Synchronization Settings.
Related Topics