Configure Customer User Settings per Organization
Note
Customer User settings can be configured globally, per organization, and per website.
To change the default customer user configuration settings for an organization:
Navigate to System > User Management > Organization in the main menu.
For the necessary organization, hover over the More Options menu to the right of the necessary organization and click to start editing the configuration.
Select Commerce > Customer > Customer Users in the menu to the left.
Note
For faster navigation between the configuration menu sections, use Quick Search.
To customize any of the options:
Clear the Use System box next to the option.
Select the new option.
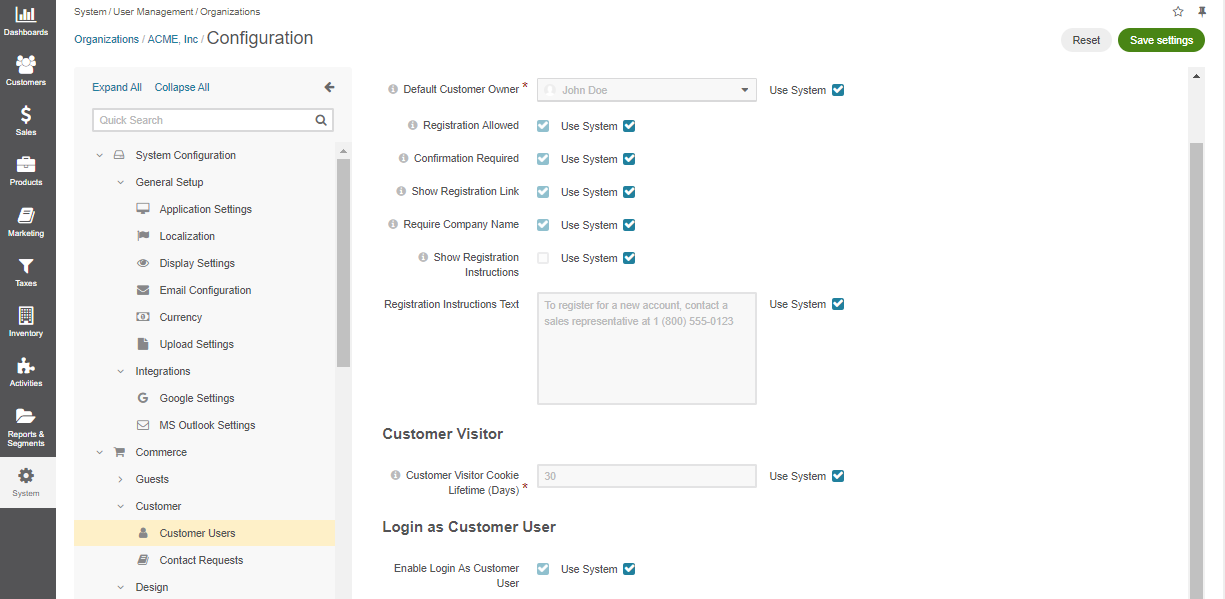
In the Customer Users Registration section, configure the following options:
Default Customer Owner — Service information that determines which user has full access to managing and viewing customer information. Usually, this is the default customer administrator or the administrator assigned to the customer. Applies to the customers created in the back-office as well as to those who register on the OroCommerce website.
Registration Allowed — Enables/disables registration of new customers from the storefront login screen.
Confirmation Required — Enables/disables the email confirmation step following user registration.
Show Registration Link — Shows/hides the registration link from the storefront login screen. The link is next to the Sign In link in the top bar.
Require Company Name — Shows/hides the company name field in the registration form in the storefront. Required for individual customers who do not belong to any company.
Show Registration Instructions — Enables/disables registration instructions in the storefront login page. This option is disabled by default.
Registration Instructions Text — If Show Registration Instructions is enabled, the text provided in the field is displayed in the storefront login page.
In the Customer Visitor section, configure the options for the anonymous users:
Customer Visitor Cookie Lifetime (Days) — Once the provided period expires, active customer visitor (anonymous user) sessions will be reset. Keep in mind that the uniqueness of email addresses and personal data is checked only for the registered users. It means that no two users can have identical personal information unless they are customer visitors (guest users). Multiple guest customers are allowed to have exactly the same data, including email addresses.
In the Login as Customer User section (available in the Enterprise edition), you can enable user impersonation for a specific organization. User impersonation allows back-office users with the Login as Customer User role capability to access and operate the OroCommerce storefront as if they were logged in as a specific customer user.
In the Login Attempts section, configure the following options:
Enable Failed Logins Limit — Defines whether a user can be locked out when the max number of login attempts is reached.
Max Login Attempts — The number of attempts within the login failure lockout interval that a user has to authenticate before they are locked out.
Login Failure Lockout Interval — The time in minutes in which failed login attempts are counted. If one failed login attempt is followed by the second failed attempt within this lockout interval, the failed login count starts. The user will be locked out if they reach the maximum number of failed login attempts. Set zero (0) to count failed login attempts globally.
Account Lockout Time — The time in minutes that indicates how long the user has before they are locked out of the system if they reach the maximum number of failed login attempts. Set zero (0) to disable automatic unlock.
In the Login Redirect section, configure the following option:
Do Not Leave Checkout — Enable this option to redirect a user back to the checkout page after a successful login. This overrides the Redirect After Login setting on the website configuration level that may specify a different target page.
In the Cookies Banner section, enable a cookie consent banner. A cookie consent banner is the cookie warning that pops up on websites when a user visits the site for the first time.
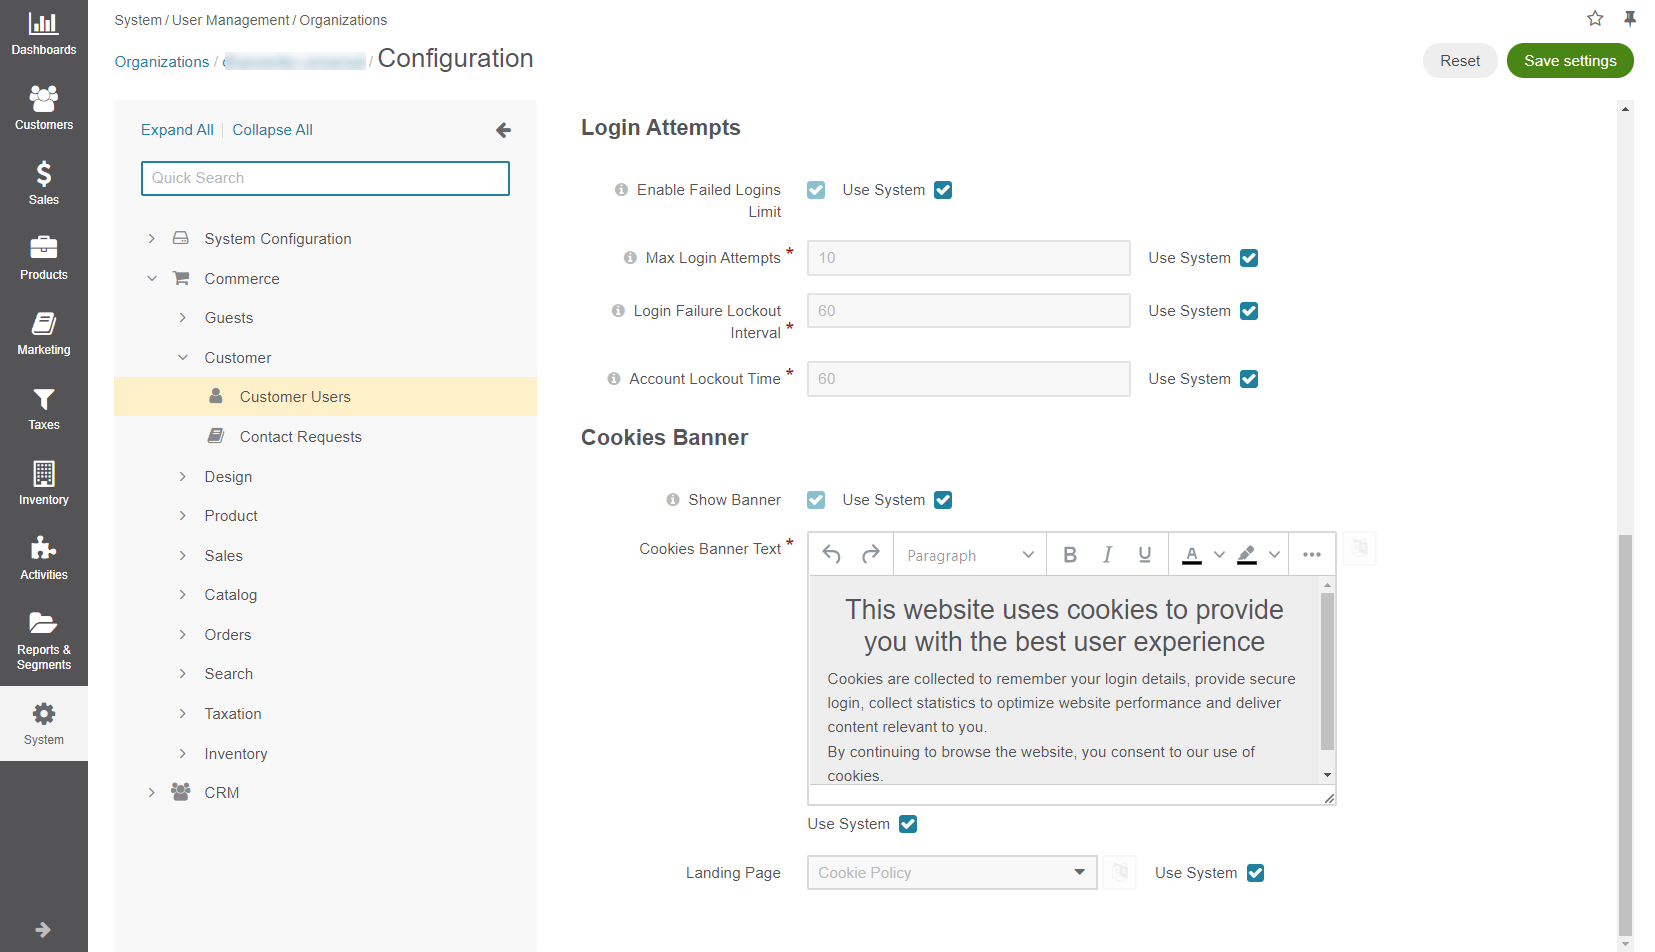
To configure cookie consent banner on the organization level, take the following steps:
Show Banner — Select the checkbox to display the cookie consent banner to the website’s visitor.
Cookies Banner Text — Provide the message of the cookie banner. To edit the text for a specific language, click the language button and edit the text for the needed language.
Landing Page - Select the landing page with cookie policy of the application, if any. This landing page will be highlighted as a link on the banner. To translate the landing page title to the specific language, click the language button and edit the title as required.
Click Save Settings.