OroPay Payment Service in the Back-Office
Hint
This section is part of the Payment Configuration Concept Guide, which provides a general understanding of the payment concept in OroCommerce.
OroPay is the payment service built into OroCommerce, delivered together with Global Payments. Use this guide to configure the OroPay integration in the back-office once OroPay is available in your environment, and to see what customers experience at checkout
For an overview of what OroPay does and how it fits alongside the payment providers you already use, see Integration with OroPay Payment Service.
Configure OroPay Integration Settings
Important
OroPay must be provisioned in your cloud environment, and you need an approved merchant account with Global Payments, before you can complete the steps below. If you have not started that process, contact our support team or your Oro account manager for more information..
To configure the OroPay integration in the OroCommerce back-office, once OroPay has been configured for your application:
Navigate to System > Integrations > Manage Integrations in the main menu of the OroCommerce back-office.
Click Create Integration at the top right.
Provide the following information in the form:
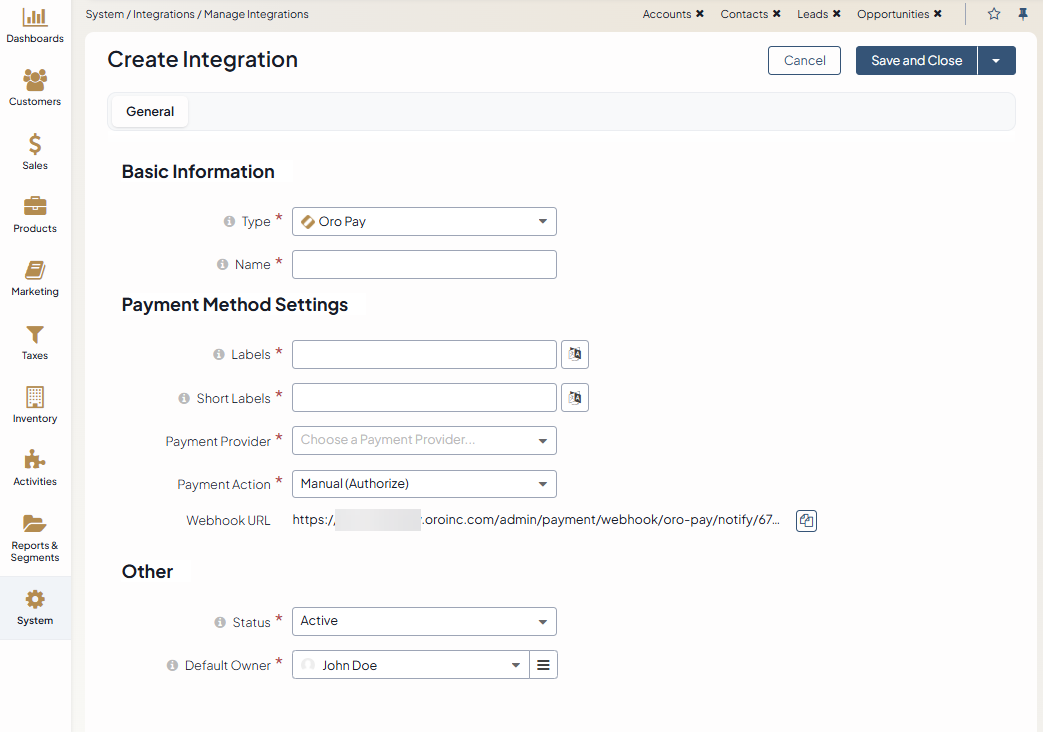
Type — Select Oro Pay from the drop-down list.
Name — Provide the payment method name that is shown as an option for payment configuration in the OroCommerce back-office.
Labels — The payment method name or label displayed as a payment option for the buyer in the OroCommerce storefront during checkout. To translate the label into other languages, click the icon next to the field.
Short Labels — The payment method name or label shown in the order details in the OroCommerce back-office and storefront after the order is submitted. To translate the label into other languages, click the icon next to the field.
Payment Provider — Select the required payment provider from the list of preconfigured options.
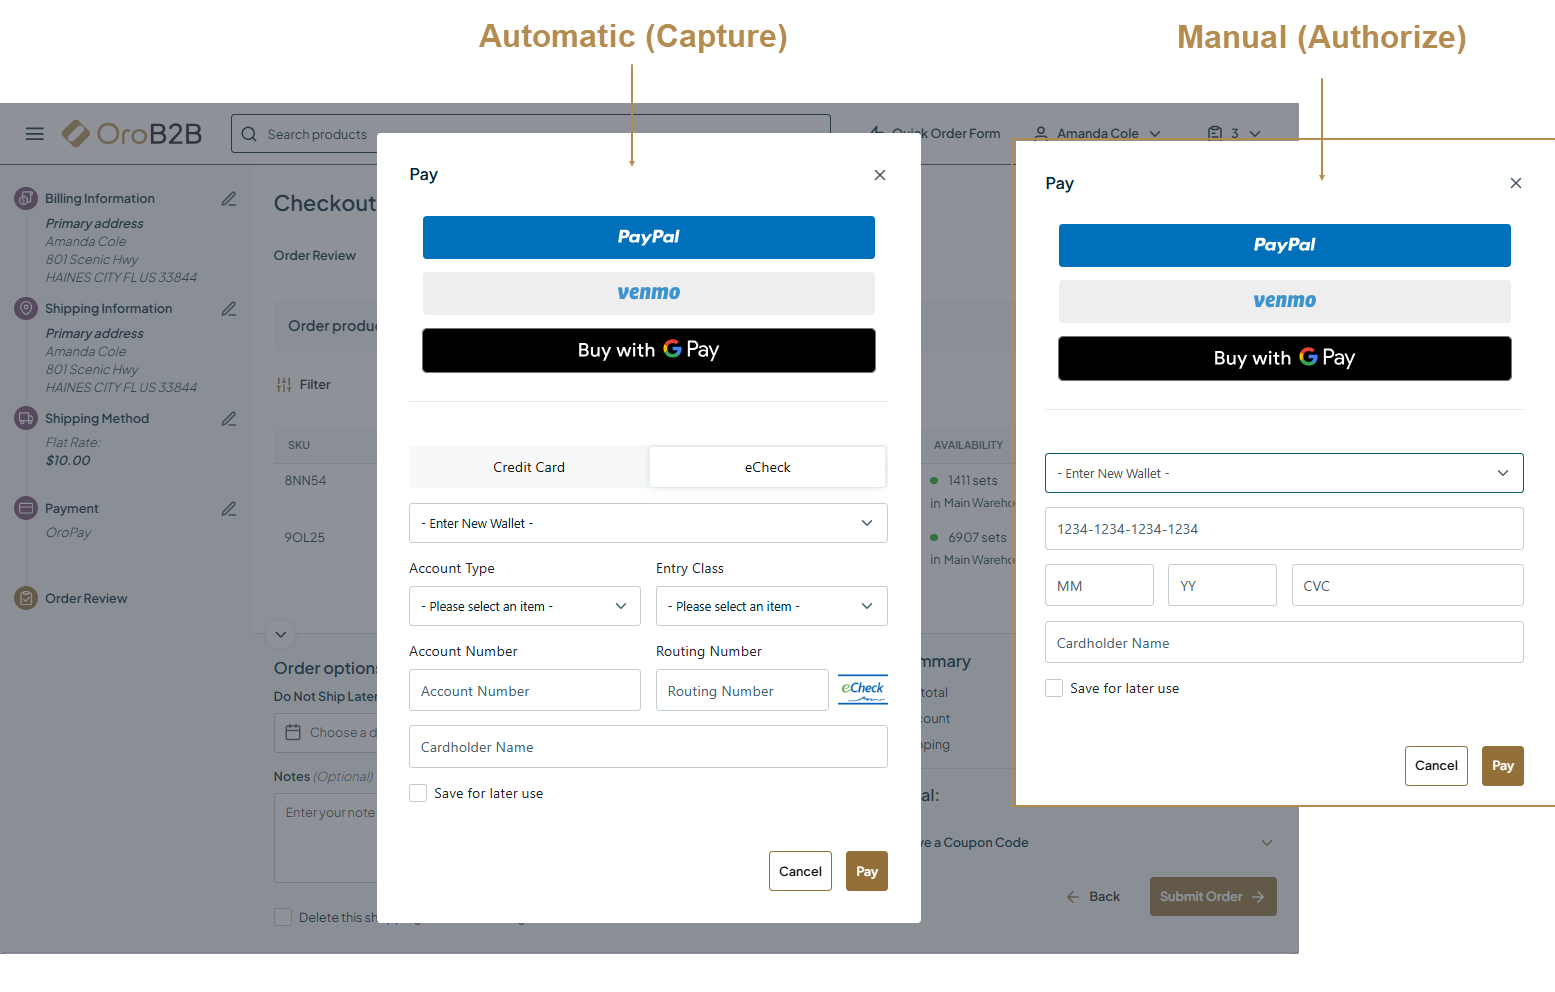
Payment Actions — Select one of the following options for credit cards:
Manual (Authorize) — The payment gateway checks with the cardholder’s issuing bank that the submitted card is valid and that sufficient funds cover the transaction. The required amount is placed on hold on the card but not yet charged. When you click Capture in the order or invoice details, the customer is charged the given amount, and the payment status changes from Payment Authorized to Paid in Full.
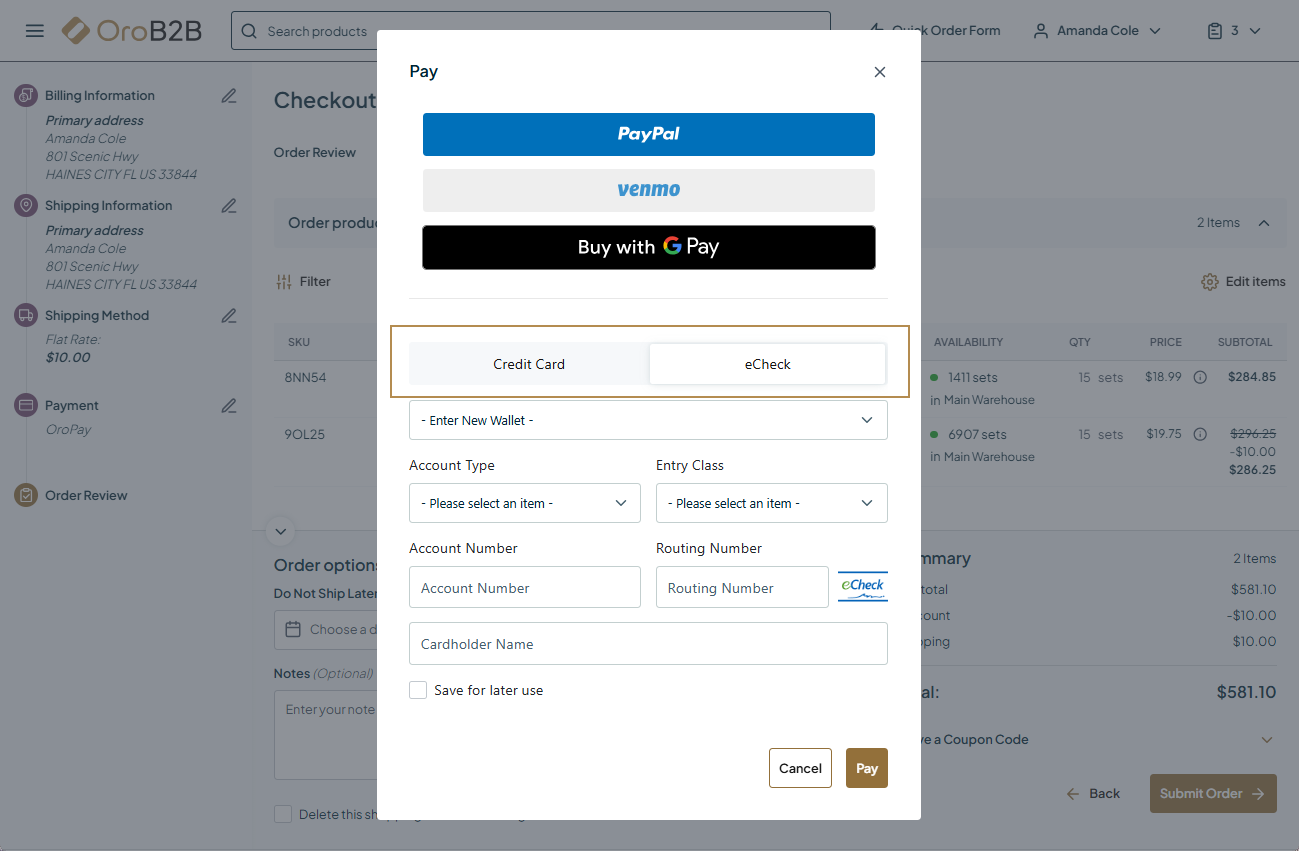
Automatic (Capture) — The payment gateway checks the card with the cardholder’s issuing bank and, where the check succeeds, initiates a money transfer from the card to your account. The customer is charged the given amount in full automatically.
When you select this option, OroPay also offers eCheck service to process e-check payments alongside credit card payments.
Status — Set the status to Active to enable the integration.
Default Owner — The user responsible for managing this integration.
Note
In the Synchronization Settings section, select the Log Warnings checkbox to have all synchronization errors written to the application log.
Click Save and Close.
Important
Once the integration with OroPay is created, set up a payment rule under System > Payment Rules and add your integration to it, to display this method to customers at checkout. For invoice payments, enable the feature and select OroPay as a payment method in the system configuration.
Checkout with OroPay
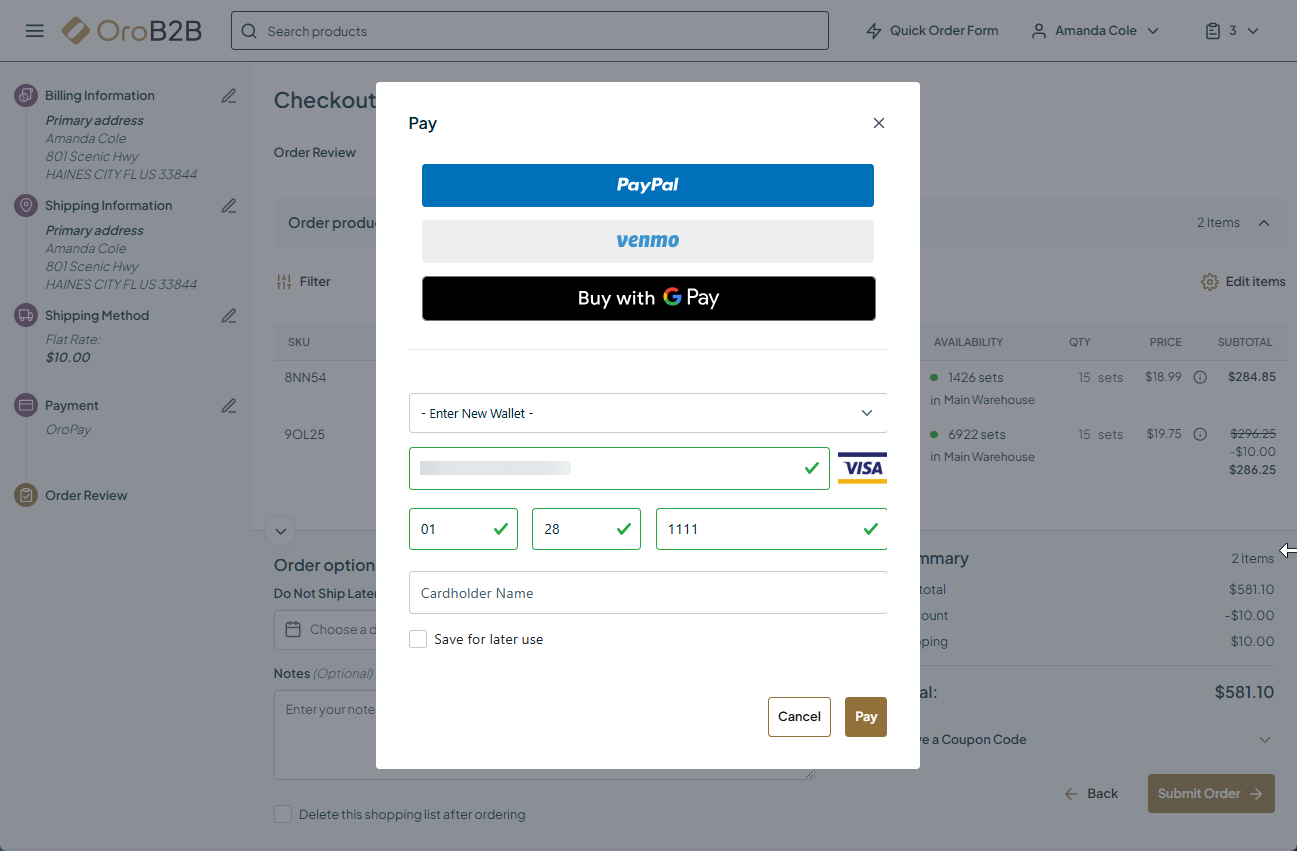
Once the payment method is linked to a payment rule, it becomes available at checkout in the OroCommerce storefront.
A customer can select the preferred payment method, or enter a card number, expiration date, CVC, and a ZIP code (if required) to process the payment through the OroPay service.
Pay Invoices with OroPay
To pay invoices with OroPay, confirm the following:
The payment method is configured as described in Configure OroPay Integration Settings.
Invoice payments are enabled, and OroPay is selected as a payment method in the system configuration. No additional payment rule configuration is required if you use OroPay for invoice payments only.
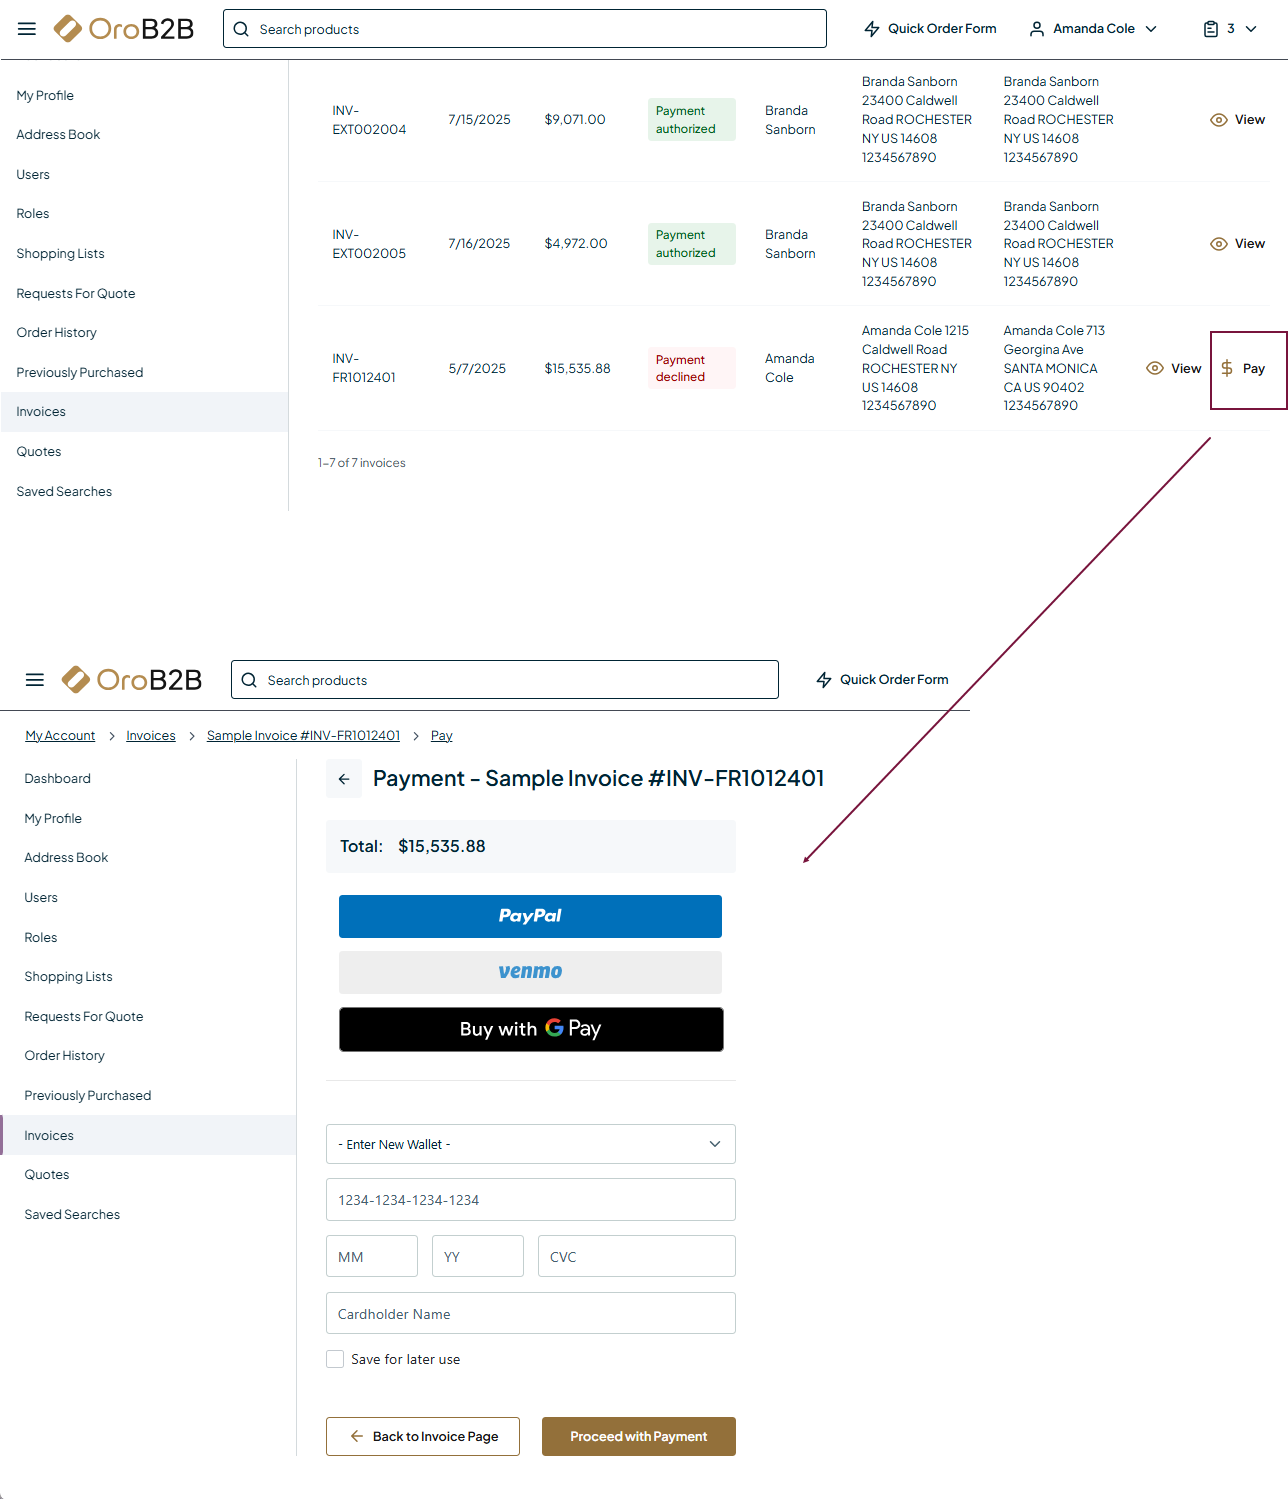
Once set, a customer can pay the invoice directly through OroCommerce using OroPay. A Pay button is displayed in the storefront, and a Payments section is added to the invoice view page in the back-office.