Configure Display Settings per User
In the Display section, you can configure the following display options for a particular user:
Navigate to System > User Management > Users in the main menu.
For the necessary user, hover over the More Options menu to the right and click to start editing the configuration.
Select System Configuration > General Setup > Display Settings in the menu to the left.
Note
For faster navigation between the configuration menu sections, use Quick Search.
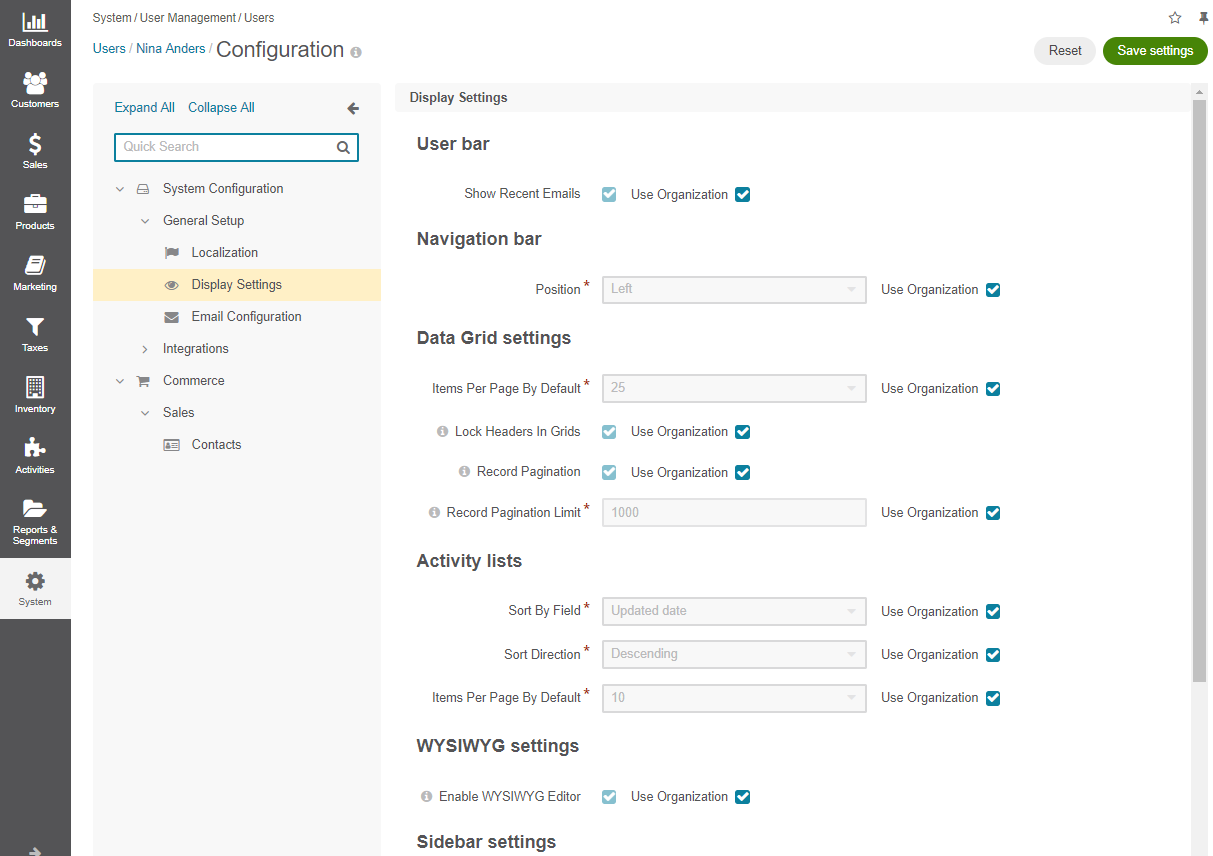
Clear the Use Organization checkbox to change the organization-wide setting for the following options:
In the User Bar section, configure the setting:
Show Recent Emails — Enable the checkbox to display the recent emails on the user bar. They will appear next to the user name.

In the Navigation bar section, configure the setting:
Position — Select whether the OroCommerce main menu will be positioned at the top of the page or on its left.
In the Data Grid Settings section, configure the options to display all the record lists (grids) in the back-office:
Items Per Page By Default — Defines the number of items displayed on one page of the grid by default (every time you open the grid).
Lock Headers In Grids — Ensures that grid headers stay visible while you scroll.
Row Link Navigation — Enables the ability for the row in the grid to behave like a native link. By right-clicking on the item in the grid, you can open it in a new tab/window.
Record Pagination — Enables the user navigation to the previous or next grid record from a record view page.
Record Pagination Limit — Type the maximum number of records that the user can navigate from a record view page.

In the Activity Lists section, configure the options to display activities.
Sort By Field — Select whether to sort activity records by the date when they were created or by the date when they were updated for the last time.
Sort Direction — Select whether to sort records in the ascending or descending direction.
Items Per Page By Default — Select how many records will appear on one page of the activity grids.
In the WYSIWYG Settings section, enable the WYSIWYG Editor setting:
Enable WYSIWYG Editor — Select this checkbox to enable text formatting tools for emails, notes and comments.
In the Sidebar Settings section, enable or disable the left and/or right sidebar to keep your sticky notes and task lists:
Enable Left Sidebar — Select Yes to enable the user to see and utilize the left sidebar.
Enable Right Sidebar — Select Yes to enable the user to see and utilize the right sidebar.
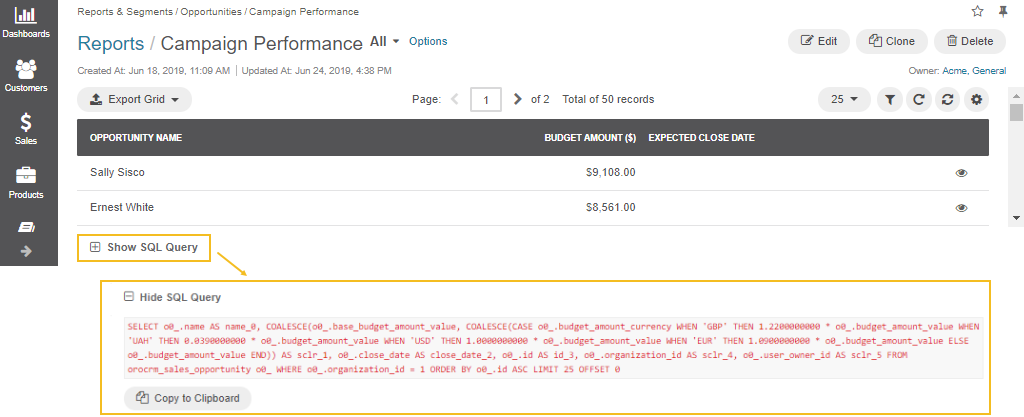
In the Reports Settings section, configure the following settings:
Display SQL In Reports And Segments — Select this checkbox to enable the user to review the SQL request sent to the system for a report or a segment. This way, users can check if a report has been developed correctly.
In the Window Settings section, configure the following settings:
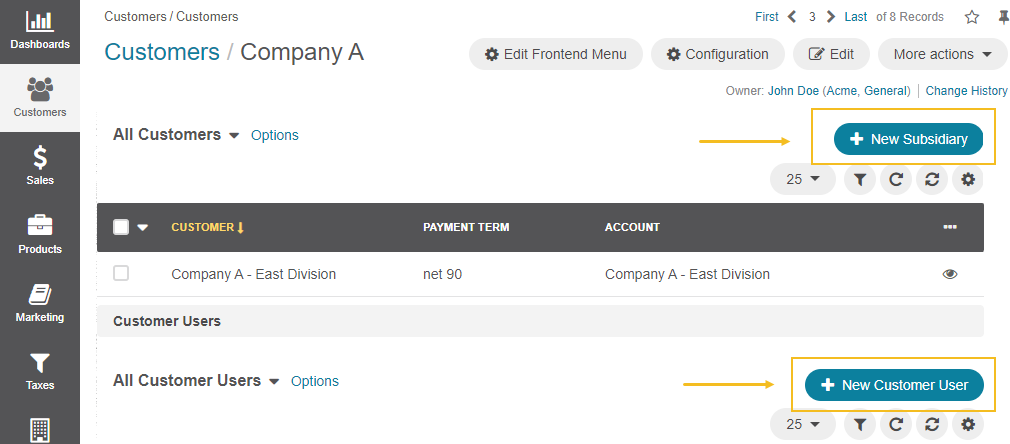
Quick Create Actions — Select the preferred way to display the quick creation buttons form. The buttons with quick actions appear on the customer, customer user, and customer group view pages. When clicked, the form can be displayed in a new browser tab, a popup dialog window, or replace the current page.