Integration with Activepieces
Note
This feature is available in the OroCommerce Enterprise Edition.
Hint
This section is part of the Integration Flows Concept Guide topic that provides a general understanding of Activepieces integration flows, how they work with OroCommerce, and the business processes that they can automate.
Activepieces is a third-party automation platform that connects applications and automates workflows between them. Integration Flow Designer embeds Activepieces in the OroCommerce back-office. As a result, you can build integration flows and automations without writing code and without leaving the Oro application.
An integration flow starts when an event occurs in OroCommerce or in another application. In the Activepieces interface, this event is called a trigger. The flow then completes one or more steps, which Activepieces calls actions, such as sending a notification, creating a record, or calling an API. Activepieces provides more than 700 connectors to other applications, for example, Slack, Jira, HubSpot, QuickBooks, and Gemini.
Administrators enable and configure Integration Flow Designer. After that, users with the required permissions create and manage flows.
Set Up the Integration
Complete the following tasks in this order:
Enable Integration Flow Designer in the system configuration.
Configure Access to Integration Flows for the roles of the users who work with flows.
Enable Integration Flow Designer
Integration Flow Designer is disabled by default. Have it enabled by your administrator globally or for a particular organization in the system configuration:
Configure Access to Integration Flows
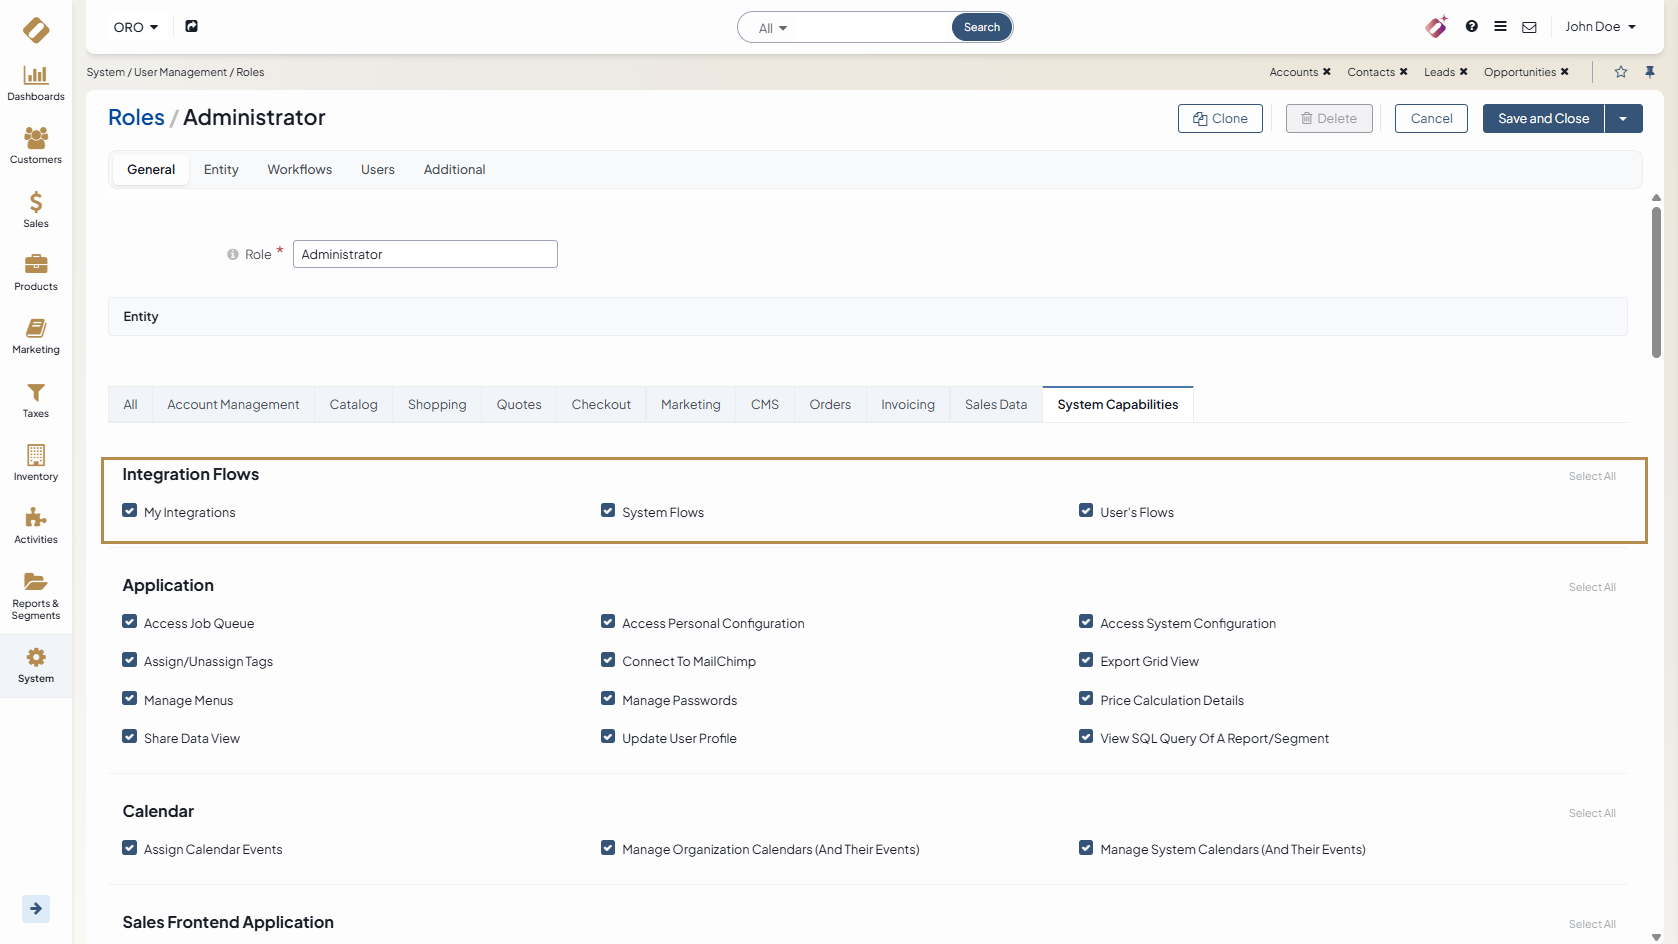
Role permissions control access to integration flows. In the role configuration, the Integration Flows group contains the following permissions:
My Integrations — Allows a user to create and manage their own flows.
System Flows — Allows a user to view and manage the shared system flows.
User Flows — Allows a user to review the flows of other users.
To grant or restrict access, edit the role and select or clear the permissions.
Choose a Flow Type
Integration Flow Designer supports two types of flows. System flows are shared by the whole team. User flows belong to an individual user.
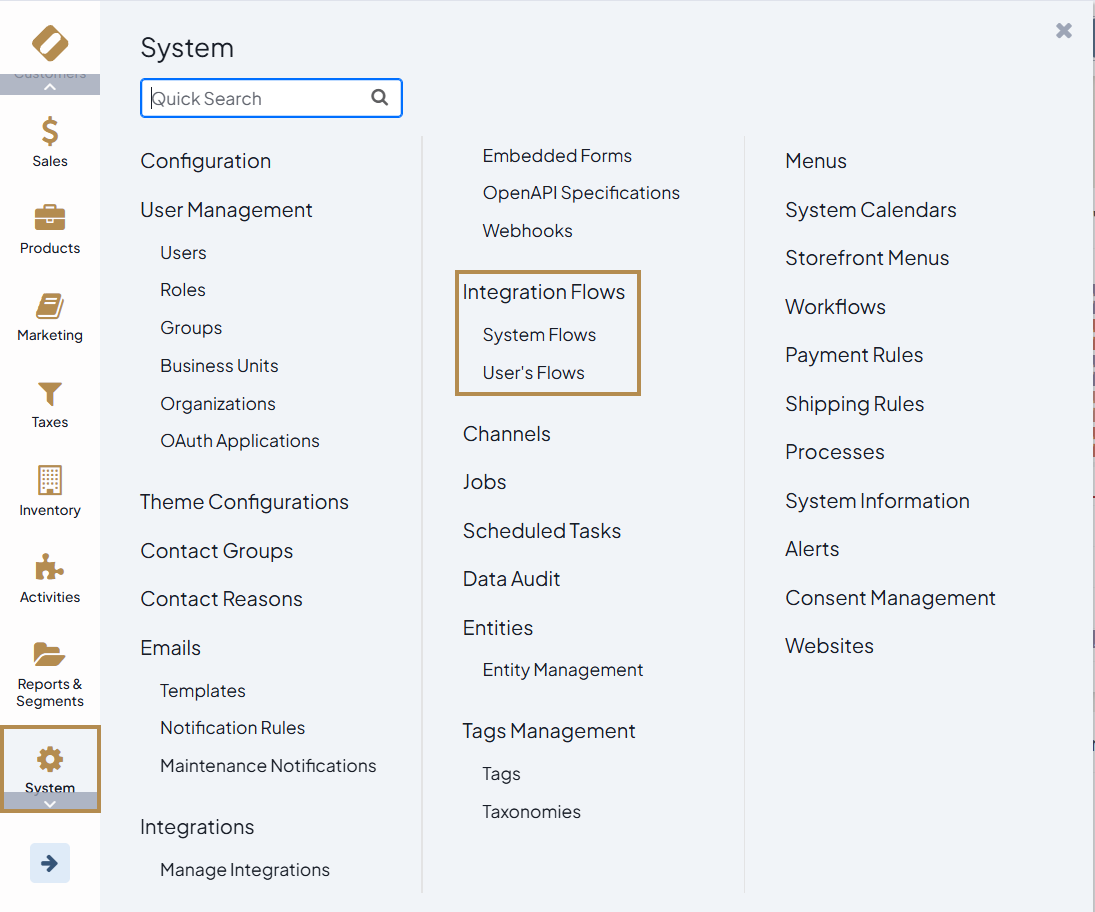
Both types appear under System > Integration Flows in the main menu.
Use System Flows
System flows are shared flows. The Activepieces user configured in the Activepieces User ID (System Flows) setting owns them. Any user who has access to System Flows can view and manage these flows.
Use system flows for automations at the level of an organization or a group of users, such as data integration between systems or notifications to a shared Slack channel or an email group.
To open the system flows, navigate to System > Integration Flows > System Flows in the main menu.
Activepieces does not have organizations. It separates system flows by the user that owns them. If different organizations use different Activepieces users for system flows, the users of each organization see only the system flows of their own Activepieces user.
Use User Flows
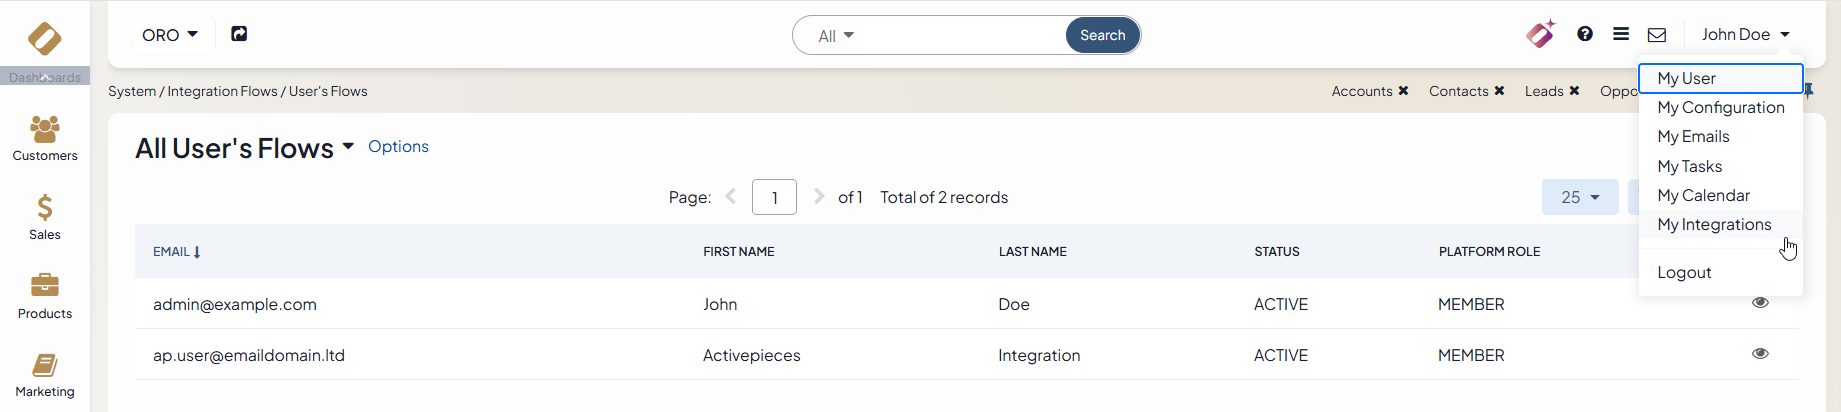
User flows are personal flows of a user. A user manages them under My Integrations on the top right.
The application creates an Activepieces user for a user the first time they open My Integrations. If an administrator has enabled the Enable Connection Autocreation For Users setting in the system configuration, the application also creates the connection from Activepieces to OroCommerce at that time. As a result, a user can create flows immediately, without connecting Activepieces to OroCommerce manually.
The flows of a user run on behalf of this user and with the permissions of this user.
Use user flows for personal automations. For example, a sales representative can receive a notification when a record is assigned to them.
Review the Flows of Other Users
The User’s Flows permission allows a user to view all Activepieces users and open flows on their behalf.
To view the flows of the users, navigate to System > Integration Flows > User’s Flows in the main menu. The grid lists the users for whom the application created an Activepieces user. These are the users who opened Activepieces.

The grid displays the following columns:
Email
First Name
Last Name
Status
Platform Role
Click the  icon at the end of a row to see the flows of the user as that user.
Explore the Activepieces Workspace
The System Flows page opens the Activepieces workspace. The My Integrations page opens the same workspace for the flows of the current user.
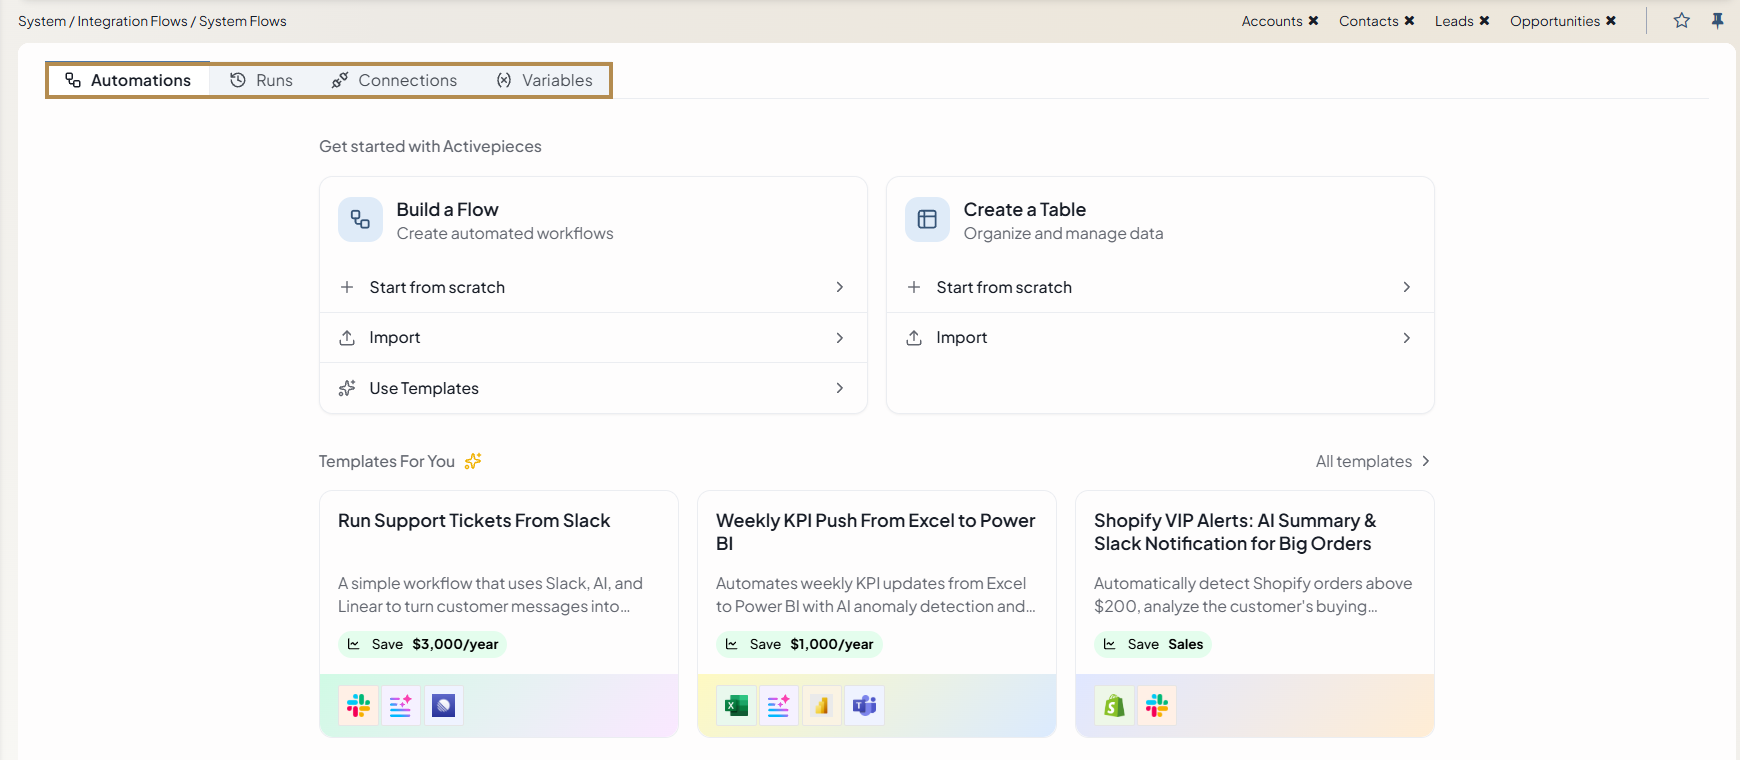
The workspace contains the following tabs:
Automations — Create and manage flows and tables. To create a flow, click Start from scratch, Import, or Use Templates in the Build a Flow section. Ready-made templates are listed in the Templates For You section.
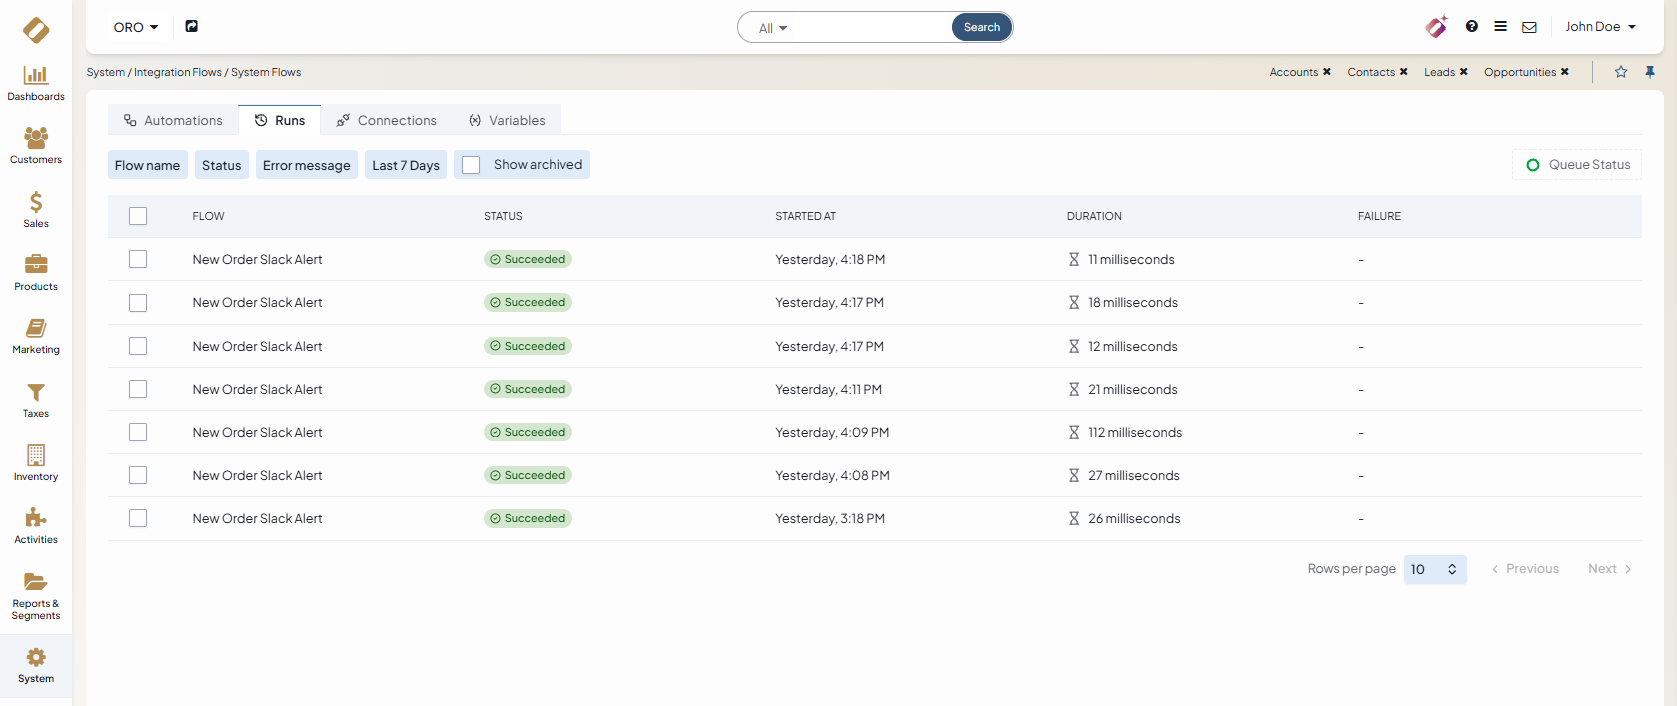
Runs — Review the executions of flows. For each run, you can see how long it took and the data that the run received.
Connections — Manage the connections to OroCommerce and to other applications.
Variables.
Create a Flow (Example)
The following example shows how to create a flow that sends a Slack notification when an order with a total value greater than a specified amount is created. Use the same steps as a pattern for your own flows, and replace the trigger, the condition, and the Slack action with the ones that your process requires.
Before you start, make sure that webhooks are available for the order entity. For more information, see Webhooks.
Navigate to System > Integration Flows > System Flows in the main menu.
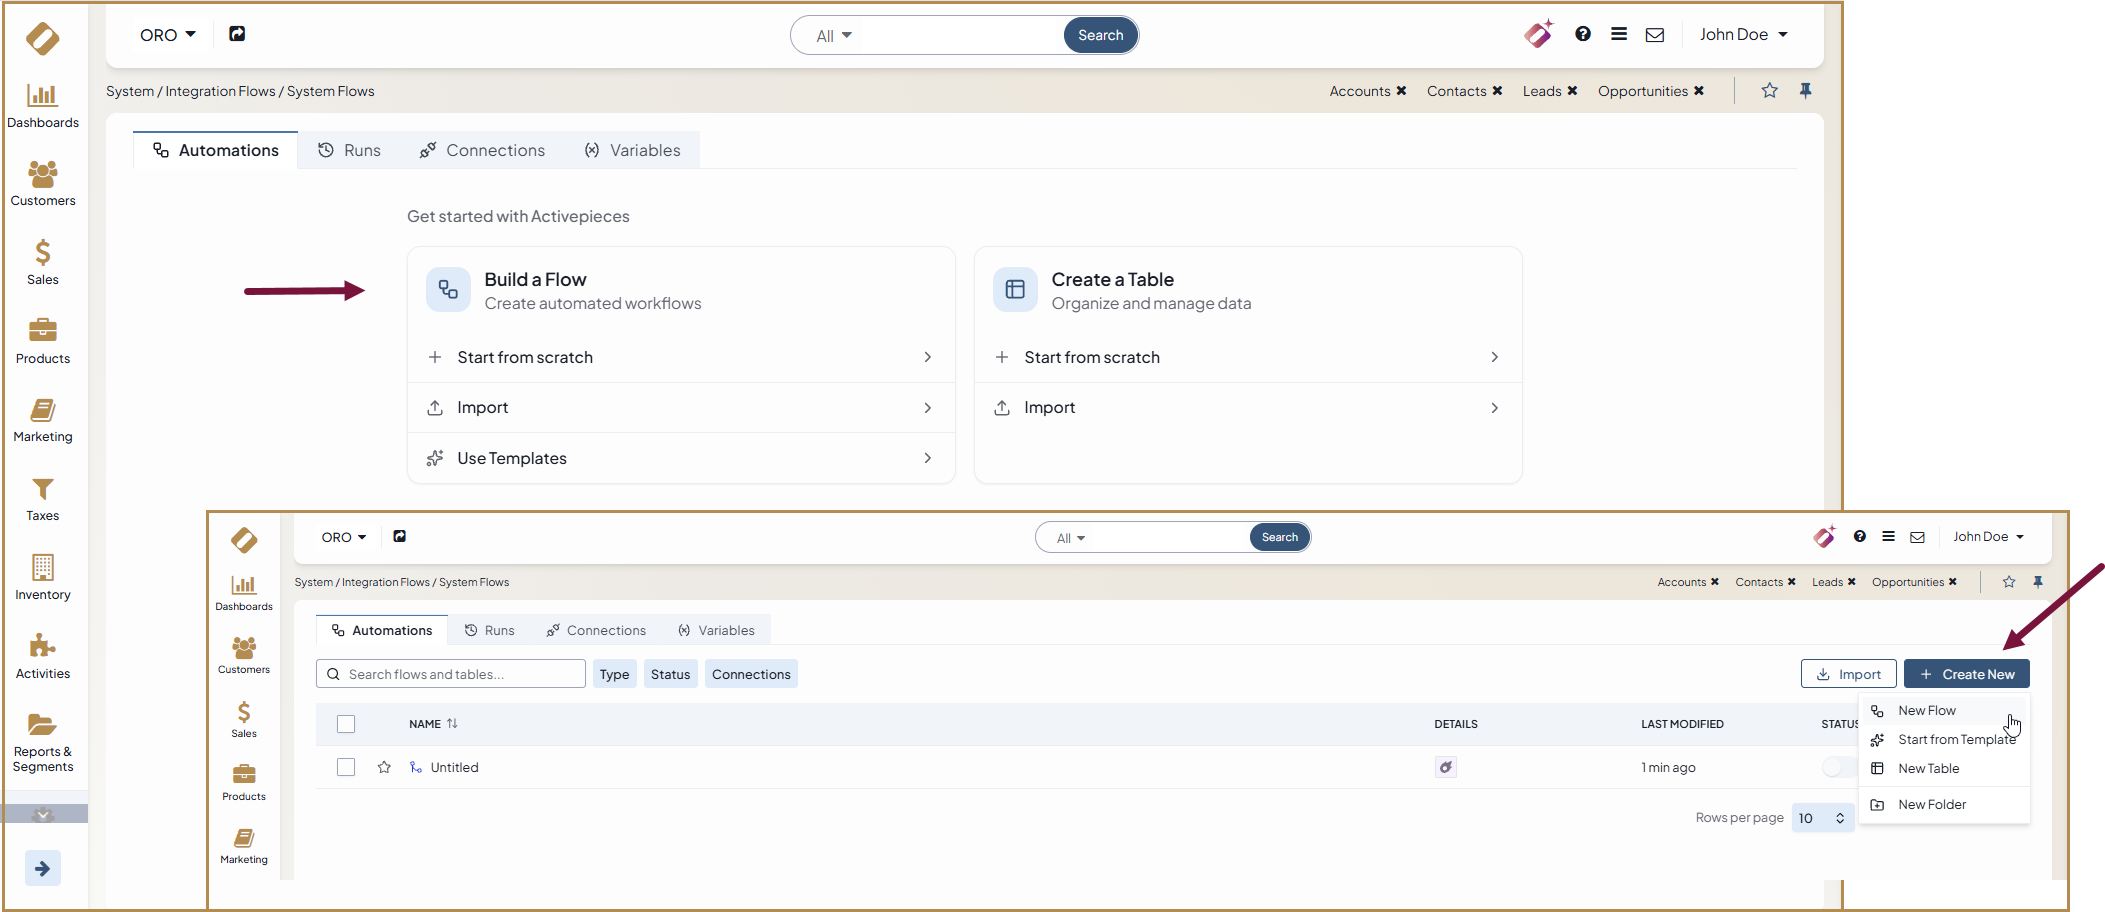
On the Automations tab, click Start from scratch in the Build a Flow section. Alternatively, click Create New in the top-right corner of the page, and then click New Flow.
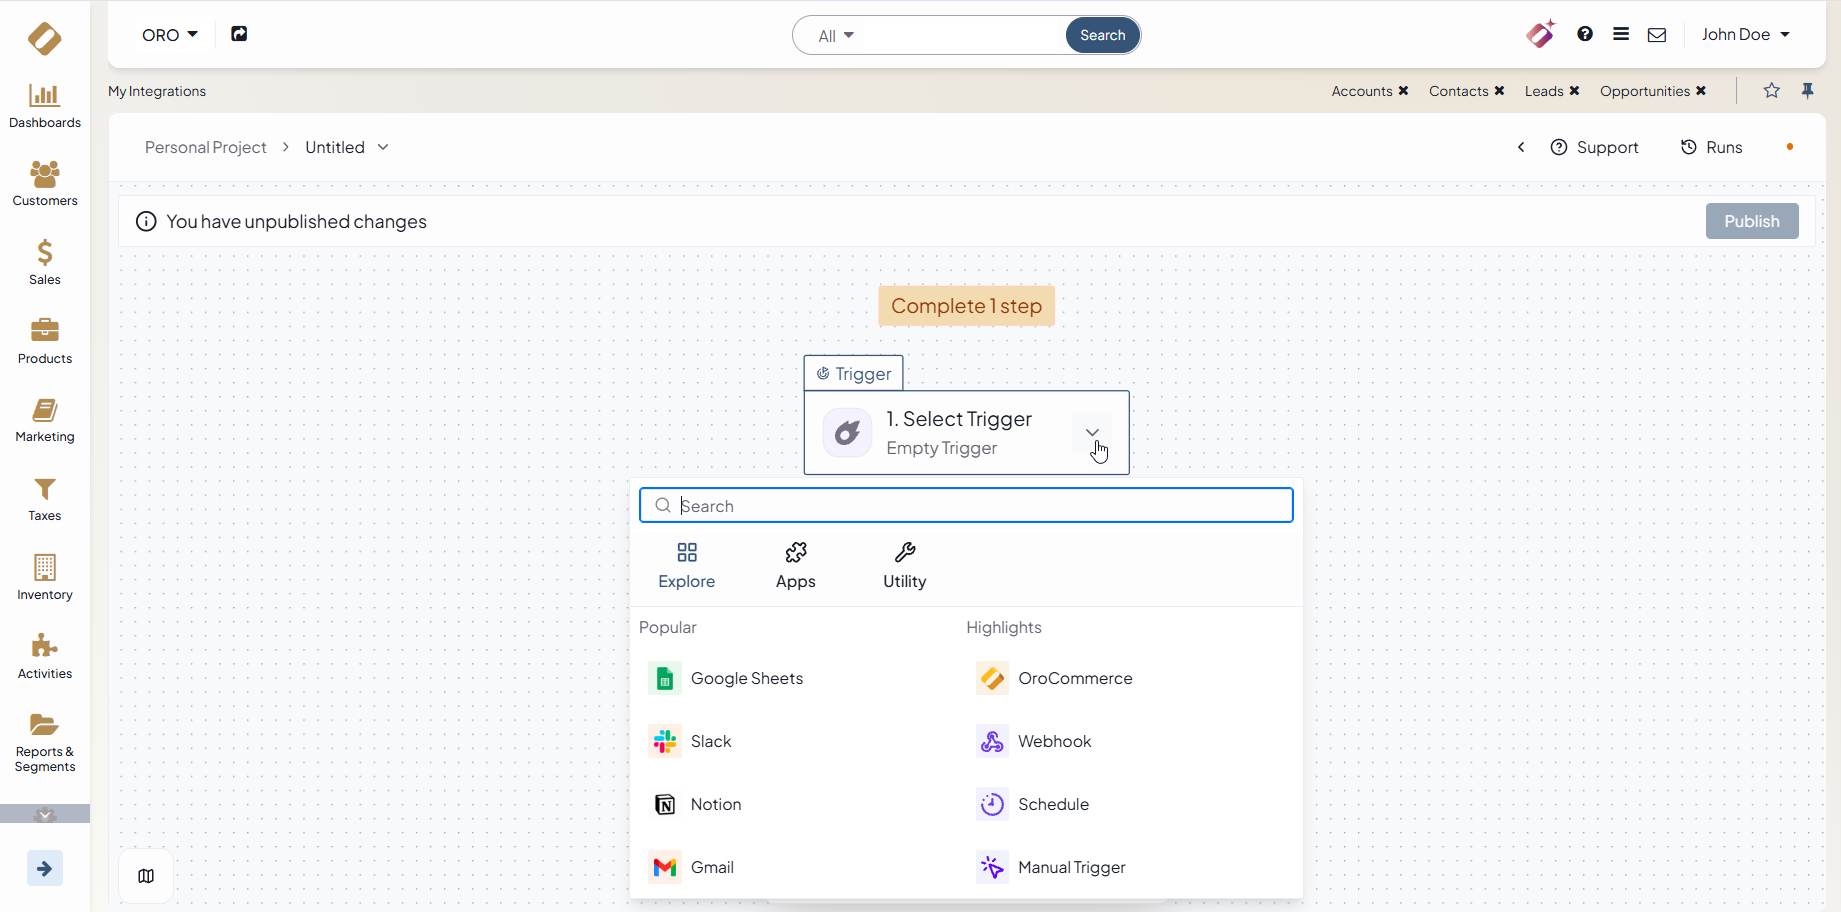
Select the trigger. For this example, select the connection to OroCommerce, which is listed first among the trigger applications.
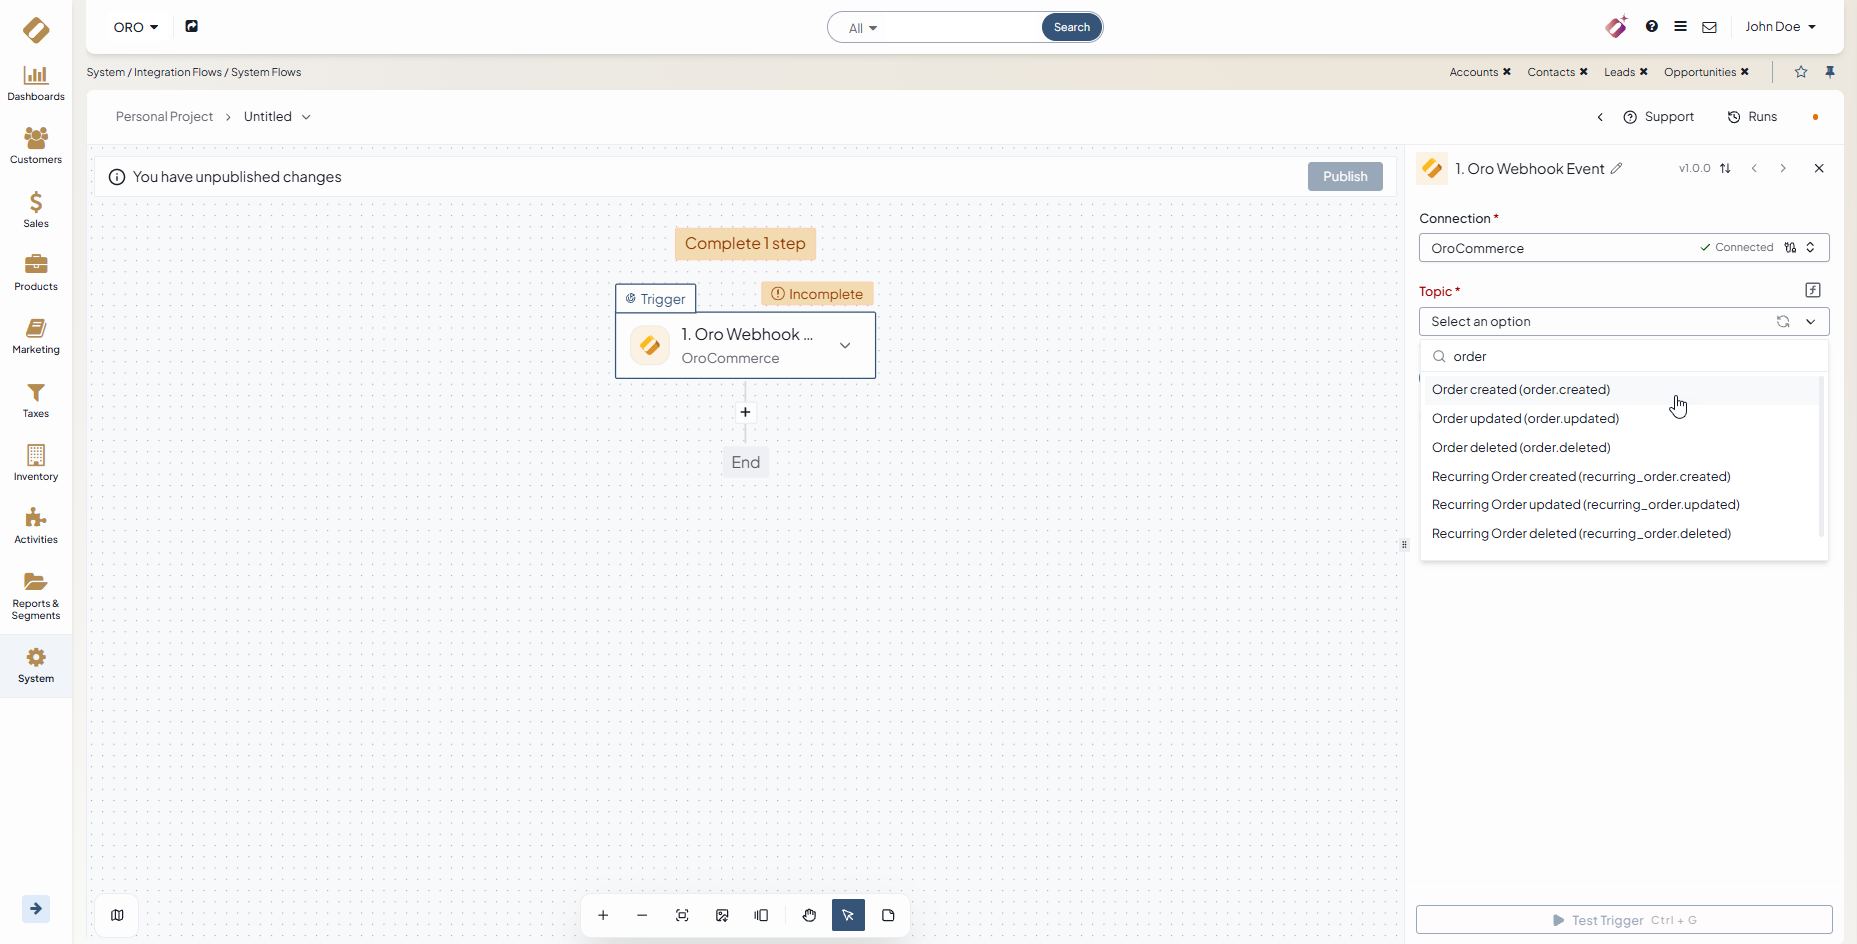
Select the OroCommerce event that starts the flow. Each OroCommerce event corresponds to a webhook event. To start the flow when an order is created, select the Order created webhook event.
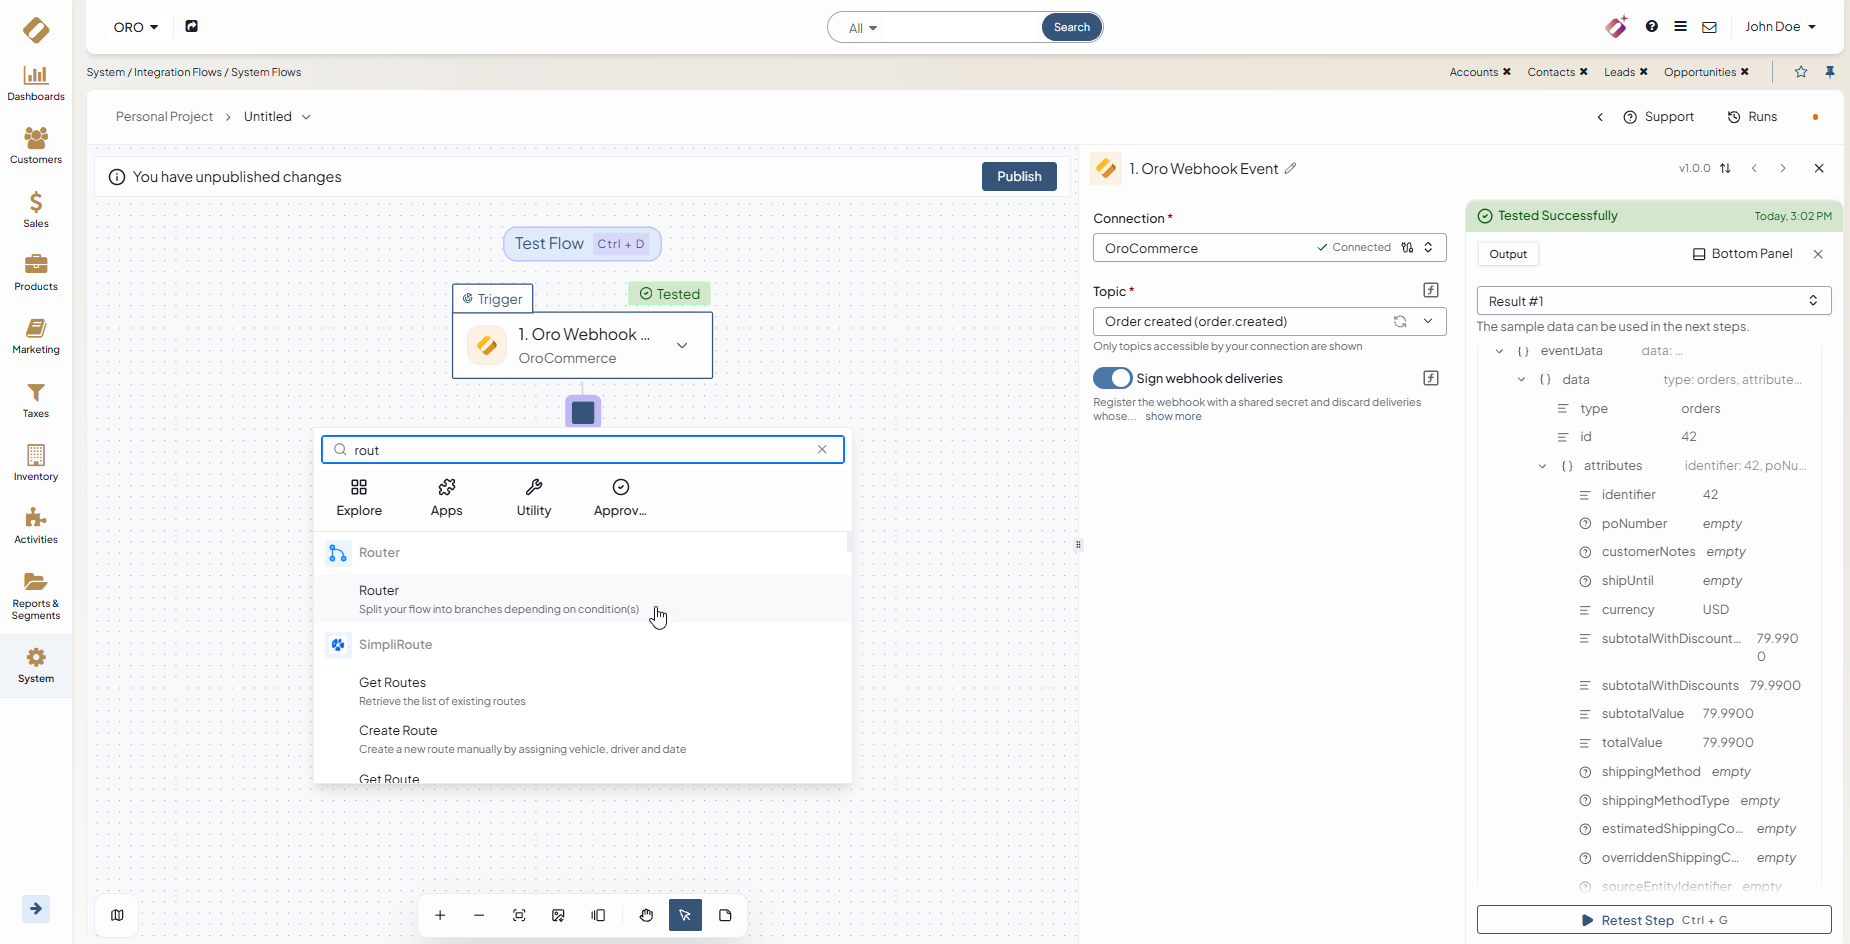
Click Test Trigger. Activepieces creates a test webhook and waits for an event.
In the OroCommerce back-office, create a new order.
Activepieces receives the event and displays the data of the order. You can use this data in the next steps of the flow.
Click + under the OroCommerce trigger, and select Router from the list.
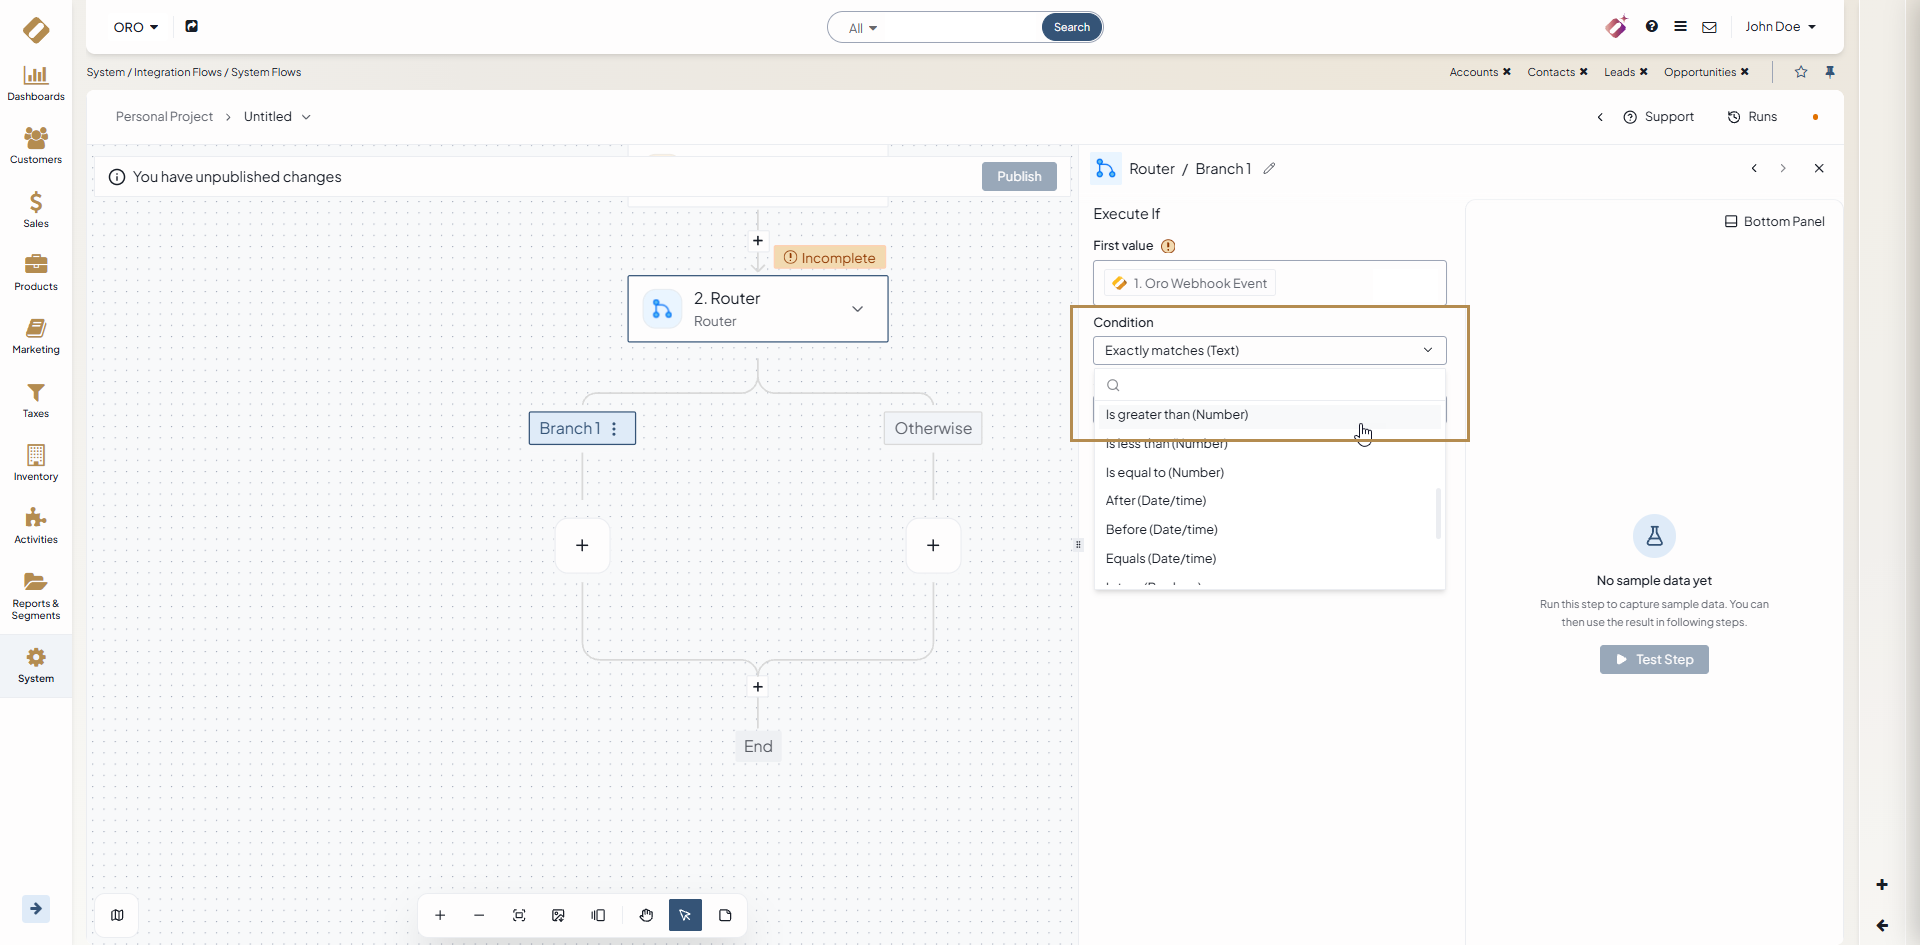
In Branch 1 under Router, add a condition that checks the order total. Select the is greater than operator, and enter the amount, for example, 50.
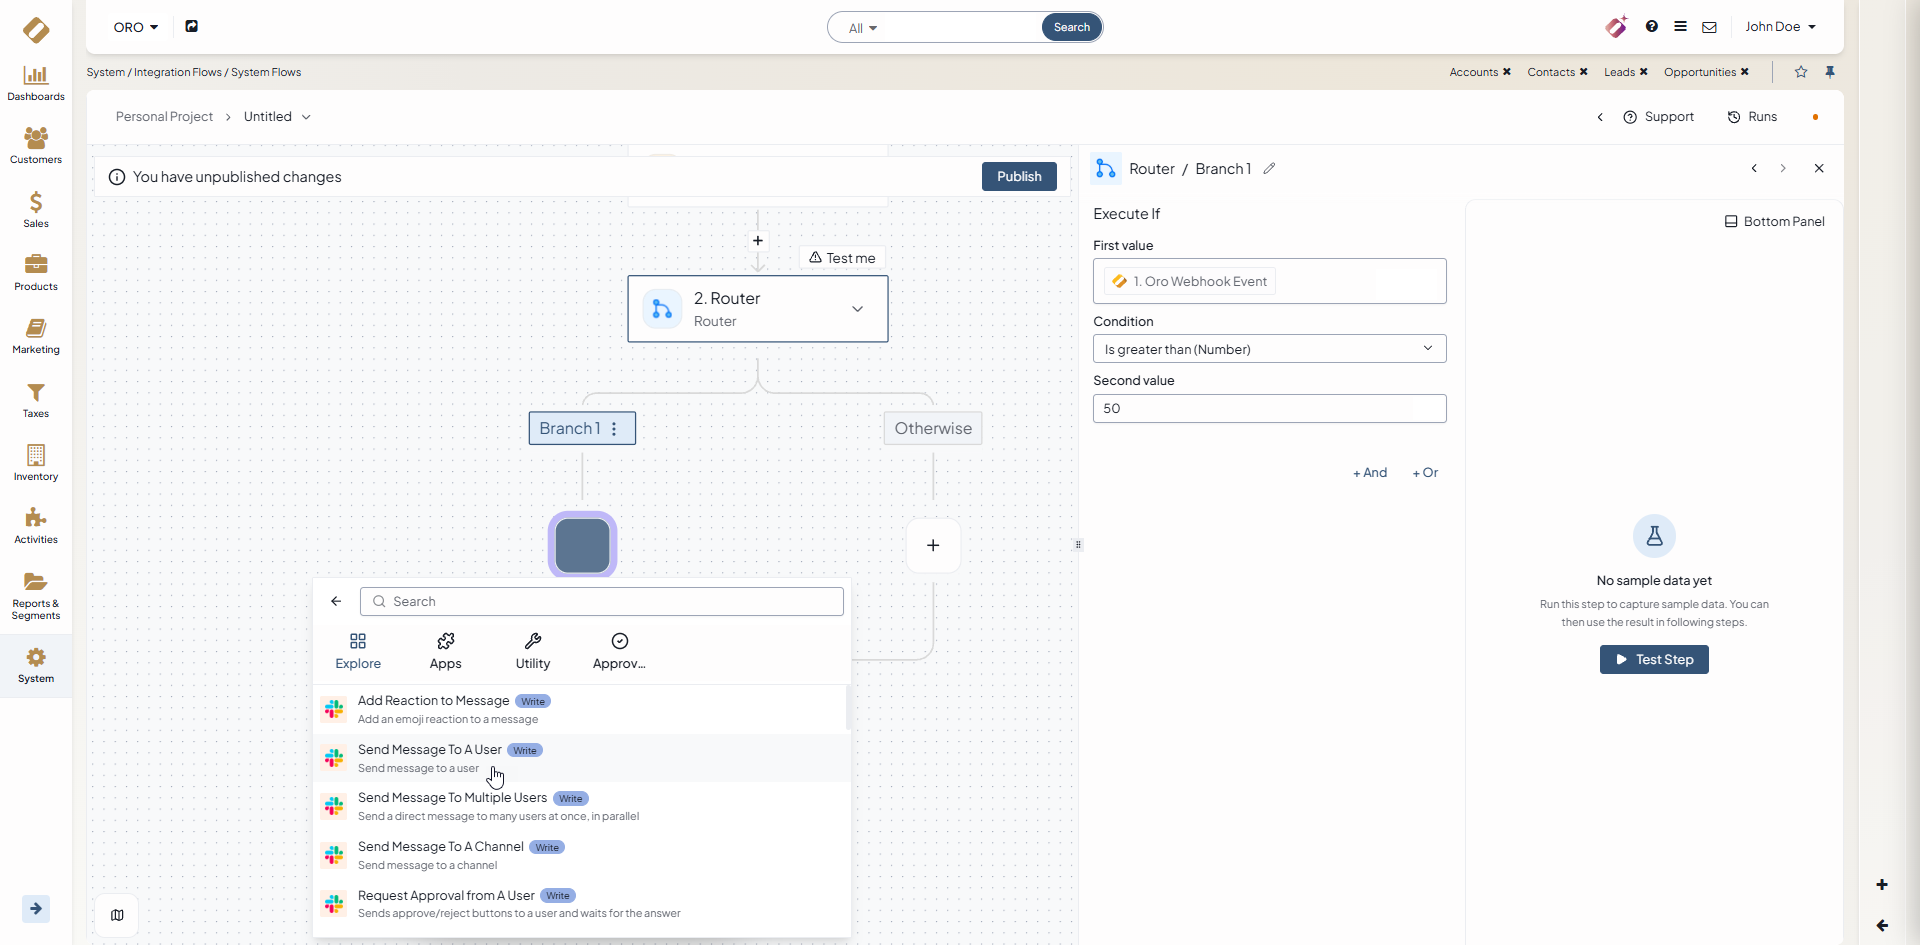
Click + under Branch 1, and select Slack as the application to connect to. From the list, select the Send Message to a User option. This is the action that sends the notification.
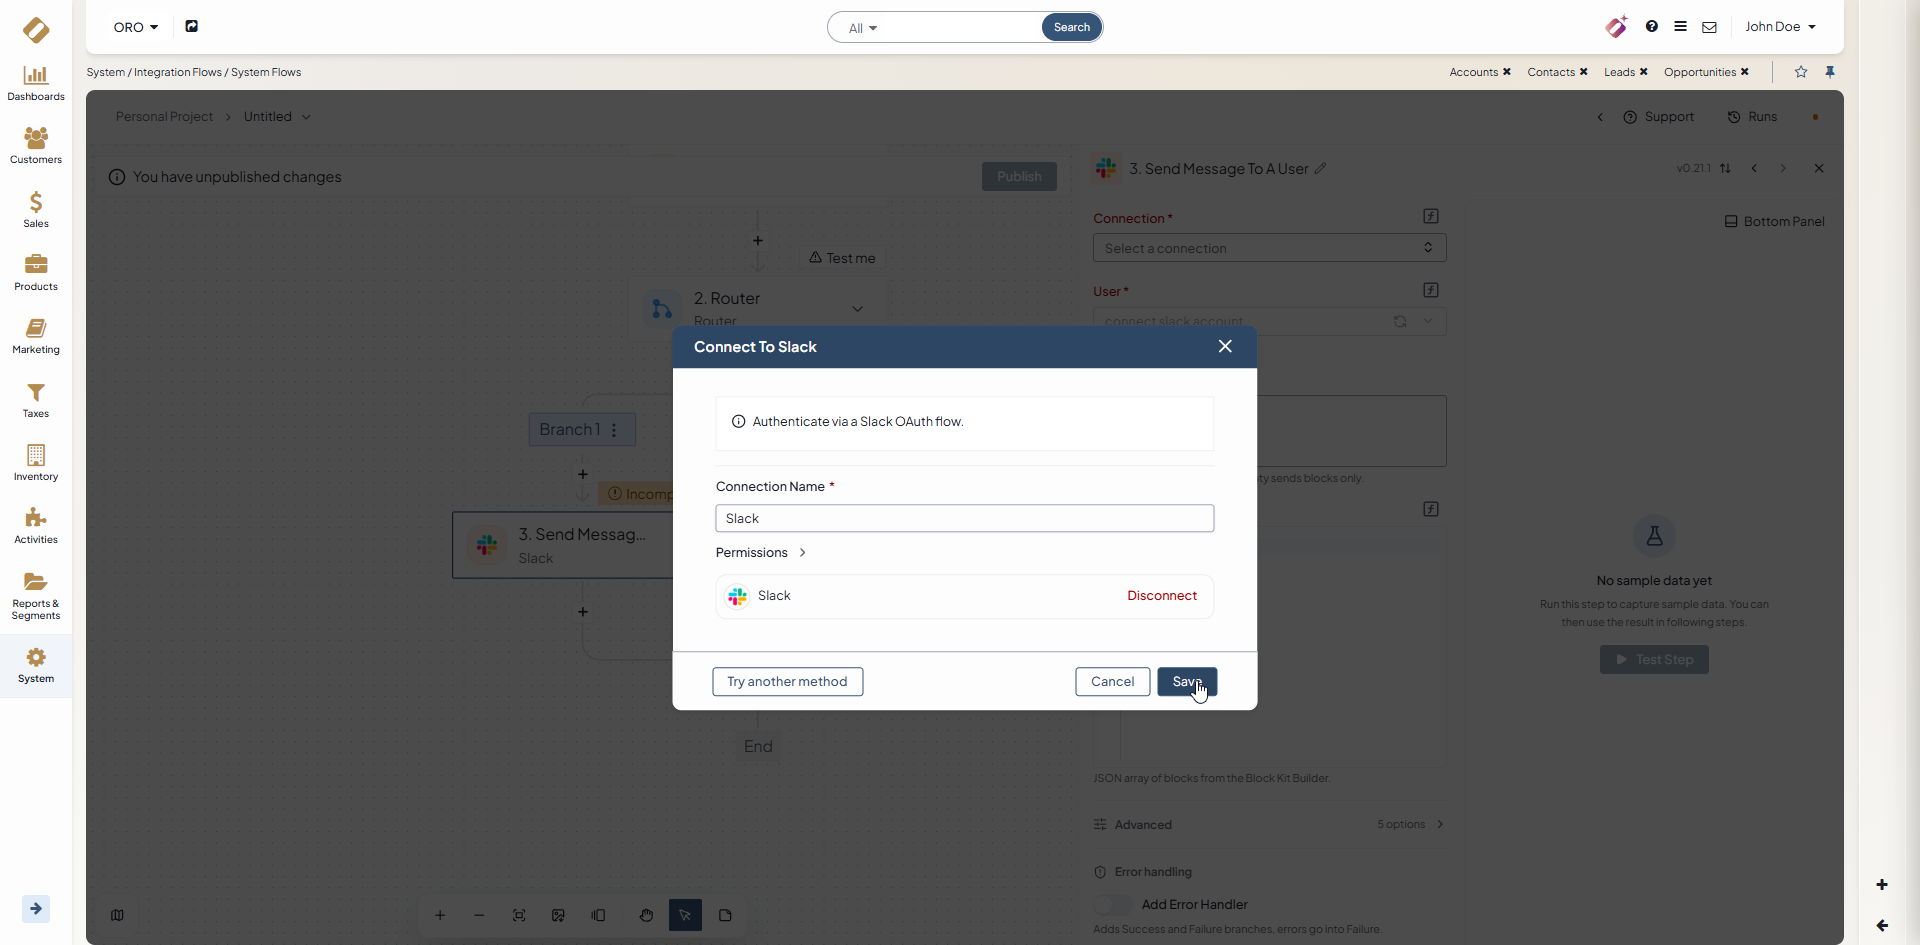
Connect Activepieces to your Slack workspace. Activepieces asks you to authorize the connection through Slack.
In the Message field, enter the text of the notification, for example, New Order Alert. To add order data to the text, use the Data Selector. For example, select poNumber and click Insert. The attribute appears next to the text.
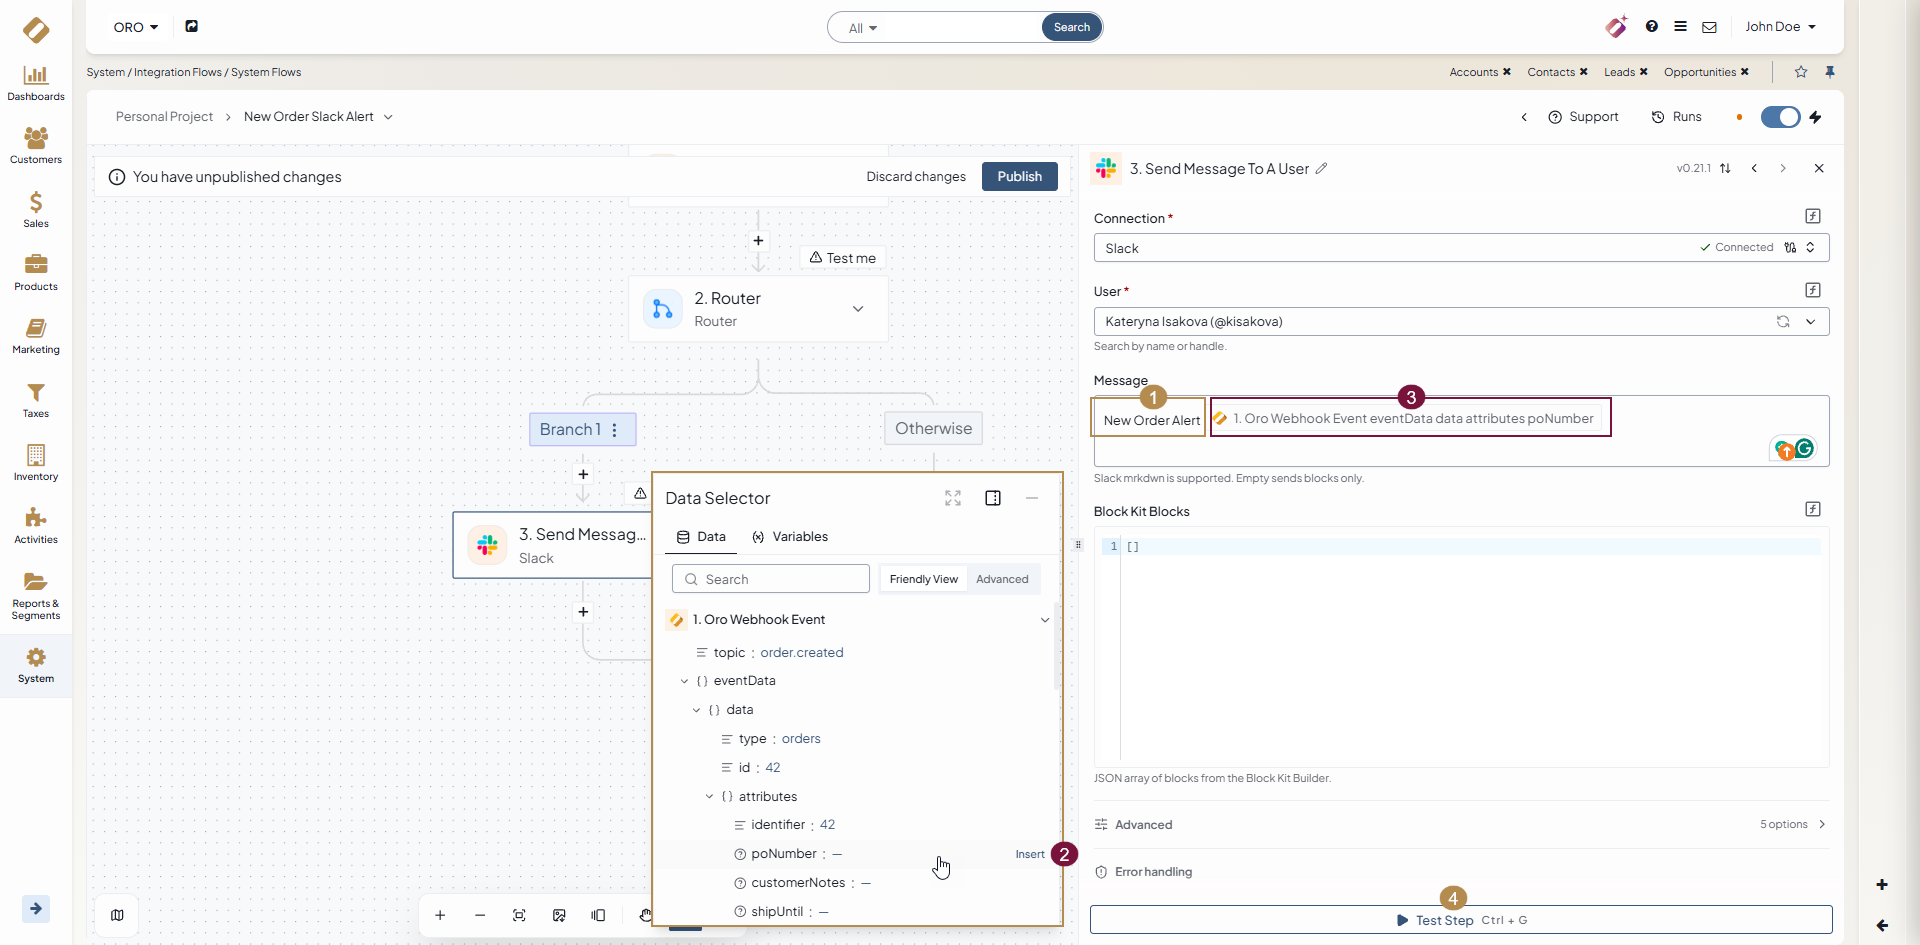
Click Test Step. Slack sends you a notification about the new order.
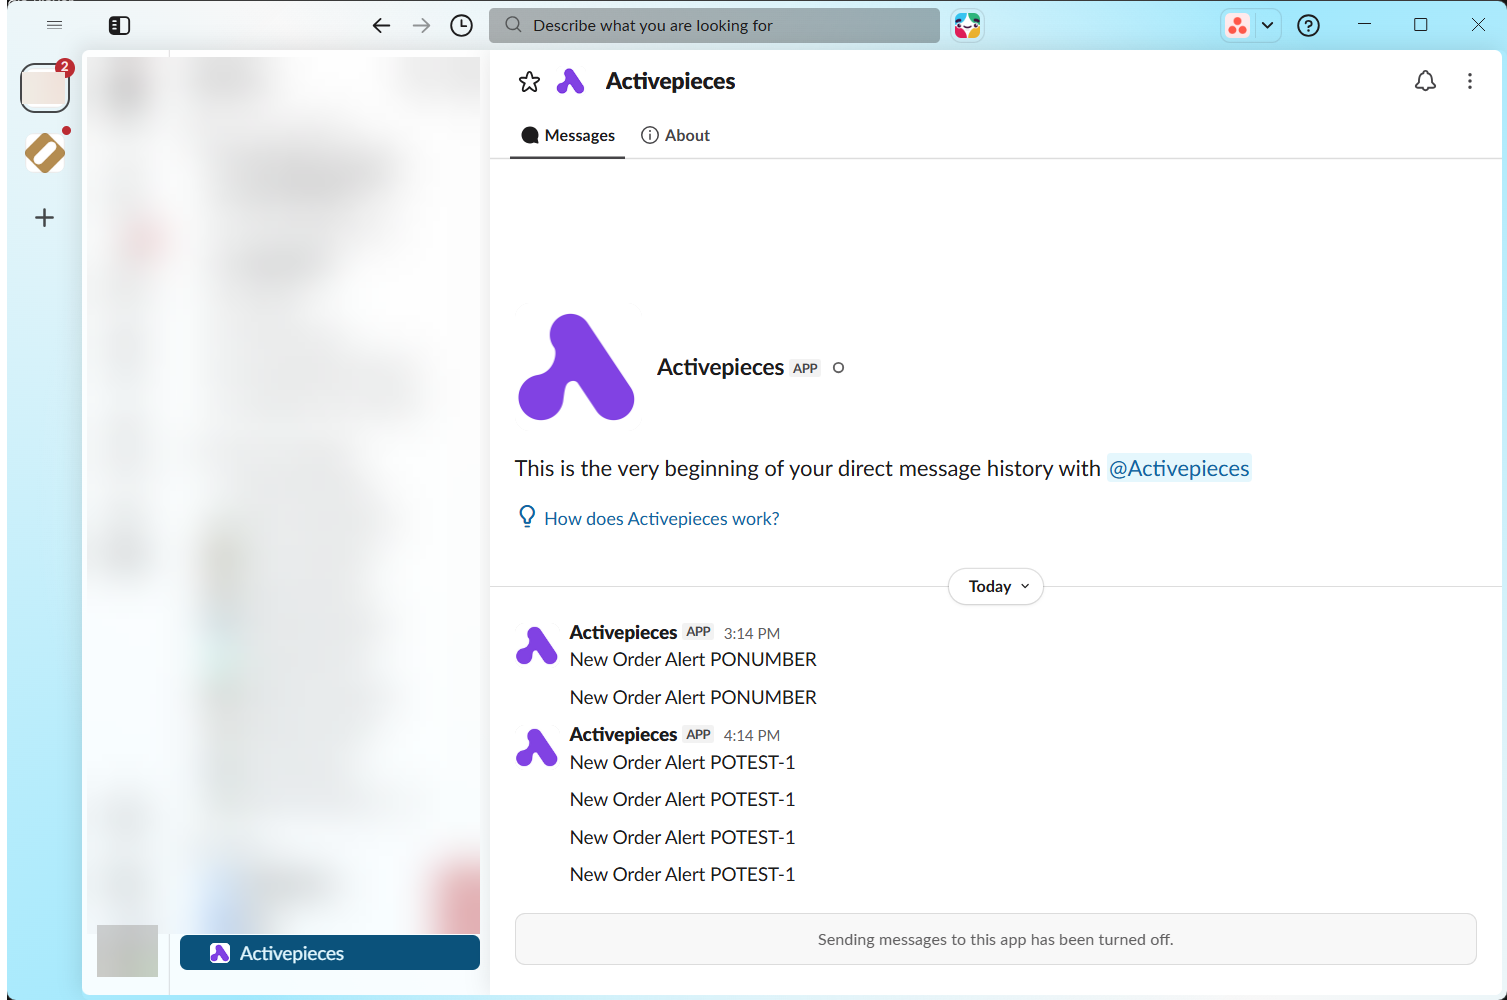
Click Publish to publish the flow.
After you publish the flow, Activepieces sends a notification each time an order that matches the condition is created. To review the executions, open the Runs tab.
Use OroCommerce Actions
The OroCommerce connector provides actions that work with OroCommerce data through the API. The actions include the creation of an invoice, an order, and a customer, the update of a customer, the creation and update of a customer user, a custom API call, etc.
A custom API call sends a request to any API endpoint that the connection user has access to. Use it to create records or retrieve data that the standard actions do not cover.
Plan Your Automations
Integration Flow Designer is suitable for the following types of automation:
Data integration — Connect OroCommerce to another system and synchronize data between them. Use this option when OroCommerce does not have a connector for the system, or when you do not want to develop one. For example, create an order in OroCommerce when a sale is completed in an Instagram shop, send a new customer from OroCommerce to HubSpot, or synchronize new invoices from QuickBooks to a CRM. A flow can send data in either direction.
Notifications and automatic reactions — React to events in OroCommerce. Use system flows for notifications to a shared Slack channel or an email group. Use user flows for personal notifications, for example, to notify a sales representative when a record is assigned to them.
AI-assisted automation — Add API keys of AI services in Activepieces. Flows can then summarize text, classify data, and generate text and images. For example, Activepieces provides the Ask AI action and connectors for AI services such as Gemini.
Custom connectors — A connector in Activepieces is called a piece. An administrator can install a custom piece that connects to the systems of their company. Installing a custom piece does not require an OroCommerce release or the work of Oro developers.
For more examples and the business context, see the Integration Flows Concept Guide.
Understand the Limitations
Integration Flow Designer works best when an event in a system starts a flow and the flow reacts to it with one or more actions. Consider the following limitations:
Flows work through the API. A flow can access only the data that the API of the connection user provides. For this reason, Integration Flow Designer is not suitable for building reports from data collected from different parts of OroCommerce.
Activepieces limits the execution time and the memory usage of a flow. For this reason, Integration Flow Designer is not suitable for processing large volumes of data. Flows cannot retrieve and process data in batches by using a cursor.
A complex flow with many branches is difficult to develop and maintain. To configure a step, you test the previous step. After a change in the first steps, you test the following steps again.